Welcome to day camp - it's either a place for you to get inspired and want to make stuff, or a place where I can show off the cute things I've made since my family is tired of my texting them pictures every day! Just like camp I do all kinds of fun projects - crafts, DIY, bake, cook, garden and more - and can't wait to share them with anyone looking for ideas.
Yep, made a paper shade that slips over a wine glass - and I'm loving this fun idea. Think I'll make a couple more and use them as table decorations for our 'Palentine's Day' dinner. Saw it somewhere, didn't think of it myself, can't remember where. Which also means I couldn't remember if there were directions so I winged it.
Cut a strip of paper long enough to wrap around the glass with some extra length to spare and wide enough to cover the glass leaving the stem uncovered, I started with paper 12" x 5". Trim one end dipping down slightly, trim the other to match (see photo) - it needs to be curved a bit to fit the glass.
Wrap around the glass and adjust to hang the way you want, I kept trimming off more and more to get it just right. Once you've got it, glue to hold - I used glue dots but any craft glue will work. Add a battery operated tea light to the glass and hang the shade over the top.
I've been doing throw-back Thursday lately with recipes from my new/old cookbook, but my sis sent me this and it's too funny and kinda genius so I have to share. And since it's a hot dog and what is clearly boxed mac and cheese I think we can safely call this a throw-back recipe hahah! (no I'm not being judgy - I love boxed mac and cheese!)
You know you're thinking that you want to make this for Valentine's day tomorrow...
This took me literally 5 minutes to make and turned out very cute - cuter than I expected actually! Perfect kid craft, but as always I'm not waiting for a kid to come make stuff with me and I just made it anyway ;) All you need is a cardboard heart, a piece of tape, and some yarn.
Don't have cardboard? When I'm searching for a thin piece (not thick like a box is made of) I'll raid anything - cereal or cracker boxes, the back of a notepad, etc. Dave doesn't even ask anymore why the bag of crackers is in the pantry not in a box hahahaha. Hey, you do what you have to do in the name of crafting.
So, trace and cut out a heart from a thin piece of cardboard - whatever size you want. Tape one end of the yarn to the heart to hold it in place and then start wrapping. And wrapping. And wrapping. Keep on going any which way to cover the cardboard completely. I found that in the beginning the yarn wanted to slip off the edges but as the heart got more and more covered it was easier to keep it in place. One thing I was thinking as I was trying to get all the cardboard covered so you couldn't see it, is that if you colored the cardboard the same color as the yarn then you could get away with tiny holes in the yarn wrapping.
Once the heart was completely covered and I liked how the yarn looked, cut the yarn from the rest of the skein and tuck the loose end in underneath the wrapped yarn. I pushed it in with the end of some not-sharp scissors to make sure the end was good and buried and wouldn't pull out. Then I attached a length of yarn to the top in order to hang it. Cute, right?
I made this out of a square of patterned paper, but it'd also be super cute to fold cocktail napkins like this for Valentine's day dinner fun. I'm thinking table decor, place setting, place card (write names on the front of each); a fun little surprise in a lunchbox; or there is a little pocket on the back that you could tuck in a little gift or candy - so cute! And very very easy:
Start with a square piece of paper or napkin - my example is 5.75" square, you can make these as big as you want as long as it's square.
1. Fold in half lengthwise, unfold, the fold in half the other direction.
2. Place that fold at the bottom closest to you:
3. Fold the right side in on an angle with the folded point being at about the halfway mark, fold so the edge of the paper (the bottom right corner before you folded the angle) stops short of the top edge by about 1/2":
4. Fold the left side up to overlap the right side:
5. Glue the left side in place:
Turn it over and there is a little pocket on the backside if you want to add a little gift or candy:
Tesha and I were shopping and saw some fabric pins and she said "I've seen these before - they're like the ones you made!"Yep, I made a bunch of these back in the day. I'm not sure they were ever 'in' style so can't really say they are back in style now hahaha, but they are pretty and I forgot all about them so I'm sharing even tho this isn't something I've made recently. I only have this one picture so can't show you the steps involved in making them, but you can pretty much see how I did it - for each pin you'll need 3 graduating sizes of flower shaped fabric and 2 buttons, and a pin for the back so you can attach it to a lapel, purse, backpack, whatever.
To assemble: stack the fabrics on top of each other largest to small. I used 2 different sizes of buttons stacked together for the center of the flower, sew thru the buttons and all layers of fabric to hold the bundle together. Attach a straight-backed pin (or a safety pin) on the back.
I made a cardboard template of 3 different sizes instead of free handing each one, but you can wing it if you prefer. If you use fabric that might ravel I'd sew around the edges before attaching to the pin.
Sorry I don't have better photos to show you!! But you get the idea right? These are all in darker, heavier fabrics - they'd be really pretty in bright springtime colors.
Keeping this short and sweet today, no time for my rambling! I'm off to visit my mom in Tennessee and have so much to do - I need to work on my procrastinating!
Hope you had a great week, stop back often to see more fun projects, recipes, whatever I can think of to make. Bye!
I've never seen this done and it's a great idea - add cocoa powder to store-bought chocolate chip cookie dough to make chocolate-chocolate chip dough. Smart. And delicious. Unless you don't like chocolate-chocolate chip cookies in which case stop reading 'cuz it'll be a waste of your time ;)
2/3 cup chocolate sprinkles (or another kind if you don't have enough of the chocolate ones - I used a Valentine mix)
2 T. milk
about 40 dark chocolate kisses, unwrapped
1. Preheat oven 375'. Lightly grease a cookie sheet or line with parchment. Put the cookie dough and cocoa powder in a bowl and combine with a mixer until the cocoa is completely mixed into the dough. You could also mix together by hand, or put in a big ziplock and knead them together.
2. Place sprinkles in a shallow dish or small bowl. Place milk in another shallow dish or bowl. Shape dough into 1" balls. Dip balls in milk to moisten, then roll in sprinkles to coat. Place balls 2 inches apart on prepared cookie sheet.
3. Bake in preheated oven about 8 minutes or until edges are firm. Immediately press a chocolate kiss into the center of each cookie. Transfer cookies to a wire rack; let cool. Makes about 40 cookies.
Store cookies layered between waxed paper in an airtight container. Store at room temp for 3 days or freeze for up to 3 months.
This is a repeat but I love making these slider boxes so much I have to share again!
from 2016:
I made a video to show you how to make this cute slider box filled with wrapped mini chocolate bars for Valentines day - I was having a hard time demonstrating in pictures so hopefully doing it on video makes sense to you and is easy to follow along this way! There is a base to hold the chocolates and a wrap sleeve that the base slides into, then you wrap the chocolates with strips of paper that have letters on them to spell out whatever word you want. I'm making these to put on everyones place setting at our "Palentine" dinner party on Valentines day - a nice little gift for them to take home. This is definitely a craft kids can do, no hot glue and just a bit of cutting. It's mostly folding and sticking the pieces together once they are cut out.
Supplies for each slider box:
-3.5" x 10.5" cardstock for the base (I used white)
-4.5" x 9" cardstock for the top (I used patterned)
-ruler
-tape or adhesive
-scorer (optional)
-pencil
-scissors
-9 1"x3" strips of paper with a letter printed on each one (computer or handwritten)
-9 Hershey's Nugget chocolate bars
-Optional: things to decorate the slider box after it's completed - scrap cardstock, ribbons, etc.
Watch the video for instructions on how to make this slider box - you could also customize it for any occasion - the one I made holds 9 mini chocolate bars, if you want this as a thank you or birthday gift I would either shorten the box a bit or wrap the extra chocolate in a label that is plain, or maybe put a picture/symbol/sticker on it. That'd be cute!
Note: Oops, I mistakenly bought Hersheys miniatures instead of Nuggets at first...and they don't fit in this size slider box - use Nuggets for this project to work. If you want to make it using different sized candy you will need to adjust the dimensions of the slider box. Just a warning - I don't want you to be surprised if you get miniatures thinking they are the right size!
2026 UPDATE: I don't know what happened to the video but this post is pointless without instructions hahaha. Click here for the link to the video on youtube. I posted an update with some photos, click here.
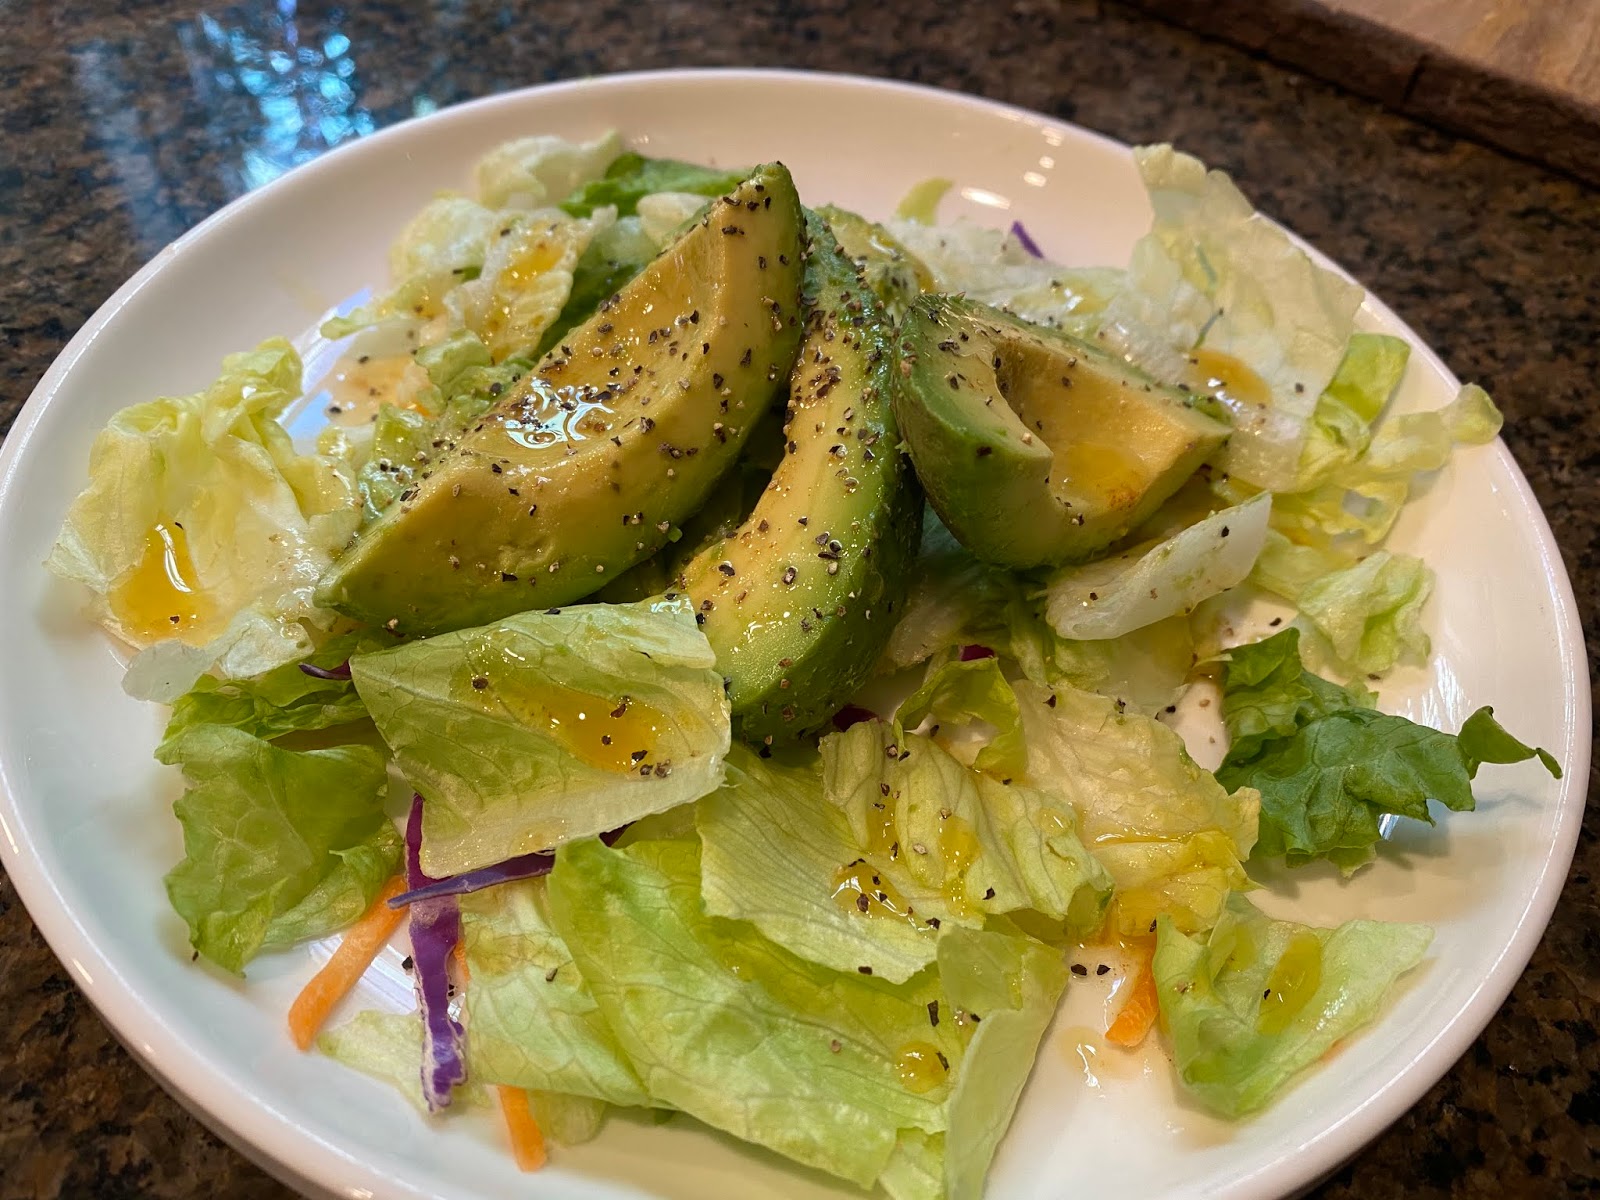
Alligator Pear? Are you, like me, wondering what the heck that is? Is it an old variety of pear we don't have now? Nope - it's an avocado! Why they didn't just call it an avocado I cannot say - I guess an avocado does look like a pear with alligator hide haha. Whatever the reason, it's in my new/old cookbook and today's 'Throw-Back Thursday" recipe - alligator pear salad is just an avocado sliced into wedges, placed on top of lettuce leaves, drizzled with dressing. Tasty for sure - only thing I did different is used bagged salad so there's a little bit of carrot and radicchio in the mix, and I sprinkled on coarse salt and pepper. The recipe calls for French dressing which is not like our present day creamy ketchup-based French dressing - the one in the book is more oil and vinegar based and I'll share that with you next week. For now just top with whatever dressing you want (the current French dressing would also be good!).
Here's the official recipe as written in the cookbook:
ALLIGATOR PEAR SALAD
2 alligator pears
lettuce leaves
french dressing
The alligator pear, or avocado, is now available in all markets at very reasonable prices throughout the greater part of the year. Cut each pear into six pieces, giving wedge-shaped sections, and if these are too large, cut each section again lengthwise. Peel and arrange wedges on beds of lettuce leaves. Either French dressing or Russian dressing may be used, but the fruit is so rich that French dressing is preferred by most people.