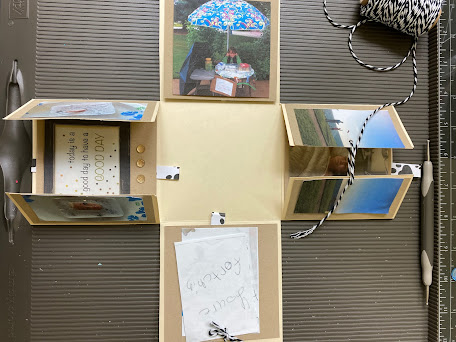
This post has a lot of pictures, like a LOT of pictures, but I figured it's easier to show you then tell you. To decorate the different layers of the explosion box I made for Brooke's graduation (click here for how to make the base and lid, and here for how to make the layers themselves), I copied old photos of her throughout her childhood along with shrinking and copying some of the drawings and notes she's made me over the years; I also found some inspirational sayings to incorporate in different ways. Finally, I made a few pockets to add gift cards and cash.
I just wrote up how to decorate the first 2 layers and realize this is way way too long and you're going to be overwhelmed. I am not trying to make this seem overly complicated so am now going to break this decorating post into 2. So this is now 'part 3.1' and I'll post 'part 3.2' next time!
*1st layer - each square has a picture on top of a pocket that holds a pull-out card.
I folded decorative paper into pockets and glued 3 sides to each of the base layer squares, leaving the tops open. Cut cardstock squares to fit into each pocket, glue on notes and attach a piece of ribbon behind each one. Insert into the pocket with the ribbon tab sticking out. Glue a photo on top of each pocket. Note you'll leave the center square blank and all the layers will be glued together in the center space until the top center square.
5.22.22: 🔥 week 21
5.22.21: jam thumbprint molasses cookies


No comments:
Post a Comment