Sunday, January 20, 2019

Around the Campfire (week 3)

Dear Campers ~

Here's a quick recap of the happenings at camp this week:

Posts in case you missed any ~

1/13: around the campfire (week 2)
1/14: epsom salt bath cakes
1/15: worlds ugliest cookies
1/16: hanging removable wallpaper
1/17: how to clean a fan
1/18: meat lovers pasta sauce (aka Christmas Pasta)
1/19: tri-color vegetable saute

What's Cooking ~

  • pork tenderloin, tri-color vegetable saute, cornbread
  • baked salmon, cauliflower rice, kale salad
  • pierogi with mushrooms and peas, grilled chicken sausages
  • bbq ribs, roasted mini potatoes
Short one for today, I'm in a hurry because I have to finish reading the "Guernsey Literary and Potato Peel Society" book that gets returned to the online library today and I still have 50 pages to go! Great book and I have to finish it before it disappears! Have a good week, check back often :)

Sincerely ~


Jill, camp counselor and garage construction-dust-collector

Saturday, January 19, 2019

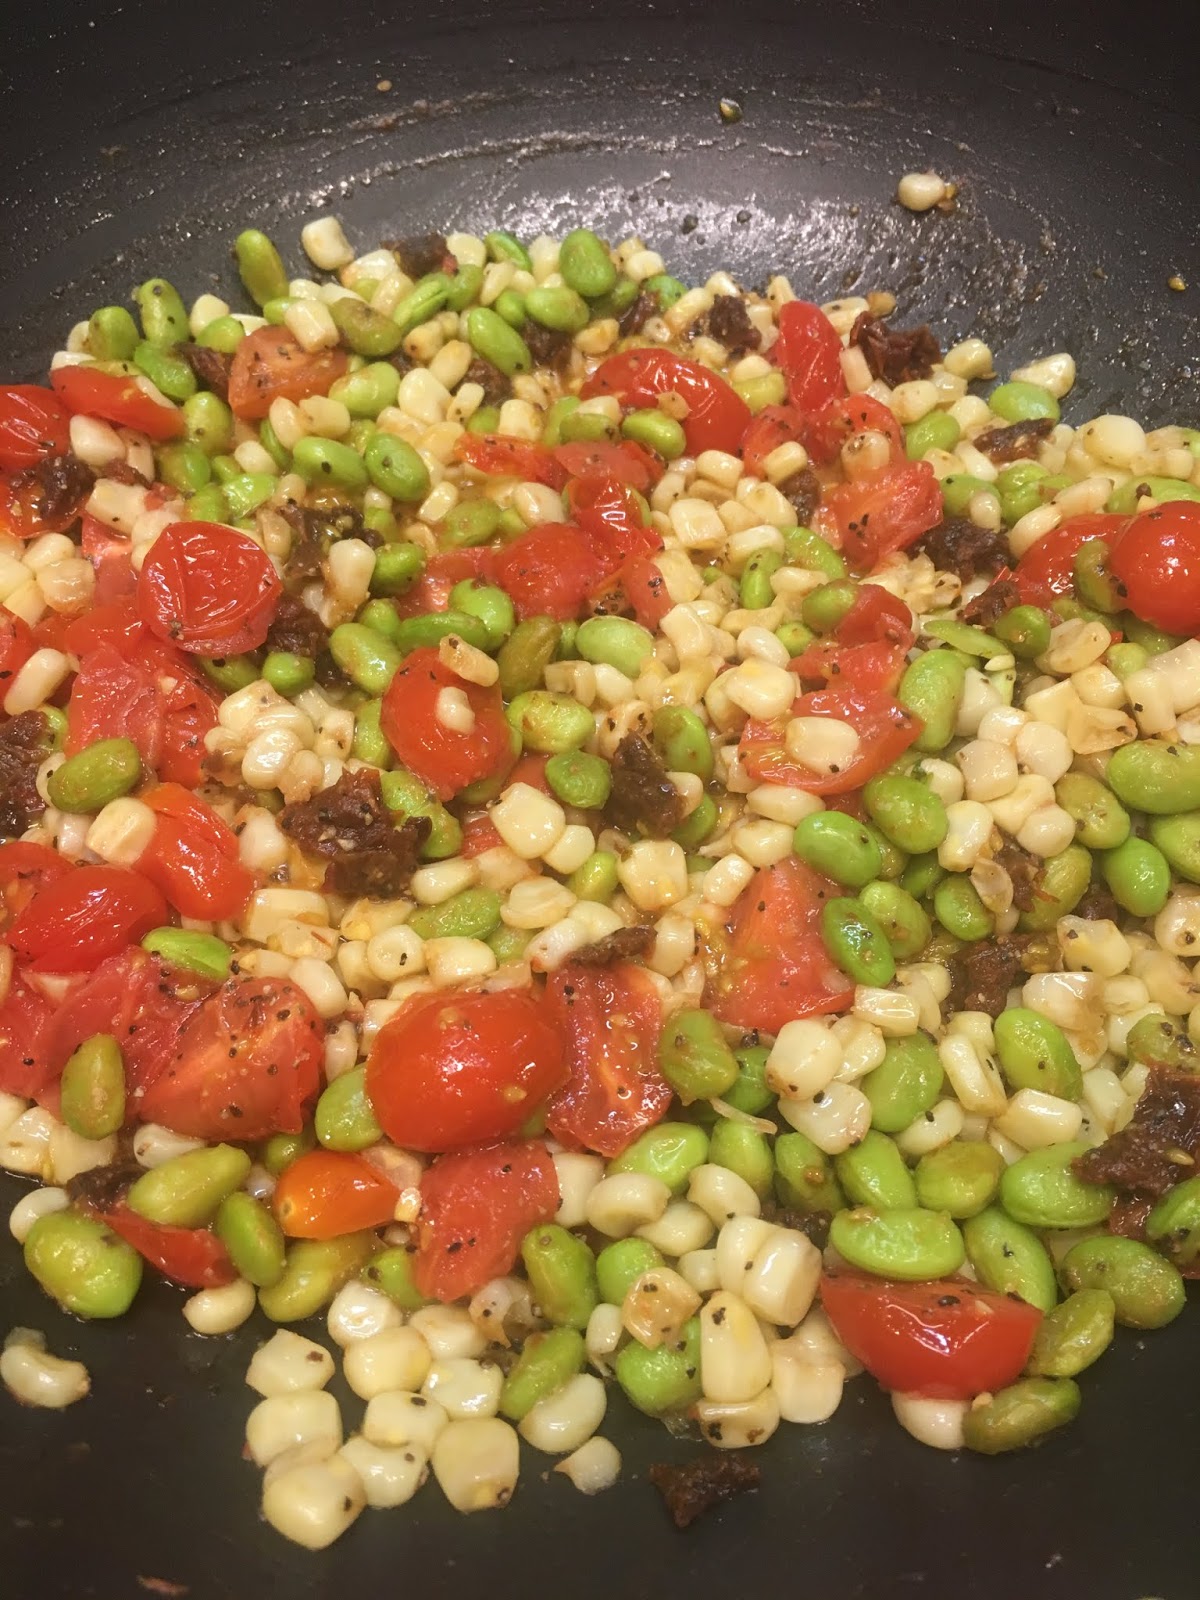
Tri-Color Vegetable Sauté


This has been in my recipe binder to try since January 2010 - guess it's time to either make it or throw the magazine page away! Actually I made it because it's pouring rain out and I didn't want to go to the grocery store so scrounged for something I could make with what is already in the house, and came across this recipe. I'm really wishing it didn't take me 9 years to discover how good this dish is - it's so good that I turned around and made it again for lunch the next day!

note: I substituted dried minced onion, garlic powder, and dried basil for fresh - and it was delicious.

Ingredients:
  • 1 T. olive oil
  • 1 onion, diced
  • 2 garlic cloves, minced
  • 1 cup frozen soybeans (edamame), shelled
  • 2 cups corn kernels, frozen or fresh
  • 1 pint grape tomatoes, halved
  • 3 T. finely chopped sun-dried tomatoes
  • 1/3 cup lightly packed fresh basil leaves, cut in ribbons
  • 1 T. lime juice
Directions:
Heat oil in large skillet over medium-high heat. Add onion and cook until softened about 3 minutes. Add the garlic and cook 30 seconds more. Add the edamame. Cook, stirring occasionally, until warmed through, about 3 minutes. Add the corn and cook until warmed through, another 3 minutes. Stir in grape tomatoes and sun-dried tomatoes and cook for 5 minutes more, until tomatoes are softened but still retain their shape. Stir in basil and lime juice. Season with salt and pepper. 

Makes 4 servings. Each serving 176 cal, 6g fat, 0mg chol, 209mg sodium, 29g carb, 5g fiber, 7g pro.

Original source of recipe: Better Homes and Gardens magazine

Happy moment ~ the smell of freshly popped popcorn 

Friday, January 18, 2019

Meat Lovers Pasta Sauce

I made this Rachel Ray recipe which she calls "Christmas Pasta", which is a fantastic dish but not sure why it's named that...so I'm changing it LOL. Sorry Rachel. It has loads of meat in the sauce so I feel like it should be called "meat lovers" and made all year round instead of just at Christmas. I don't know why I didn't take a picture of this terrific meal - but it looks like chunky thick red pasta sauce mixed with penne!

Here's a picture of Lucy eating parsley leaves instead ;)


Ingredients:

2 T. extra-virgin olive oil
4 cloves garlic, crushed
1 bay leaf
1/4 pound pancetta, thick cut, chopped into small bits (Italian cured pork)
1/2 pound bulk hot Italian sausage
1 pound combined ground beef, pork, and veal (see note)
1 medium carrot, peeled and finely chopped
1 rib celery, chopped
1 medium onion, chopped
1 cup good quality dry red wine
1 cup beef stock
2 (32 oz) cans chunky style crushed tomatoes
a handful of chopped flat leaf parsley leaves
1/4 teaspoon allspice or cinnamon
coarse salt and black pepper
2 pounds penne rigate, cooked to al dente
grated pecorino romano or parmesan

Directions:

  1. Heat a deep pot over medium high heat. Add oil, garlic, bay, and pancetta bits and brown for 1 minute. Add meats and brown and crumble them for 5 minutes.
  2. Chop carrot, celery, and onions near the stove and add to the pot as you work. Cook vegetables with meat 5 minutes and add wine. Cook for 1 minute; add stock and tomatoes to the pot.
  3. Stir in parsley, allspice, or cinnamon and season sauce with salt and pepper, to taste. Bring sauce to a boil, reduce heat to medium low, and cook 10 to 15 minutes minimum before serving. Reheated sauce only improves.
  4. Toss pasta (cook off only as much pasta as you need at the time: half a pound for every 3 people) with a couple of ladles of sauce to coat, then top bowl with extra sauce. Top pasta with lots of cheese and pass bread at the table.


(pancetta)
Notes: I don't eat veal so did a combination of beef, pork, and lamb (that's my standard meatloaf mix - I bought one pound of each knowing I'll make meatloaf or something with the remainder); was worried the hot Italian sausage would be too spicy so did a combination of 1/4 pound hot and 1/4 pound mild; and I cut the carrot and celery into very small pieces. The photo that accompanies her recipe shows the veggies in pretty big pieces - I didn't want to see the veggie pieces. I started the dish a little differently (based on reviews I read) by sautéing the pancetta and garlic in the oil for one minute and then adding the carrot, celery, and onion for 5 minutes before adding the rest of the ground meats. I don't like hunks of ground meat so made sure to really break the crumbles up into small pieces. Because the recipe states that reheating the sauce only improves it, I made this in the morning and let it cool, refrigerated it until about an hour before serving and then reheated. SO good! 


click here for original source found on the Food Network

Happy moment ~ how good it feels to change into dry clothes after walking in the pouring rain


Thursday, January 17, 2019

Cleaning a Fan

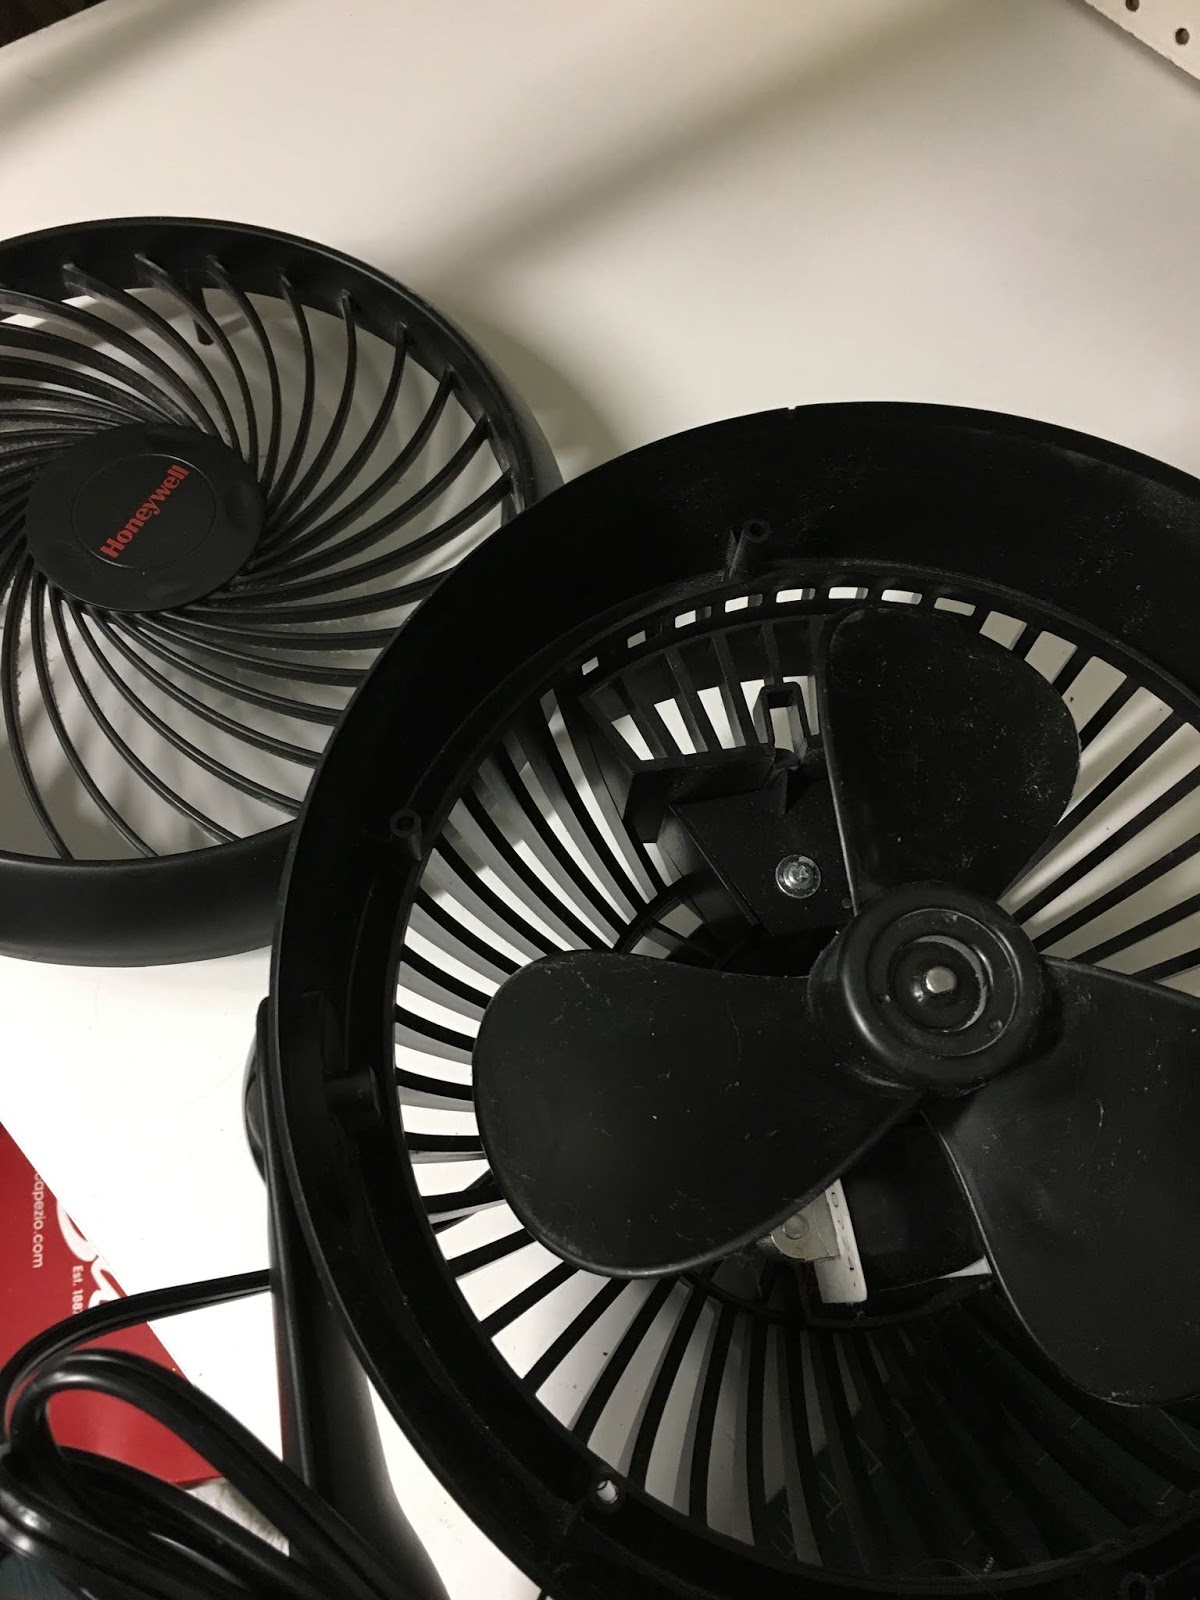
Quick tip for today - I told you I've been stuck doing projects in the house while the garage/craft room is being worked on, this is what happens when I've arranged and organized everything I can...I notice random things that I've overlooked or ignored because really, who has time to take the fan apart to clean it? Apparently now I do.

I've never done this before, you guys all probably have, but it's what I just figured out and I'm sharing!

Usually I just wipe the outside of the fan down, maybe sticking a rag in the open slots to dust inside or maybe not. The amount of dust that was in this fan tho required me taking it apart to clean it - it was disgusting. There are tiny screws on the back of the fan that I removed (not knowing what the outcome would be) and sure enough, the cover of the fan came off, enabling me to be able to clean it all. Done.

Now I gotta go find what else needs taken apart....bye!


1.17.17: tuna-egg salad
1.17.16: the best meatballs


Happy moment ~ listening to the rain, especially in usually sunny California

Wednesday, January 16, 2019

Removable Wallpaper


I haven't been able to work in my craft area (aka: the garage) for the last few days so getting lots of in-the-house projects done; I've emptied closets and drawers to sort/purge/organize, lined shelves, cleaned the pantry...not being able to make fun crafts is probably a good thing for me once in a while! I ordered this removable wallpaper from Amazon - and hung it in the pantry (only on the wall that you can see from outside the pantry tho, I didn't go crazy and do the whole closet). I was worried it would be hard to hang by myself - the reviews said it's better with 2 people - but this was quite easy actually and I love, love how it turned out.

The paper is about 21 inches wide x 16 feet long, and has a repeating pattern - which means if you are going to put two pieces of paper together and you want the pattern to match, you might need to buy extra paper because chances are you'll have some waste when lining up the pattern. Usually the paper will say how many inches there are to the pattern before it repeats, in my case the paper repeated every 20 inches. I'll attempt some simple math: the wall I wanted to cover is 46" wide x 92" high. The paper is 21" x 192" - I'll need three sections of paper to go across the wall (2 pieces 21 inches wide, 1 is 4 inch piece for the remainder of the wall) that are each 92" long. The paper is 192" long so I would get 2 pieces 92" and have 8" left over for the third piece. Even without a repeating pattern I wouldn't have enough paper long enough for the third piece. So I had to buy two rolls of paper. Make sense?


Removable and repositionable wallpaper is like a giant roll of Contact paper, you can stick it down and pull it back up as many times as you want (until it get's all stretched out of shape, which eventually it will so don't pull it too hard). Starting with the top left corner of the wall, fold back a couple inches of the paper backing so the sticky part is exposed. Place it where you want in the corner of the wall and press so it stays in place. Then slowly peel off a few inches of paper at a time, smoothing the paper down with something hard and flat (credit card, etc. I used a shower squeegee and it worked perfect) to remove the bubbles. If you find it's not hanging straight or it's got bubbles, just gently pull the paper up and do it again (and again, and again) until it's right. Continue to the bottom of the wall, I left a couple inches and cut the paper from the roll - you could measure the paper out and cut it before hanging it but I was worried my measurement would be off so I just cut it after it was on the wall.


Now for the second piece you'll want to find where the repeat is to match up to the first piece you already hung, that's where the waste might come in - I could either have started the top of the second piece down a few inches from the ceiling where the pattern lined up and then piece in the top (which is what I chose to do) or find the repeat in the paper that matched the top of the first piece and cut off the paper to match it at the ceiling. I found I was wasting more paper by cutting off the amount that I would have needed to get the pattern to match at the top, by piecing it there wasn't so much waste.

In person you don't see the seam at all! 


Repeat for the third piece and you're done.


Today's happy moment ~ not being able to park in the garage, but finding a parking spot right in front of the house


Tuesday, January 15, 2019

Chocolate Chip and Mini Marshmallow Cookies (aka: Gnarly Cookies)

The title of these cookies sounds waaaaaay better than they look. In fact, Mickey called them "gnarly" and asked if I was drunk when I made them. I wish, at least then there would be an excuse. But nope - stone cold sober (I needed a drink afterwards tho!). These are truly the ugliest cookies I've ever baked. It's a little embarrassing actually - but I'm sharing so you know that not everything I make turns out! LOL!! I'm not living the perfect Facebook-only-share-the-good-stuff-so-everyone-feels-bad-about-their-own-lives life, sometimes there are "fails" hahahahaha.

On the bright side - these do taste good. So if you need a cookie that looks awful but tastes good for some obscure reason, here ya' go. You're welcome. Maybe you'll win the "ugliest cookie contest" or something...

Ingredients:
  • 1/2 cup unsalted butter
  • 1/2 cup packed light brown sugar
  • 1/2 cup granulated sugar
  • 1 large egg, room temperature
  • 1 t. vanilla
  • 1 1/4 cup all purpose flour
  • 1 tablespoon corn starch
  • 1/2 t. baking soda
  • 1/2 t. salt
  • 3/4 cup chocolate chips
  • 3/4 cup mini marshmallows
Directions:
  1. Cream the butter and sugars until fully mixed and fluffy. Beat in the egg and vanilla.
  2. In a separate bowl, sift together the flour, corn starch, baking soda and salt, add to the butter mixture until combined.
  3. Stir in the chips and marshmallows. 
  4. Shape the dough into heaping tablespoon sized balls, chill for at least 30 minutes.
  5. Preheat the oven to 325'. Arrange the balls on a parchment-lined cookie sheet, leaving at least 3 inches between cookies. Bake 15 minutes until browned on edges but still soft in center. Let cool on cookie sheet. click here for original source of the recipe. 
I've never made a more un-appealing batch of cookies, except maybe these that I burned LOL:


One tiny thing that made me feel better - I gave these to the guy working on my garage and said "these are the ugliest cookies I've ever made" and he goes "I don't care, they're cookies". In fact, that's my happy moment of the day ~ when you make ugly cookies but someone still appreciates them. 


Monday, January 14, 2019

Epsom Salt Bath Cakes

I posted last month that I was going to make shower melts (click here for bath salt ornaments) for gifts but then I didn't follow up with how they turned out...because they didn't turn out! They do smell good, and the benefits are still there - they just didn't harden into the little cubes I was expecting. Never fear, they are still useful...just not very pretty gifts haha, and I can't really set one in the shower for the steam to melt it like I planned. So I put all the mushy cubes in a clear container and now just scoop out a bit and add to my bath water. I scented them with Doterra "breathe" respiratory blend which seems perfect this time of germy-cold year - click here to see how to make them and let me know if you have better luck getting them to stay in cubes! I will probably make these again and just not bother making them into cubes, I like just adding a scoop to the bath.

Having said all that, I did make a different bath salt thing that totally worked and I'm loving - these bath salt cakes. I found the recipe at epsomsaltcouncil.org and didn't change anything (shocker, I know.) - I have been using these cakes for a couple weeks now, I will definitely be making more of these in the future and want to experiment with "frosting" them...I'll let you know how that works out. For now, here's how to make these easy epsom salt cakes (I'll tell you how I did it, if you want additional instruction or info check out the epsom salt site):


Combine 4 cups of Epsom salt with 3 tablespoons of water. Mix in 1 teaspoon of olive oil; add 10-15 drops of essential oil (I combined lavender and grapefruit) depending on how strong you like your fragrance. Add food coloring until desired shade is achieved. Note: when you bake the salts, some of the fragrance and color will evaporate so you might want to go a little heavier with both. Mine turned more white around the edges after baking, but are still a light pretty blue and smell great.

Coat the inside of a 12-count muffin mold with a little olive oil. Divide mixture evenly among the muffin cups. Firmly pack the mixture - I tamped the mixture down as hard as I could using the bottom of a small glass -  and bake at 150' for one hour.


Note: their directions say to avoid hotter temperature because they could melt the salts, but my oven doesn't go lower than 170' and that worked just fine.


Let cool fo 20-30 minutes, turn pan upside down and gently ease the cakes out of the mold. Place the bath salts in a glass jar to store - I gave a few as gifts, stacked on top of each other and put in a clear treat bag, tied with a label and bow. Super cute.


Sunday, January 13, 2019

Around The Campfire (week 2)

Dear campers ~

This week saw 2 new additions to the blog - "man-day Monday"and everyday happy moments; hope you enjoy both of them! I think "Man-day" is going to just be on the first Monday of the month, at least until Dave gets the hang of it :). Here's a recap of what happened at camp this week:


Posts you might have missed ~

1/6: around the campfire (week 1)
1/7: man-day monday
1/8mini trees from a big tree
1/9: tuna noodle casserole
1/10: happy moments
1/11: how to clean a stained yeti
1/12: sour cream chicken enchiladas

What's Cooking ~
  • asian style meatballs with sweet chili dipping sauce, sticky rice, creamed spinach
  • sour cream chicken enchiladas
  • tuna noodle casserole
  • grilled chicken, mushroom ravioli with peas and roasted asparagus

Miscellaneous stuff keeping me busy that doesn't warrant a post ~
  • Started reading "Helter Skelter" - holy moly real life crime spree waaaaay gorier than most of the scary/thriller books I read. Yikes. Only finished 1/2 before I got 6 books from the online library that I'd been waiting for! Read "Look Alive Twenty Five" by Janet Evanovich (love that series!) and "The Blinds" by Adam Sternbergh (thriller/mystery that I could not put down).
  • Forced to stay home for a couple days with work happening in the garage (I can't get to my craft stuff! oh no😱) so I rearranged furniture and all the stuff on the shelves in my office, took everything out of 2 big under-stairs closets and organized/sorted it all before putting it back,  and switched around all the artwork on our walls. I also organized/sorted/purged the garage before the work started. 
Hope you had a great second week of the New Year!

Sincerely ~


Jill, camp counselor and furniture mover maniac


Saturday, January 12, 2019

Sour Cream Chicken Enchiladas

I've posted my chicken enchiladas before (click here) which we love, but as I'm reading Joanna Gaines' new cookbook (thanks mom!) I see she has a similar version that sounds good so thought I'd give it a try. To be honest I can't give a good critique because I didn't follow her recipe exactly - it's so annoying when people review a recipe and then note all the changes they made to it! If you didn't make the recipe exactly you have no business giving it a poor rating hahaha!


Anyway - I combined some of her recipe with my standard recipe and came up with good dish that is waaaaay saucier than my usual one...I like extra saucy so I really liked this version, Dave doesn't like saucy so he prefers the way I've always made them. So your choice - make my delicious go-to enchilada recipe, or try this sauced up version!


I'm not going to give you her original recipe since I didn't make it exactly (she added more verde sauce and diced green chiles, uses 10 larger flour tortillas, and bakes in a 13x9 dish). This is very similar to my standard recipe with the addition of soup to the sour cream. One thing I will do from now on no matter if it's this hybrid recipe or my regular one, is to mix the sour cream and the verde sauce together before pouring overtop - way easier to spread that way (my recipe calls for pouring the verde sauce over and then spreading the sour cream over the sauce).

Ingredients:
  • 16 oz. jar mild green verde sauce
  • 10.5 oz. can condensed cream of chicken soup (I used Campbells Healthy Request)
  • 8 oz. sour cream (I used light) 
  • 3-4 cups shredded rotisserie chicken
  • 8 oz. shredded mozzarella
  • 4 oz. or so shredded colby jack (it's what I had - use whatever you want!)
  • 9 corn tortillas
  • fresh chopped cilantro
shredded lettuce, chopped tomatoes, chopped avocado for salad on the side if you want, or put toppings in small bowls and let everyone garnish as they wish. 

Directions:

Preheat oven 350'. Spray an 11x7 baking dish with non-stick spray. 

Mix together the verde sauce, soup, and sour cream. Spread 1/2 cup in the baking dish.

Lay out the tortillas on a clean workspace, top with a sprinkle of shredded colby/jack or whatever cheese you want, some of the shredded chicken, and a bit of fresh cilantro. Tightly roll up the tortilla and place it seam side down in the baking dish. Continue rolling the tortillas and adding to the baking dish in a tight single layer.

Pour the remaining sauce over the filled tortillas. Bake for 20 minutes. Sprinkle the 8 oz. mozzarella on top, bake until the cheese is melted about 15 minutes.


Serve with side salad or bowls of garnishes. This made 3 big servings (3 tortillas each) or 4 smaller portions.

1.12.18: sweet dill pickles (the best!)
1.12.17: little ideas for things to purge
1.12.16: closet storage


Happy Moment ~ getting an out-of-the blue text from your niece saying she misses you


Friday, January 11, 2019

How to Clean your Yeti (or other stainless steel mugs)

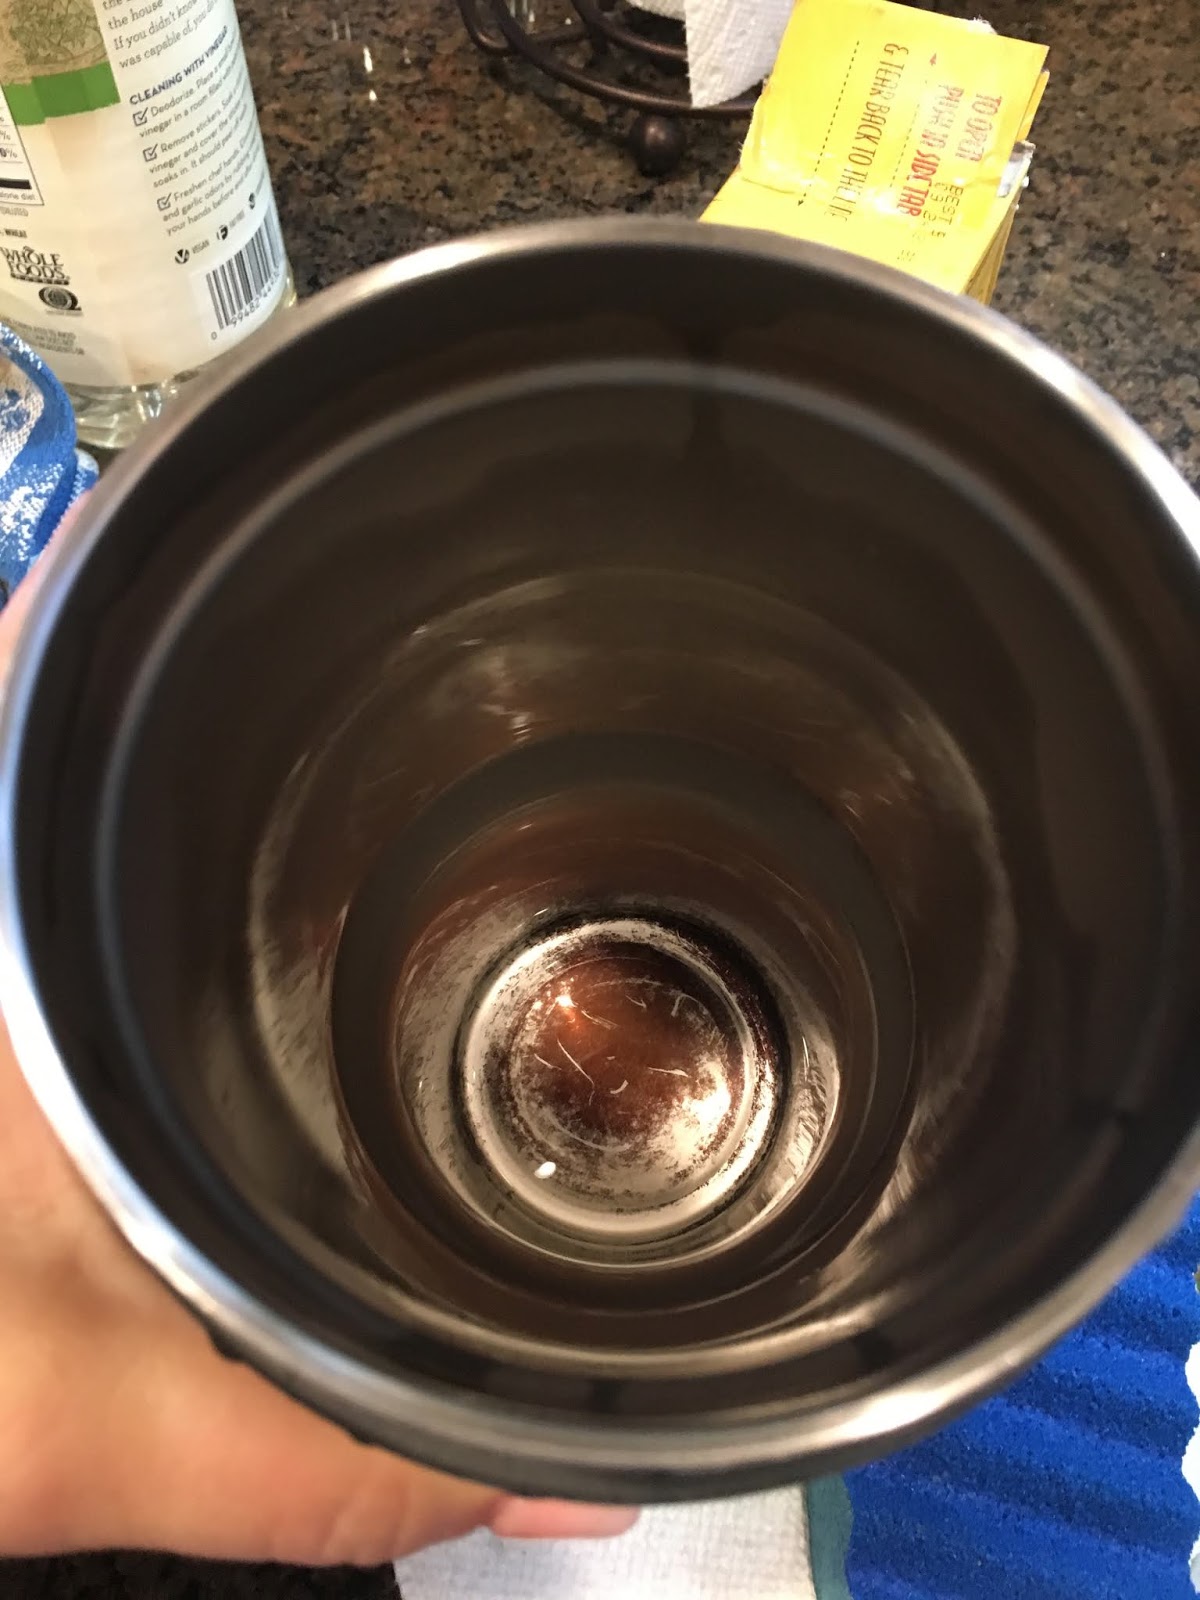
So Dave's Yeti that he uses daily as a coffee mug was super stained and I didn't know it - he thought putting it in the dishwasher would clean it but when I took it out of the washer the other day I noticed how bad it was! The entire thing was coffee-stained and looked gross. So I decided to see if I could remove the stains...and I did...and it was simple.

Put some white vinegar in the bottom of the mug; I used a blue sponge that has a scrubber side, put baking soda pretty heavily on the wet sponge so it makes a paste then dip in vinegar and start scrubbing. You need a little elbow grease but it didn't take long for the staining to come off. It's like a science experiment, the baking soda hitting the vinegar foams and bubbles which is pretty cool on it's own - but then I poured the vinegar out and rinsed and it was almost perfectly spotless! Just the very bottom still had a little stain, so I repeated the vinegar/baking soda/scrubbing and it all came out. Looks brand new!

Of course I didn't have high hopes for the vinegar/baking soda to work so didn't take a picture of the cup totally stained - I did take one of the remaining stain on the bottom tho so you have an idea of what the entire inside surface looked like.
Yuck, right?

Side note - I read that you are supposed to remove the black rubber ring from the top to clean it, didn't know that! Now his mug and top are just about as clean and sparkly as can be ;)


Happy Moment (see yesterday for an explanation) ~

the first sip of coffee in the morning. ahhhhhh.