Monday, April 20, 2020

Boredom Buster: Paint by Number

I am pretty crafty, but one thing I'm not great at is painting. And I really, really wish I was! When Mark sent me his mom's latest project I thought this might be one way I can paint and have it actually look like what it's intended to be hahahah. I don't know if his mom is a painter outside of paint by number, I should ask that, but judging by how great this looks I bet she is! Love this - thanks for letting me share it Claudette. How bad do you want to get a paint by number kit right now? What a great boredom buster - gotta go, I'm now going to find an online kit :)

work in progress...

almost done, gotta finish the driveway...

Done!

PS: He said her only comment about this is "you have to be patient!" Uh oh, I might be in trouble!!

Sunday, April 19, 2020

Around the Campfire 🔥 (week 16)

Dear Campers ~

Here's a quick recap of what happened at camp last week in case you missed anything:

Posts ~
4/12: 🔥week 15
4/13: Miss Lori's latch hook
4/14: DIY: fabric face mask
4/15: tuna salad stuffed avocado
4/16: make an herb planter box
4/17: DIY: no sew face mask
4/18: ham and spinach wagon wheel

What's Cooking ~
  • turkey sausage, mushrooms, spaghetti squash baked with marinara, roasted asparagus
  • grilled tuna, orzo mixed with tomatoes, cukes, feta, roasted garbanzo beans
  • grilled chicken, caesar salad
  • meatloaf, mashed potatoes, mixed vegetables
  • grilled pizza, chopped salad
  • baked pork chops, roasted broccoli, pierogi with mushrooms and peas
Miscellaneous stuff keeping me busy ~
  • made a few more masks, officially out of fabric so experimented with no-sew ones made out of t-shirts (they are good, make one if you need one!)
  • re-did the crazy channeling-my-inner-9-year-old nail polish :) doesn't get tiresome lol!
  • read "Fractured" by Karin Slaughter #2 in Will Trent series. Liked it better than the first one, still gruesome but not as bad as the first! ⭐️⭐️⭐️1/2
  • also read "From Dead to Worse" #8 in the Trueblood series. Because I'm a glutton for punishment and can't stop reading these dumb books. The 'good news' is that there are only 5 more to go and then I can move on. ⭐️⭐️⭐️
  • finally finished a jigsaw puzzle I've been working for a couple weeks - it's in my puzzle stash in a baggie with no picture or box to follow. I had no idea what it was going to be hahahaha, it took me waaaaay longer than it would have if I had a frame of reference! I should take a photo of it to include in the baggie for next time...
Hope you had a good week, that you're staying healthy and not letting yourself get too bored! Create while we wait :) See you next week for more fun projects, recipes, whatever else I can think of to make!

Sincerely ~


Jill
camp counselor and vampire sucker (wait, that should be sucker for vampire books😂)

Saturday, April 18, 2020

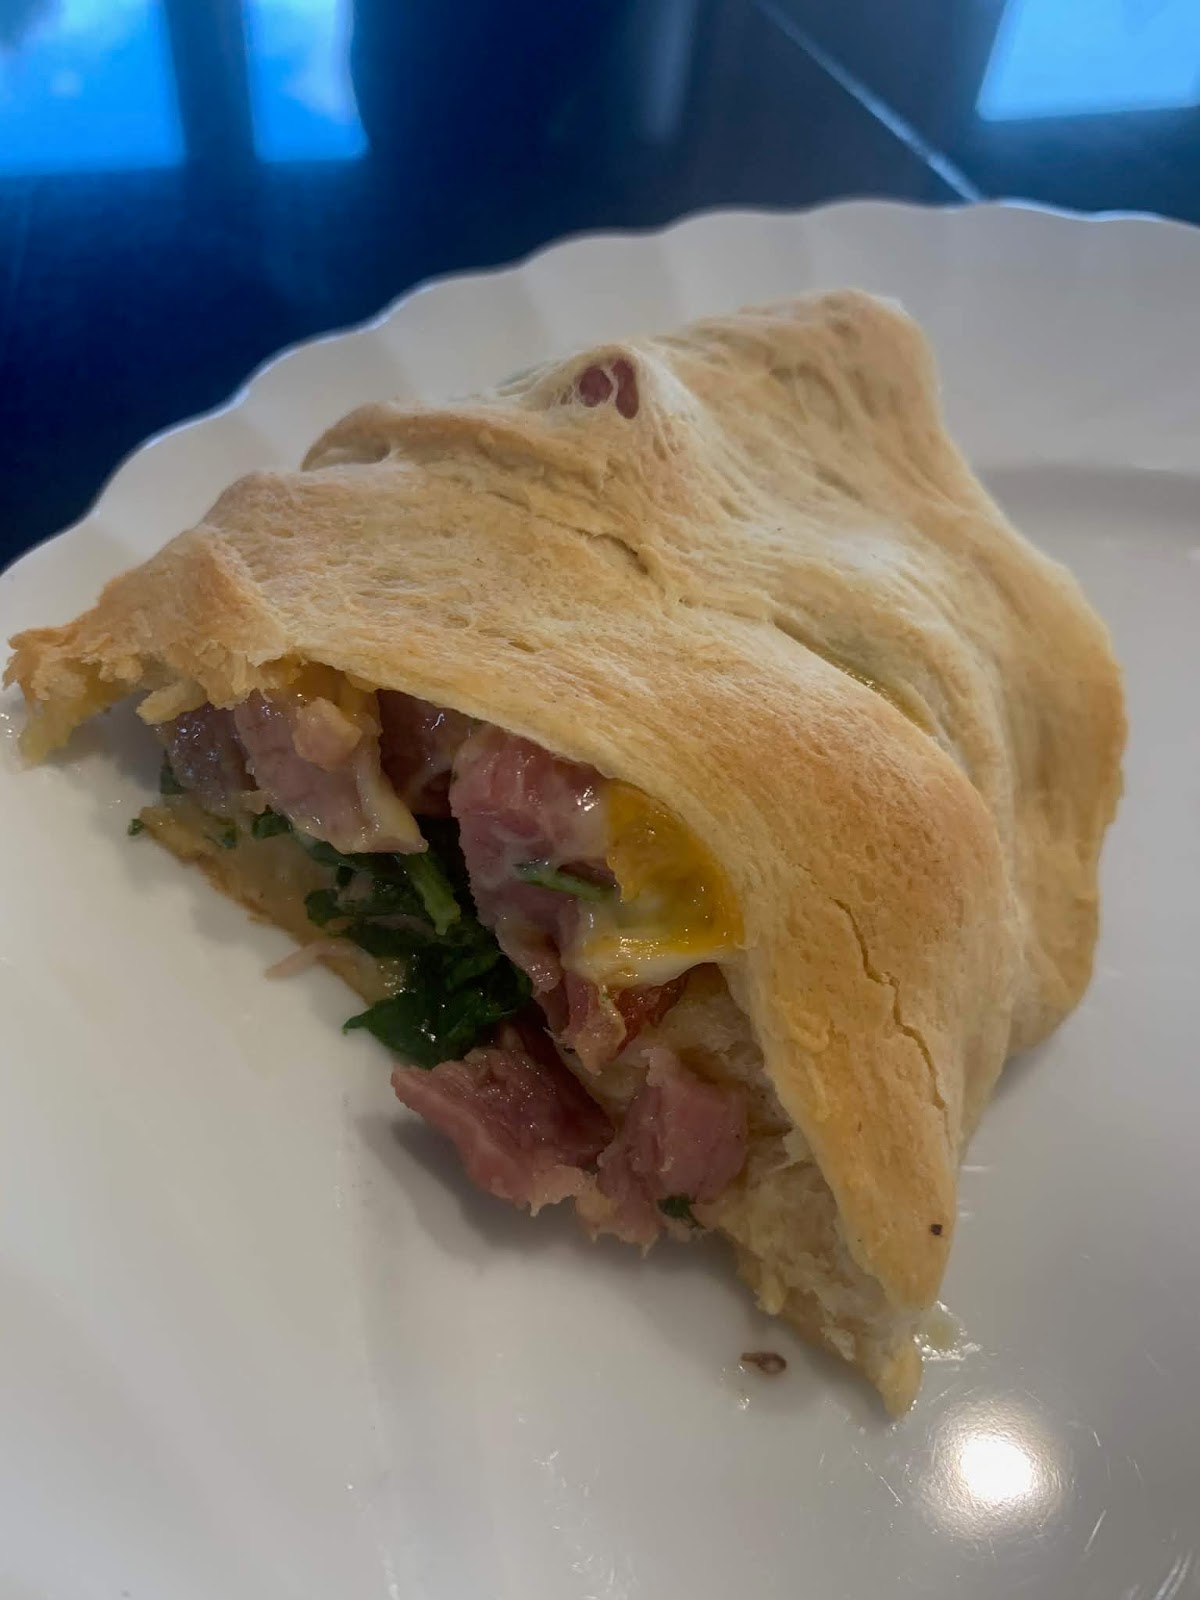
Ham and Spinach Wagon Wheel

This is from my sis - yay I love when other people blog for me! And this looks delish - doesn't she realize that her sis gets hungry too? 😉


Ok ok. cooking every night has gotten tiresome.  Perhaps I shouldn’t have been so quick to rule out Hello Fresh all those months ago?

Had some leftover Easter Ham, Spinach, and a tube of crescent roll which took me back to my archives to bring out this oldie!

2 cups chopped ham
2 cups chopped fresh spinach
½ cup shredded cheese (or in my case I had Colby jack slices so used that)
1 tube crescent roll (I used reduced fat)

Lay out the crescent in a sun pattern. Overlapping corners, press down and spread out a bit.
Put spoonfuls of ham/spinach mixture in the wide part of the crescent roll. If using shredded cheese combine it with the ham and spinach, or sprinkle on top. 


Since I did cheese slices I then placed a slice over each spoonful of meat mixture.


Fold the points of the crescent down over the mixture, pressing in the inside to make a ring.


Bake 350 for 12-15 minutes until crescent is browned!  


So delicious.  The husband and teen both approved.  Maybe not filling enough for a dinner without salad or something on the side but they still liked it!


4.18.19: 'healthier' potato soup
4.18.18: texas chocolate cream pie
4.18.17: Lisa's nieces make k-cup bunnies
4.18.16: hair tie

Friday, April 17, 2020

DIY: No-Sew T-Shirt Face Mask

I posted the other day about the fabric masks I've been making - and after making a couple more I'm officially out of fabric. But people still need masks! I've been seeing lots of new-sew options, or how to tie a bandana/scarf into a mask so I thought I'd experiment with that. Guys, you can totally make a mask for yourself out of an old t-shirt! For real - it's so easy. There are tons of online ideas but I thought I'd show you what I found to work...

My first try is very easy but it only gives you one layer of t-shirt and while that might be better than nothing it doesn't feel thick enough. But it'll work in a pinch:

 - cut about 7" from the bottom of an old cotton t-shirt, depending how wide the t-shirt is you'll have a band of fabric. Mine was from a guys shirt and about 24" wide x 7" tall. Lay the band down and cut a long rectangle from one end towards the other, stop short about 4.5" from the fold at the other end. You're left with an 9" square and two long ties (cut the loop in the middle of the tie to form 4 ties). Then wrap around your face and tie in the back.


The second one I did ended up being thicker, almost pleated so there's more fabric over the nose and mouth, and just as easy - if anyone needs a mask I'd recommend this one:


-cut off a short sleeve from the t-shirt and the hem around the bottom of the shirt. Cut the hem in half so you have one long strip, then cut that in half. Fold the sleeve so the underarm seam is in the middle. Put one hem strip thru the sleeve on either side, scrunch the shirt down and tie into a loop that will go around your ear. Fold the pointed top part down under the mask and put it on, adjust the loop ties to fit your face.


I have so many cut up t-shirts from making my t-shirt rag quilt (which doesn't use the sleeves or hem so I have lots of them!) - you just need to find an old t-shirt you don't mind cutting up to make these masks. You can get two masks out of one shirt (two sleeves = two masks!), for the second one just cut a strip of  t-shirt from the bottom - even without the hem t-shirts don't fray so it'll work fine.


4.17.19: Cathy's baked mostaccioli perfect for today - it's snowing out!
4.17.18: shoelace tightening tip
4.17.17: money origami
4.17.16: baeckeoffe - can't pronounce it but it's good!


Thursday, April 16, 2020

DIY: Herb Box

Mickey sent me this and I absolutely love how it turned out! I have my pallet herb garden which is still great, but now I want a box like this - and check out how they attached it to the house, genius. It might not be quite time to plant yet unless you live somewhere much warmer than Michigan - but you have time to build the box while sitting around at home :) When she texted me the photos she added this which made me laugh: "Actually this planter box, I thought was going to be a shelf for the living room. And I’m like, wow Kyle that is so nice it’s amazing - he had it stained so cool. And then he’s like thanks! So we carry on and then he goes, well actually this is my herb box. The shelf is the tree in the driveway." 
Haha - can't wait to see the shelf he makes from the tree!


Here's what she has to say about making the herb box:

I know it isn’t time for planting yet in Michigan, but in North Carolina we're two weeks into Spring! With spring comes time to plant a garden! As you prepare your garden, here is a super easy idea to plant herbs that looks good and saves space! We had a bunch of wood laying around from winter projects so we took 3 - 1” by 6” boards and created the box. Super simple. The key is to make sure your wood is treated or it will rot if left outside. If you want your box to be deeper, you can always do 1” by 8”. Once the box was constructed, we stained it and painted it white. We used an exterior semi-transparent paint. In order to get the white washed look, we then sanded the boards. You can sand as much or as little as you want. Just depends how “weathered” you want it to be.


We ordered the pipe shelves from Amazon (just type in pipe shelf and a bunch of options come up). These particular ones were 6 for $15.99. We mounted two of these to the side of the porch and set our shelf on top. The shelf is pretty heavy, but we attached it to the pipes with the provided clasps. Before we filled it with dirt, we sprayed the Inside with flex seal and drilled small holes into the bottom to help with drainage. Once your shelf is constructed, fill with dirt and your herbs! We chose lavender (for looks and smell), sage and tarragon. This project is super easy, cost efficient and a great way to display herbs! 


Wednesday, April 15, 2020

Tuna Salad Stuffed Avocados

Got the idea for tuna stuffed avocados from allrecipes.com, but their recipe for tuna salad included green onions, bell pepper, garlic and balsamic vinegar which is not how we like our tuna salad...so I adapted the idea to suit us. Make your favorite tuna salad and fill avocado halves with it, put on a bed of lettuce and have a delish and pretty lunch.


I have been making tuna salad this way since I met Dave, it's how his mom made it and it's great:
Mix together one can drained tuna fish, chopped celery, sliced green olives with pimentos, and enough mayo to stick it together. Season with salt and pepper. I know - olives? Trust me, it's delish.


Now in the interest of full disclosure and keepin' it real - the above filled avocado looks pretty and all that, but really - that is not enough tuna to fill me up at lunch! This is how my plate looked after I took the 'pretty' picture (the half avocado is under that mound of tuna salad)!!


4.15.19: eggshell candles
4.15.18: LeDonna's Broccoli Cottage bake

Tuesday, April 14, 2020

DIY: fabric masks

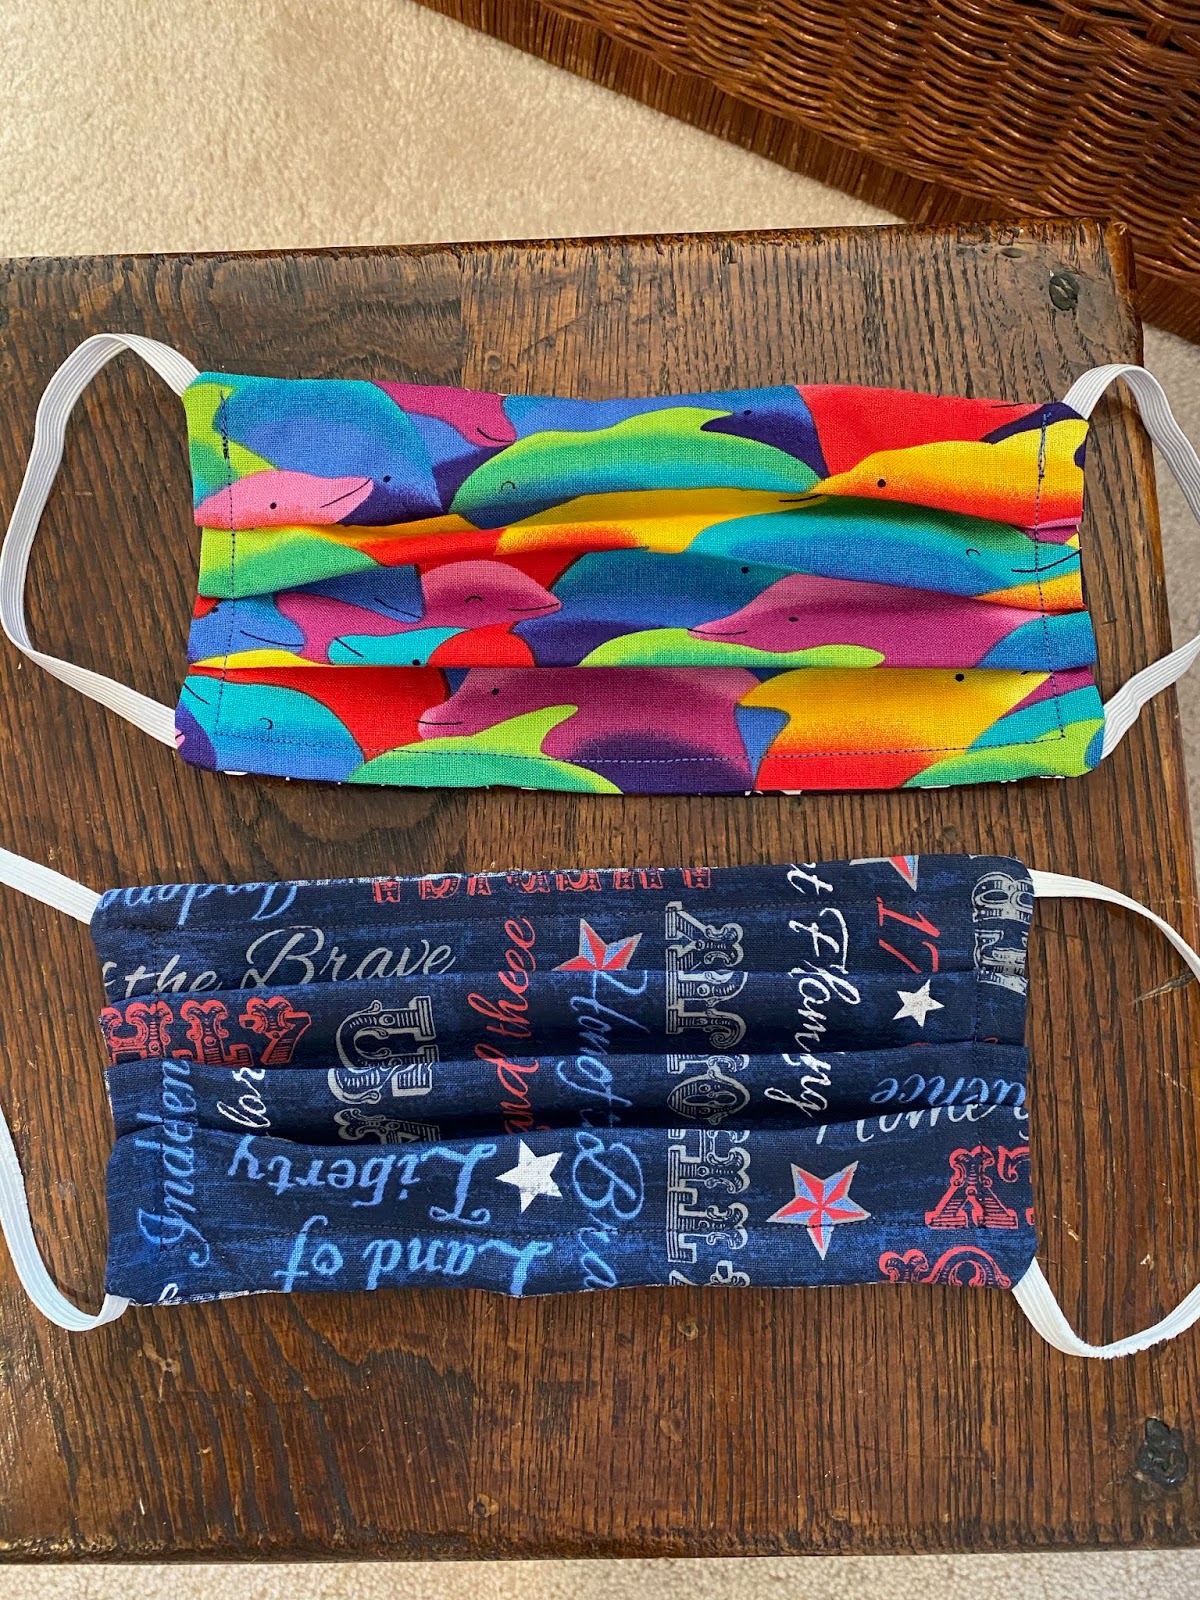
I'm a couple weeks behind everyone making fabric masks, but with the 'stay-at-home' restrictions continuing I figured I better get on it! I'm limited to the fabric I have on hand, which is a lot of holiday and a little left over from other projects like quilts, etc. The first one I made using a large pattern that is cup-shaped and I did it in burgundy snowflake mostly because I wasn't sure what I was doing and used it as sort of a sample. Dave wore it a few times and then nicely asked if I had anything a little cooler, or manly like skulls and crossbones hahahha. So I made him a skeleton one out of Halloween fabric but apparently that isn't what he had in mind LOL! 


I made the majority of them with binding tape ties, those are quite a bit more time consuming because I had to make the long strips. Then I found a small stash of thin elastic and made a few with ear loops, those go much quicker so I liked making them - downside is they aren't adjustable like the ties so might not fit everyone. 


I'm not going to bore you with mask patterns and how to sew them - there are SO many good instructions online. I played with a few different ways to make them and ended up settling on a simple pleated one with either ties or elastic. Most of them I started with 2 squares 9" x 7" and ended up with a mask approximately 8" x 3.5".  One tip came from Tracy, I started sewing a 6" length of pipe cleaner to the inside top edge, that way you can bend over the bridge of your nose and it made the fit much better. In the picture below you can see it sewn across the top edge, I used a wide zigzag stitch to hold it in place. 


These are the last two I made this morning to get in the mail to my niece. I have fabric for 1 or 2 more and then I'm done with mask making (great way to use up a big stash of odds and ends fabric) unless I find more fabric and elastic. Trying to keep everyone healthy!! 


4.14.19: 🔥 recap (with a beautiful bunny cake!)
4.14.18: strawberry cream cheese frosting
4.14.17: Brooke's DIY speaker
4.14.16: how to repair an ironing board

Monday, April 13, 2020

Boredom Busting a little at a time...Lori's latch hook hanging

Miss Lori sent this to me and I had an "ah ha!" moment - you might remember that I have been working on a latch hook kit for YEARS, last I posted about it was from a picnic table at the campground 2 years ago. Well guess what? Yep, I put it away and haven't thought about it again. Then I get this from Lori, she wrote that she did a couple rows a day until it was done and that's where the 'ah ha' came in - what a great idea! Instead of being overwhelmed with sitting down for hours at a time trying to finish a project, why not just plan to do a little at a time? I immediately got my kit out, put it on a table in my craft room so I don't have to put it away each time, and will now just do a couple rows a day and walk away. This never occurred to me - I'm an 'all or nothing' kind of crafter, so starting big things like this latch hook, cross stitch, crocheting an afghan, etc. mean that I feel like I have to be all in and work only on that thing...which means they never get done because I get tired of it and want to work on something else hahaha. Thank you so much Lori for teaching me this simple way to actually accomplish big projects - and it means I can have multiple things going at once, just doing a little every day!

Here's what she had to say, and the photos of her gorgeous latch hook hanging:


When we first learned we had to stay at home for a while I ordered this from JoAnn’s.  I remember helping my older sisters with them when I was younger and felt like I wanted to give it a whirl!  I did about two rows a day until it was done, then sewed the edges back with invisible thread and put a little circle hanger on the back.

My assistant at the studio is a PHD music student at MSU so I’m going to give it to her for her practice room!

Going to start something new tomorrow!


Here's my very old kit that I am now committed to working on a little bit every day - you can read more about how to do latch hook and my whiner comments about how long it's taking here from 6/18:


4.13.19: herb crusted lamb roast
4.13.18: Florian's sauerkraut
4.13.17: roasted carrots
4.13.16: lemon cream pie with gingersnap crust

Sunday, April 12, 2020

Around the Campfire 🔥 (week15)

Dear Campers ~

Here's a quick recap in case you missed anything last week at camp:

Posts ~
4/10: my sis is hungry: banana muffins
4/11: hot cross buns

What's Cooking ~
  • pork roast, roasted carrots and potatoes
  • grilled tuna, orzo salad (tomatoes, feta, garbanzo beans, spinach)
  • beef and homemade egg noodles (recipe soon!)
  • rice bowls (leftover pork roast chopped up, layered with rice and salad)
  • beef enchiladas
  • crusted pork chops, mushroom ravioli, roasted broccoli
  • chicken fried rice
Miscellaneous stuff keeping me busy ~
  • did a few virtual exercise classes this week - barre, tap twice, fitness blender on youtube; there are lots of free classes online!
  • finished 'Tess of the d'Urbervilles' - the poor woman never caught a break, sad and tragic.
  • then I read the opposite of Tess - another Trueblood one about vampires 
  • started a series by Nora Roberts without realizing what it's about, after 4 pages I realized that it's too close to what we are going thru right now with the pandemic and I have no desire to read a fiction book about something happening in real life! Sent it back to the library.
  • been making lots of fabric masks - I'll show you how they turned out this week
Happy Easter!! I woke up this morning thinking about sunrise service and pancake breakfast - it's been forever since I've had either one of those things. It's weird to be isolated and not spending time with family and friends - thank goodness for facetime and zoom.  Stop back this week and see what's going on at MMDC - I'll keep busting the boredom for sure :)

Sincerely ~


Jill
camp counselor and believer

Saturday, April 11, 2020

Hot Cross Buns

Dave and I were watching Jeopardy the other night and one of the answers was hot cross buns. He looked at me and said he'd never had a hot cross bun - and neither have I. So guess what I made today as my boredom buster thing to do?

Yep. We got buns. (And they turned out great!)


Apricot-Raisin Hot Cross Buns

  • 4-4.5 cups all-purpose flour
  • 1 package active dry yeast
  • 1/4 cup warm water (110')
  • 1/8 teaspoon sugar
  • 3/4 cup milk
  • 1/2 cup butter (1 stick)
  • 1/3 cup sugar
  • 1/2 teaspoon salt
  • 2 eggs (plus 1 egg white, see below)
  • 1/2 cup finely snipped dried apricots
  • 1/2 cup raisins, coarsely chopped
  • 1 egg white, beaten
  • 1 tablespoon water
  • dried apricots cut into strips (optional) or confections' sugar glaze (optional)
Step 1
In a large mixing bowl place 2 cups of the flour; set aside. In a small bowl combine the yeast, warm water, and 1/8 t. sugar. Stir until yeast is dissolved; set aside. In a medium saucepan heat and stir the milk, butter, 1/3 cup sugar, and salt until warm (120'- 130'F) and butter almost melts. Add to flour mixture along with the yeast mixture and eggs. Beat with an electric mixer on low to medium speed for 30 seconds, scraping sides of bowl constantly. Beat on high speed for 3 minutes. Stir in apricots, raisins and as much of the remaining flour as you can with a wooden spoon.


Step 2
Turn dough out onto a lightly floured surface. Knead in enough remaining flour to make a moderately soft (not sticky) dough that is smooth and elastic (3 to 5 minutes total). Shape dough in a ball. Place dough in a lightly greased bowl, turning once to grease surface of dough. Cover and let rise in a warm place until double in size (about 1-1 1/2 hours).


Step 3
Punch dough down. Turn out onto a floured surface. Cover and let rest 10 minutes. Grease two baking sheets; set aside. Divide dough into 20 portions; shape each into a smooth ball. Place balls 2 inches apart on prepared baking sheets. Cover; let rise until nearly double (45 to 60 minutes). 


Step 4
Preheat oven to 375'. Make a crisscross slash across top of each bun with a sharp knife or scissors. In a small cup combine beaten egg white and water. Brush mixture over buns. Bake for 12 to 15 minutes or until golden brown, rotating baking sheets halfway through baking. Top with apricot strips or glaze in an x-shape if desired. Serve warm. Store remaining buns in an airtight container in the refrigerator up to 3 days. To reheat, place 1 or 2 buns at a time on a microwave-safe plate and heat 15-20 seconds. Makes 20 buns. 


per serving: 177 calories; 6 g total fat; 28 g carb; 1 g  fiber; 8 g sugar; 4 g protein

© Copyright 2020 bhg.com. All rights reserved. Printed from https://www.bhg.com 04/10/2020


click here for source

4.11.19: Al and Cathy's DIY fire pit