Wednesday, May 10, 2023

Chinese Green Beans

I posted Jiji teaching us how to make authentic beef and broccoli last month (click here for that post, you won't be sorry!) and included the recipe for how to make Chinese green beans; I know that second recipe is going to get lost tho if I don't assign it it's own post - and seeing how these are the most amazing green beans I'd hate to forget where the recipe is!

For 8 servings you'll need:

  • large bag of washed and trimmed green beans
  • vegetable oil
  • 2 cloves garlic
  • salt
  • dark soy sauce (it's different than regular soy sauce, it helps give a darker color to the dish)
  • oyster sauce
  • raw cane sugar

Precook green beans in hot water for a couple minutes, remove from water. You cook them a bit ahead of sautéing them because the heat is so high in the frypan or wok the beans will burn before they are cooked thru. 

Smash and chop garlic cloves, set aside. Heat veg oil in a large pan over high heat. Swirl oil around, add beans to the hot pan (oil will splatter so be careful), cover for a couple minutes. Add garlic and season with salt, stir; add dark soy, oyster sauce, and raw cane sugar all to taste. Saute until beans are coated and cooked thru, stirring constantly. Serve with beef and broccoli, and steamed rice. 

Note: I know there are no amounts given and that makes it a little hard to know what you're aiming for here - Jiji just drizzled on the different sauces until everything is coated, then sprinkle with some sugar. Taste and adjust to get enough sauce to coat the beans, it's ok to add a little more and taste again, keep tasting and adjusting. 


Tuesday, May 9, 2023

Tip-sy Tuesday: things you should not put down the garbage disposal

Saw this list of common items that you might be tempted to put down the garbage disposal and shouldn't. I didn't  know a few of these and thought you might be interested as well.  I'm not copying the entire article, just giving you an overview. To read more details regarding these items, find the original story here at bhg.com


coffee grounds (forms a sludgy mess and could clog)

potato peels (creates a sticky, gluey mess)

fibrous veggies (celery, asparagus - wraps around the blades)

starchy foods (oatmeal, pasta, beans - expands in water and could clog or not allow proper draining)

grease, fats (solidifies in the pipes)

onion skins, eggshells (potentially coats blades keeping them from being sharp)

paint (including from art projects)

nuts (turns into nut butter and can clog)

pits and seeds (mango, cherries, peach - could bend or break the blades, also cause clogs)

shellfish shells (crab, lobster, shrimp)


5.9.22: baked brussel sprouts by Brooke

5.9.21: ðŸ”¥ week 19


5.9.18: how to clean shrimp

Monday, May 8, 2023

Explosion Box (Part 1 - Base and Lid)

I made this explosion box last year for Brooke's graduation present - yes I made it a year ago and am just now posting! It's just that it's a bit of work (but not hard, just time consuming) and there's so much I added to it that I just kept putting off writing it up for you. But it's time! 

An explosion box is folded pieces of paper layered on top of each other creating the base of the box that you decorate as you like, with another piece of paper folded to make a top. After adding however many layers you want to the base and decorate/fill it, you fold up the box and put the top on. When the recipient lifts the top off, the box falls open to reveal all the surprising layers and gifts. 


my explosion box is 4 layers with pockets, pull outs,
accordion folds...there's a lot going on here!

You can make it much simpler than I did, I kept adding layers and went a little extra because I was having so much fun making it! I searched for different ideas online, there's a lot of inspiration out there if you want to make your own explosion box - everything from very detailed and layered, to a simple one-layer thing. Up to you! 

There's too much to my final product to show you all at once so I'll space it out over a couple-three posts. Today I'm going to show you how to make the base layer and lid without any decorations. For the finished product I combined a whole bunch of ideas, but for the base layer and lid I followed the directions found at 'it's always autumn'.

Here is her instructions, and she made a video that you can watch if you click on the above link. I took pictures of the process that follow her printed directions:

4.75 from 4 votes

Explosion Box

Learn how to make a cool explosion box full of photos and notes for a fun DIY gift. Use our printable template and cutting chart to make it easy.
Prep Time1 hr

Ingredients

  • 12x12 inch Solid Colored Card Stock 1 per layer you'd like to include
  • 1 sheet Printed Card Stock
  • Adhesive
  • Paper Trimmer with Scoring Blade see note
  • Photos
  • Embellishments

Instructions

  • Print the cutting decide and decide how many layers you would like to make your box. My box has three layers and uses the dimensions that are highlighted in light yellow. Cut your solid card stock to the dimensions listed on the cutting guide.
  • Find the scoring measurement for the largest piece of cardstock. Measure in from one edge of the cardstock and score (for example, 4 inches in on a 12 inch piece of card stock). Rotate the paper 90 degrees and repeat. Repeat twice more until the card stock has been scored 4 times. This will divide the sheet of paper into 9 equal size boxes. Repeat with the other layers of cardstock.
  • Fold in the card stock along all scored lines. Again, you should see 9 equal size boxes on each sheet of card stock.
  • On the largest piece of card stock, make a diagonal fold through each of the corner boxes. The diagonal fold should fold "down" while the other folds fold "up". Watch the video for a good explanation of this step.
  • On the largest piece of cardstock, trace the heart from the cutting guide and cut it out as shown.
  • One the other pieces of card stock, cut away the corner boxes. Layer the largest piece of cardstock on the bottom, then center the next piece over it and adhere on the center box only. Repeat with any other layers.
  • Print the lid template on the back of the printed card stock (trim it to fit in your printer if needed). Cut along the solid lines, then score and fold along the dashed lines. At each corner, cut up to where the dotted lines meet from one side only. You are not removing the corners; you are making a flap so you can glue the lid together.
  • Fold over the flat at each corner and add adhesive, then press to adhere the flap to the side next to it, creating a box lid.
  • Decorate the box as desired, adding pictures, notes, embellishments, etc. When finished, gather up the sides of the box, folding the hearts in toward the center, and place the lid on top.

Notes

If you don't have a paper trimmer with a scoring blade, you'll need another way to cut and score your cardstock. You may use a ruler and an exacto knife to cut the card stock, or even scissors if you cut carefully. For scoring, you can use a ruler and the back of a butter knife, or a different type of scoring tool.

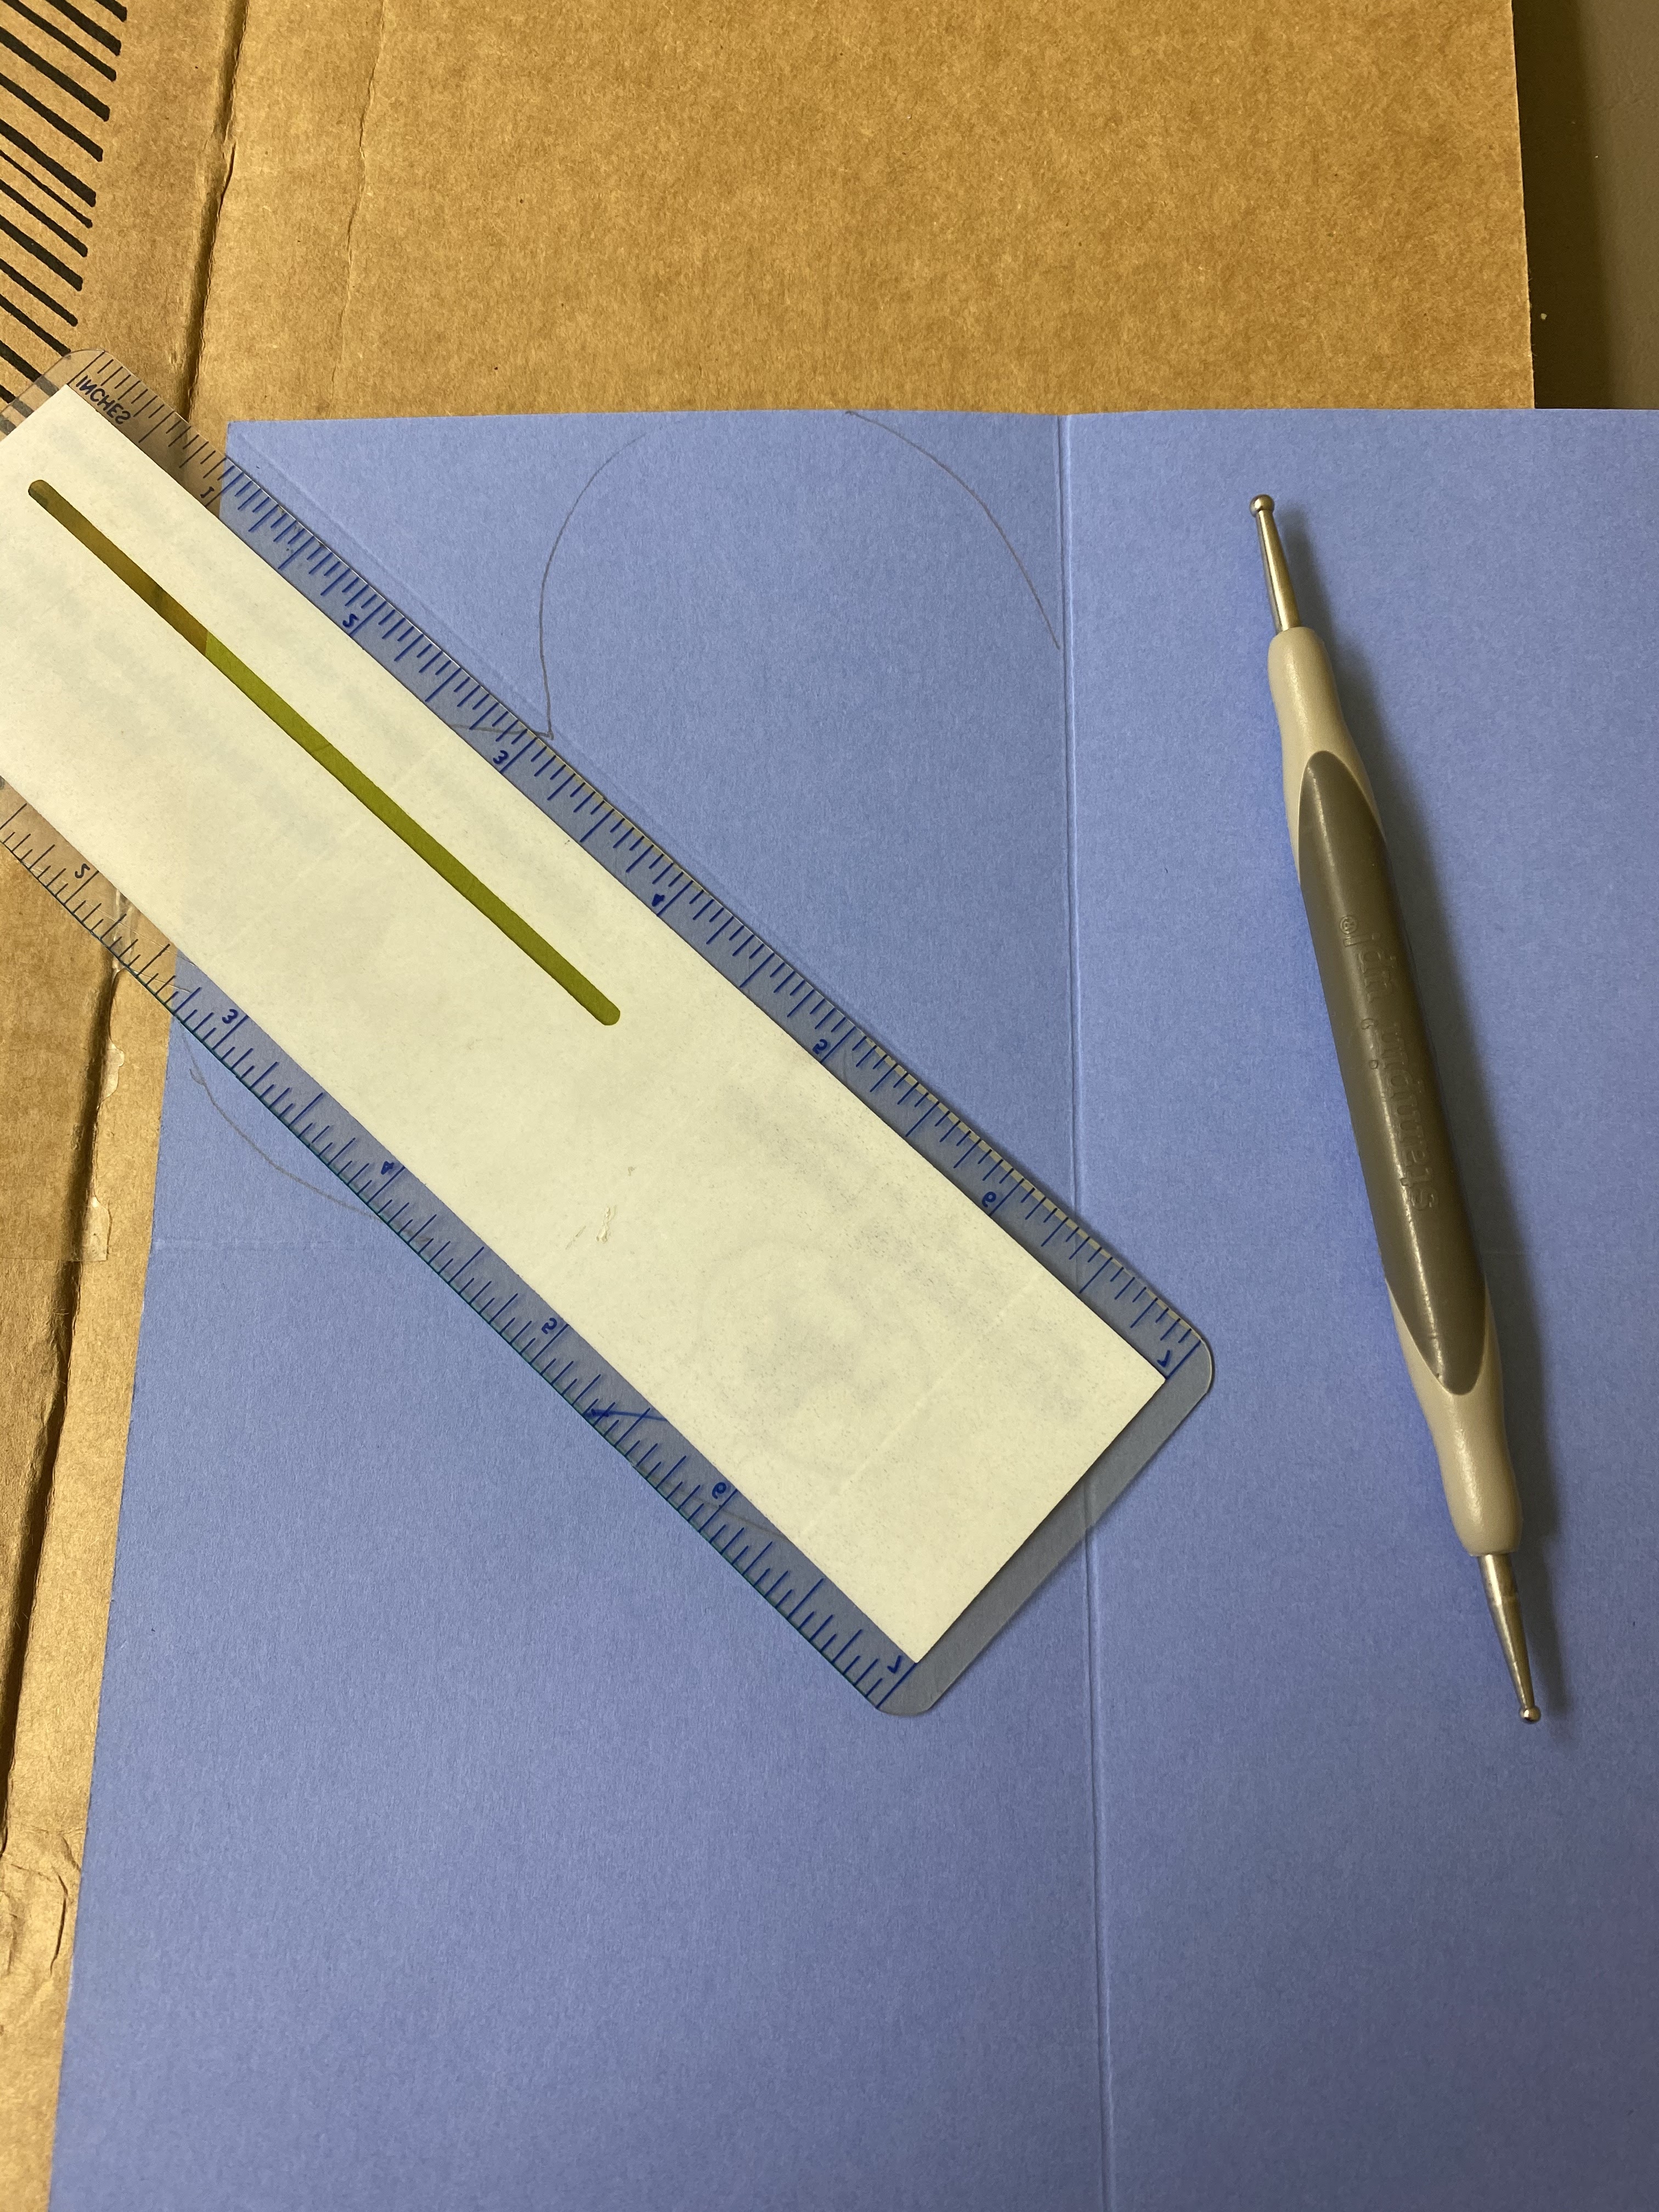
starting with a 12" square piece of cardstock, score and fold every 4 inches 
for a total of 9 (4") squares.

her site gives you a heart template to shape the 4 corners. Turn the paper
 over and trace around or freehand a heart shape as seen above. Please note
this photo is wrong, I traced on the paper before turning it over. 

with the paper turned over, score a fold line thru half of the heart as seen above and below,
you want the score line thru the heart the opposite of the score lines on the squares. This will
help when folding the box. The diagonal line thru the heart will fold 'down' while the 
other score lines will fold 'up'. See the next pictures:


hopefully the pictures above and below help you see what I was talking about with the folds!


To make the lid, she has a template that you can print onto your piece of paper so you don't have to measure as much. My problem with the template is that the score/fold lines aren't the same on all 4 sides for some reason. So I just measured my own fold lines. The box I made above ends up being 4" square so I wanted the lid to be just a little bit bigger, I made it 4 1/4" square.

For the lid - start with a 7" square piece of cardstock or decorative paper. In the example below I'm using purple cardstock but for the final product I used decorative paper which is the first photo at the top of this post. Score at 1 3/8" on all sides, fold. Using the photos below as a guide, cut one side of each of the corner squares just to the fold line: 


snip off just the tip of the corner squares:


Apply adhesive to the bottom of the corner square:


Fold as shown and glue the corner square/tabs in place:


Fold the box up and keep closed with the lid:


When the lid is removed the box falls open - 'exploding' as you will:

Sunday, May 7, 2023

🔥 Around the Campfire (week 19)

Dear Campers ~

Here's a quick recap of what happened at camp last week in case you missed anything:

Posts ~

4/30: 🔥 week 18

5/1: cinco de mayo recipes 

5/2: TT evaporated milk substitution

5/3: chocolate pretzel and strawberry birthday cake

5/4: Macey's salisbury steak with mushrooms and onions

5/5: MSTI: air fryer caramelized bananas 

5/6: Words

What's Cooking ~

  • pizza, salad, breadsticks
  • chicken pot pies, steamed green beans
  • baked bbq salmon, coconut rice, creamed spinach 
  • grilled pork chops, sweet potatoes, green salad
  • fettuccini with mushrooms and Italian sausage, caesar salad
  • burgers, orzo salad (tomatoes, feta, fresh parsley, olive oil)
That's it for this week - hope you'll stop back often to see more crafts, recipes, projects, whatever else I can think of to make at camp (or get someone else to make for me!). Bye!

Sincerely ~


Jill
camp counselor

Friday, May 5, 2023

My Sister Tried It: Air-Fryer Caramelized Bananas

Well, continuing on with my series for my sister of things “that I have tried “- today I have tried another “recipe” that is definitely within my wheelhouse. I saw it several times online and must be I am hungry because I decided it looked delicious. In my interest for full disclosure I will let you know that it said I could use a very ripe banana, so that also enticed me to give it a try, because I feel terrible about myself when I waste fruit or vegetables by letting them spoil.  It turns out that I am way healthier in the grocery store that I actually am at home when I am looking for something to eat. But that’s a story for a different day. Lol.


So back to my “recipe”.  This one said in the title caramelized bananas, but when I looked at the recipe, it was actually just brown sugar and cinnamon in an air fryer. How much easier could this get?


It did say I could add pecans and/or ice cream but I have no pecans and it’s lunchtime on a weekday so ice cream probably isn’t called for. 

The top of the banana did get a delicious carmelized top.  I mean come on - sugar on a warm banana ? How could I go wrong? I actually loved this as a snack. The warm banana was filling and the sugar gave it just enough sweetness to make it feel like a treat. Next time I think I’ll use less sugar (wasn’t necessary) and maybe more cinnamon instead (just to try and make it a tiny bit healthier). But hey- as a snack goes it does count as fruit and doesn’t turn my fingers orange like Cheetos do so I consider it a win. 😉 
ps.. as a side bonus it made my kitchen smell delicious! 

Below is the real recipe I copied from and my pictures! 

Thursday, May 4, 2023

Salisbury Steak Patties with Mushrooms and Onions by Macey

 Salisbury Steaks: With Mushrooms + Onions 


  • 2 Salisbury Patties (See Below ** for Recipe)
  • 2 cups orange juice
  • 1 cup apple cider vinegar
  • ½ cup Worcestershire sauce
  • 1 ½ tablespoons steak seasoning, or as desired (My favorite is Montreal Steak Seasoning; what I used for this recipe as well!)
  • Black Pepper and Sea Salt as desired
  • 2 teaspoons olive oil


** Salisbury Patties: I do not have specific measurements for this; I just eye ball it as I go… However, the ingredients that go into the patties are below: 


              Ground Beef
              Worcestershire Sauce
              1 Egg
              a couple dashes of Milk :) (if that makes sense haha)
              Gluten Free Breadcrumbs to absorb excess moisture, help the patty keep it’s shape!


  1. Place the patties side by side in a dish; add in the OJ, Apple Cider Vinegar and the Worcestershire Sauce (yum!) I let these babies marinate in the fridge for 45-60mins.

•••• lucky for me, I am blessed with an orange tree in the backyard! So all I do is squeeze the juice into a measuring cup and then pour into the dish. However, I think any kind of OJ would be good! 


  1. Preheat the oven to 425, and remove the dish from the fridge; cover patties in plastic wrap and allow them to become room temp (roughly 15mins). Then, place patties on a clean cutting board and rub them with sea salt/ black pepper, Montreal Steak Seasoning.
  2. In a cast iron pan, heat the Olive Oil on high heat; once the oil starts to bubble, throw the steaks in (not literally throw.. But you know what I mean lol) and let them cook on high until they're lightly browned on each side. (~2-3 mins).
  3. Then transfer the patties (still in the skillet) back into the oven. I use a thermometer to make sure they are the way that I like (135ish) which usually takes 8-9 mins in the oven.
  4. While patties are cooking, I heat a second pan on the stovetop where I first add chopped onions and mushrooms cooked in olive oil, some red wine, and salt and pepper to taste. When they're almost done cooking / sautéing, then I add in the chopped garlic right at the end (so it doesn’t burn). Make sure before you add garlic that the red wine has burned off so then when you throw garlic in, you can reduce the heat. It should be burned off if you put it in right when you put the onions and mushrooms down! (You don’t want to taste the alcohol … normally you would; or at least I do ;) but for cooking… high heat until the alcohol in the red wine has had a chance to cook out. 

** If you want more “sauce” aka Gravy… (which I do!) I leave the remains from the mushrooms and onions in the pan, add some beef stock, corn starch, and a dash (or 2) of heavy cream… again, I’m eyeballing this depending on how thick I want the gravy to be and how much of the scrapings left in the pan… Scrape the goodness from the pan (the oil / juices the mushrooms onions garlic made) and slowly add the starch in to ensure it’s not too thick! (super easy, and super yum).


You can either have this with a baked potato on the side, or on top of a healthy scoop(s) of mashed potatoes.


Check back next time and I'll share how I make my mashed potatoes! 


Wednesday, May 3, 2023

Chocolate Pretzel and Strawberry Birthday Cake

I asked Jen if she wanted me to make a dessert for Kenedy's birthday dinner last weekend and if so what Ken would like - Jen came back with the request for either chocolate-covered pretzels or chocolate-covered strawberries. Jen texted me 'well neither are really birthday desserts so good luck with that' hahaha. 


I had the thought that maybe I could stick dipped pretzel rods in the top of a frosted cake and googled to see if anyone had done that - and came across an idea to stand the dipped rods around the outside of the cake (click here). The inspo photo was so pretty, and it seemed fairly simple to make, so I went with that basic idea but then made it my own by topping the cake with dipped strawberries. So pretty!

I made a 3-layer 6-inch round cake which after filling the layers with strawberry buttercream equaled about 5" tall. The pretzel rods I bought are about 7" tall, which I didn't think would look right so I carefully cut the pretzels down to about 5 1/2" tall (using a serrated knife and gently sawed the pretzels down). Dip the cut end into melted chocolate wafers (I used white but there are lots of different colored wafer melts out there), lay on a piece of parchment until firm. Melt another color of wafers, if desired, and drizzle over the base coat of chocolate. Add sprinkles while the drizzle is still wet or they won't stick. 


For the strawberries I simply dipped them straight into the remaining melted white chocolate and did the same thing with the drizzle. Spread the remaining melted chocolate out in a thin layer on a piece of parchment and let it harden. Then break/shatter into little pieces, this will top the cake before adding the berries. 

To assemble: 

Trim the cake layers so they are straight across the top (if they bake up with a domed top). Put one layer down on a serving plate or cardboard round, spread with frosting. Top with second layer and repeat spreading with frosting. Add the top layer and frost the entire cake. Note you do not need to make the frosted cake 'pretty' because you are covering it all up with pretzels and berries - yay! See, like I said, easy hahah. 

Stand a dipped pretzel up against the side of the cake and lightly press it into the frosting to help hold in place. Repeat all the way around. It took 28 pretzels to cover the sides of my 6" cake. Fill in the top of the cake with the broken/shattered pieces of hardened chocolate. Top with the dipped berries and you're done. 

One other note - this made a tall cake that wouldn't fit in my standard cake carrier, just FYI if you are planning to transport the finished cake. 


Oh, just fyi in case you care - I made a doctored butter yellow cake (add an extra egg, pinch of coarse salt and 1/2 t. vanilla) and strawberry buttercream frosting (add about a tablespoon of strawberry jam to pink-dyed buttercream frosting). 

Buttercream frosting:
  • 1 stick of unsalted butter, softened
  • 3 1/2 - 4 cups confectioners sugar
  • 1/2 teaspoon vanilla extract
  • pinch of coarse salt (don't add salt if you are using salted butter)
  • enough milk or cream to give the consistency I want, maybe 2-3 tablespoons. I don't measure, just pour in a tiny bit at a time.
Beat the butter until fluffy. Mix in 1 cup of powdered sugar, add vanilla and salt. Slowly add the remaining powdered sugar alternating with a little milk each time and mix until the frosting is light and creamy. 

Tuesday, May 2, 2023

Tip-sy Tuesday: Substituting Evaporated Milk

Quick tip for today - I was making buttercream frosting over the weekend for Kenedy's birthday cake but didn't have milk or cream, and didn't want to run to the grocery store if I could help it...so I took a chance on substituting evaporated milk (I usually have both evaporated milk and sweetened condensed milk on hand) and I'm happy to report it works! Whew.


Note: don't use sweetened condensed milk, it's very thick and can't imagine it would add the necessary moisture to thin the powdered sugar and butter based frosting. Evaporated milks texture is similar to regular milk, I probably could have diluted it with some water but I just added it straight from the can - I didn't notice any difference in the taste or texture of the frosting.

Brooke had a piece of cake and asked if I made the frosting, I said of course - she said 'I love your frosting, will you teach me how to make it?'. I'm not about to tell her that 'my frosting' is just traditional old buttercream hahaha. It is really good tho, and I'm happy to know I can substitute evaporated milk in the future if necessary. 

Stop back tomorrow to see Kenedy's finished cake, it turned out SO good and everyone loved it!

Monday, May 1, 2023

Cinco De Mayo recipes

Hooray, Hooray, the first day of May! I think it's supposed to snow here but still, the spring flowers are coming up and warm weather is sure to follow (at least it better or Dave will have a conniption!) ;)

Do you guys do anything to celebrate Cinco De Mayo? We don't 'celebrate' but it's always fun to have a reason to make any Mexican-themed dinner (unlike any other day of the month that isn't May 5th and I make my standard enchiladas hahah). Here's a list of a few things I've made in the past that you might like to try out this week - there's some good ones on this list but Mexican street corn salad is probably my favorite. 


sour cream chicken enchiladas

chicken enchilada suizas

enchilada sauce

red and green enchiladas

chicken tamale casserole

salsa verde pork enchilada casserole

copycat sweet pulled pork  

topopo salad

mexican street corn salad

margarita cupcakes

tequila and citrus

skinny margarita


5.1.22: ðŸ”¥ week 18 

5.1.21: tri-fold card