 I have no idea where I got this pattern, maybe Cathy (sorry to whoever gave me this, it's been too long and I'm blank); I made a bunch of these easy bags before I started this blog and then sort of forgot about them until a cashier at our local grocery store commented on one I was using for a grocery bag and said she wished she had a pattern for something like mine. I told her I'd be happy to share and would bring her a copy of the pattern, no problem...especially since I'm at the store pretty much every day! After finally finding the pattern (nothing's easy...ha!) I made a copy and thought I'd write some simple directions for her because the pattern really looks like nothing, and once you cut the pieces out there's no indication what to do next. But of course with my bad memory I could not remember how I did it... and I can't find one exactly like this online to remind myself. I thought about taking one of my old ones apart to see if I could figure it out that way but then had the idea that I should just make a new one and in the process take pictures and note how I did it. And here ya go...finally after 20 minutes later of my rambling... the instructions!
This is a reversible bag, so you essentially make two bags and join them together. Even if you don't want to reverse it you'll still need to choose two fabrics that go together because you do see the inside, the lining of the bag is very visible with this style of tote. There's also no closure at the top so it's not a great design if safety is an issue when you're carrying this - it is perfect tho for groceries, going to the beach, or taking your tap shoes and water to class. I'm using a large one to carry all my other bags while grocery shopping, keeping my cart and hands free which has been great.
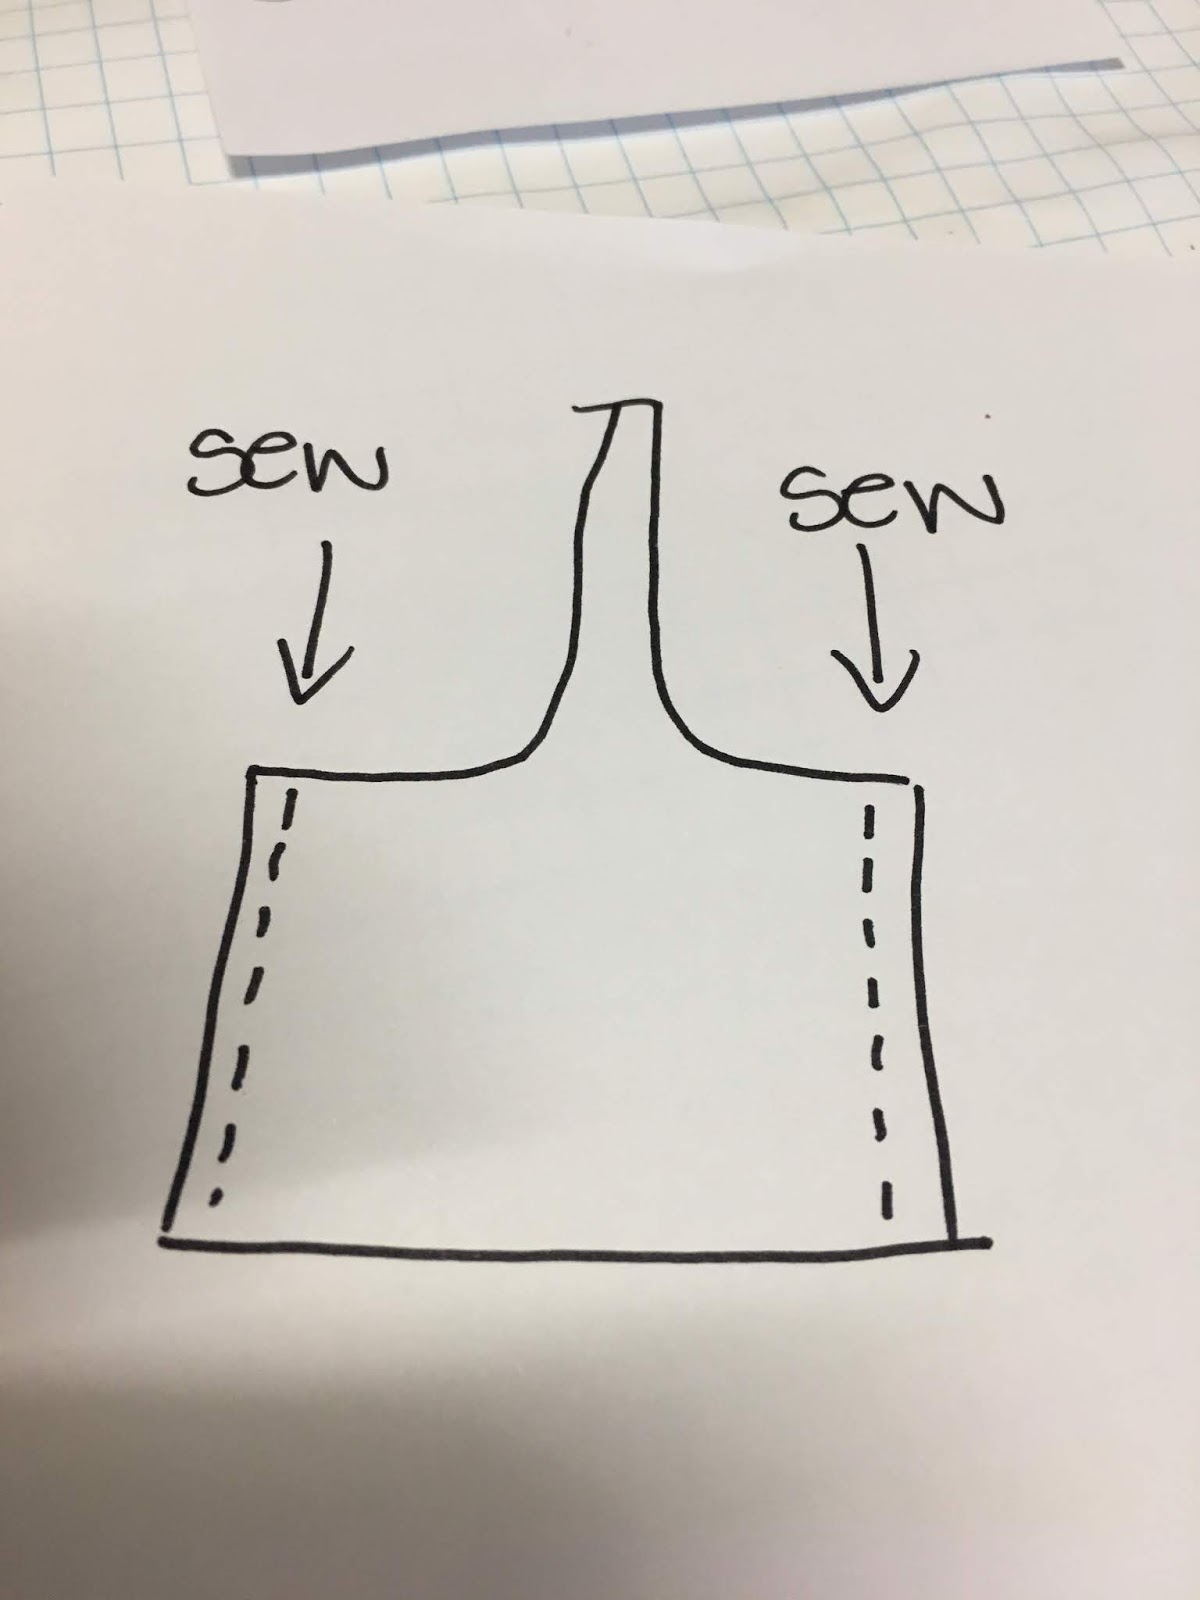
First step - make the pattern. Piece #1 is the strap, 11" long by 1 3/4" at the top graduating to 2" at the bottom. Piece number 2 is 11"x 8 1/2" with a curve cut out. The top of this piece is 2" wide, 4 1/2" diagonally from the bottom left corner to the center of the curve, ending at 1 1/2" on the right. Piece number 3 is the easiest as it's just an 11"x 8 1/2" piece of standard paper. Cut all three pieces out of paper to make the pattern.

Lay the pattern on the fold of your material, pin in place so it doesn't move around (you can tape the paper pieces together if you want), then cut the material using the pattern as a guide. You'll need 2 pieces of the same material to make one bag. Repeat this process with your second coordinating fabric for a total of 4 pieces of tote-shaped material.

Unfortunately my main fabric is double sided and that might confuse you! The picture below is 2 pieces of the same fabric, I just laid one of them upside down. I'm using the pattern on the left as my main bag pattern. For the inside bag I'm using textured white fabric, so I cut 2 of those out the same as above.

With right sides facing each other (the "right side" is the side of the fabric that you will want showing once your item is finished) sew the 2 pieces together down the sides - only the sides for now.


Here comes the only hard thing to explain, it isn't hard to do I just don't know how to describe it. You are going to make "box corners" on either side of the bottom of the bag - this allows the bag to be wider and open up/hold more. If you just leave it without making box corners your bag will totally be functional but more like an envelope - make sense? Ok, stay with me here...

Pick up the bottom corner and pull the two fabrics apart, turn the corner so it faces up and the seam is now on top in the center of a triangle. As you pull the fabric apart you will hopefully see what I mean! Sew across the triangle 1 1/2" from the tip (it'll be about 3 inches across at that point), then clip the tip off to get rid of some of the fabric bulk.
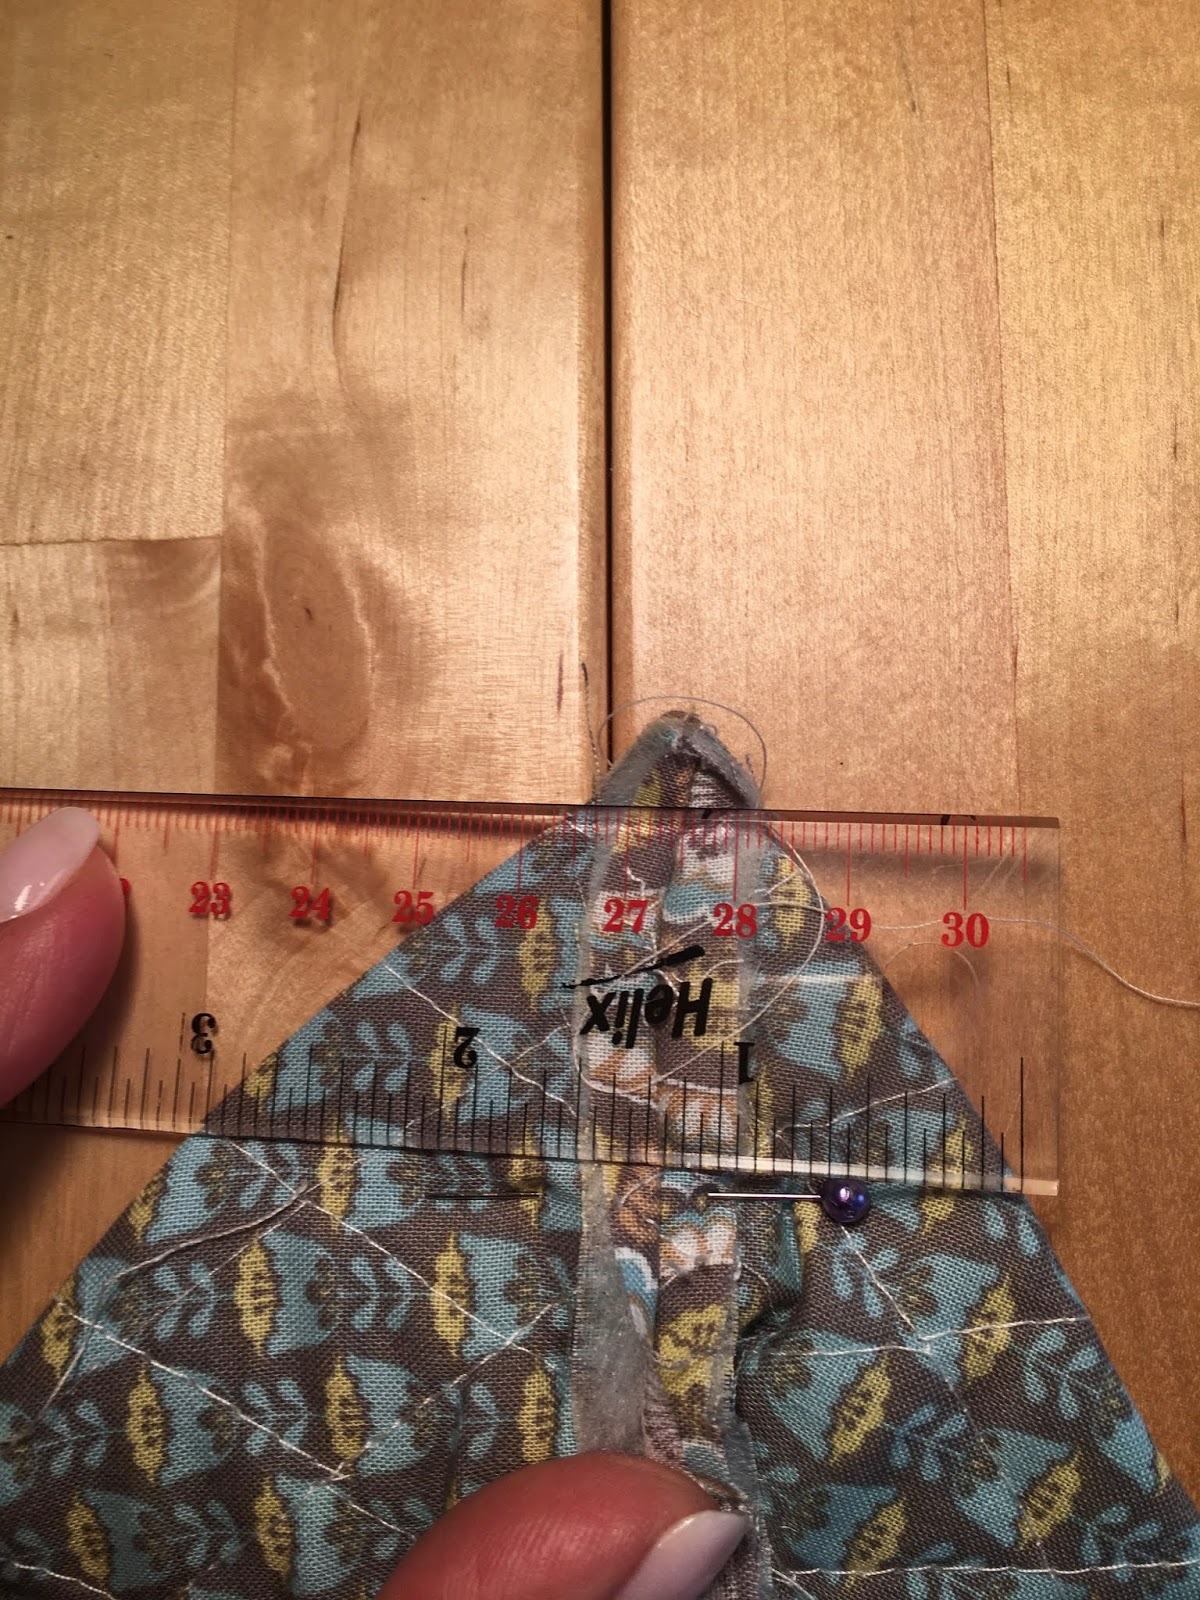

I made a quick video to show how to make the box corner in case my description wasn't very clear! click here if the video below won't play...
This is what the outside of the bag looks like with the box corners in the bottom:
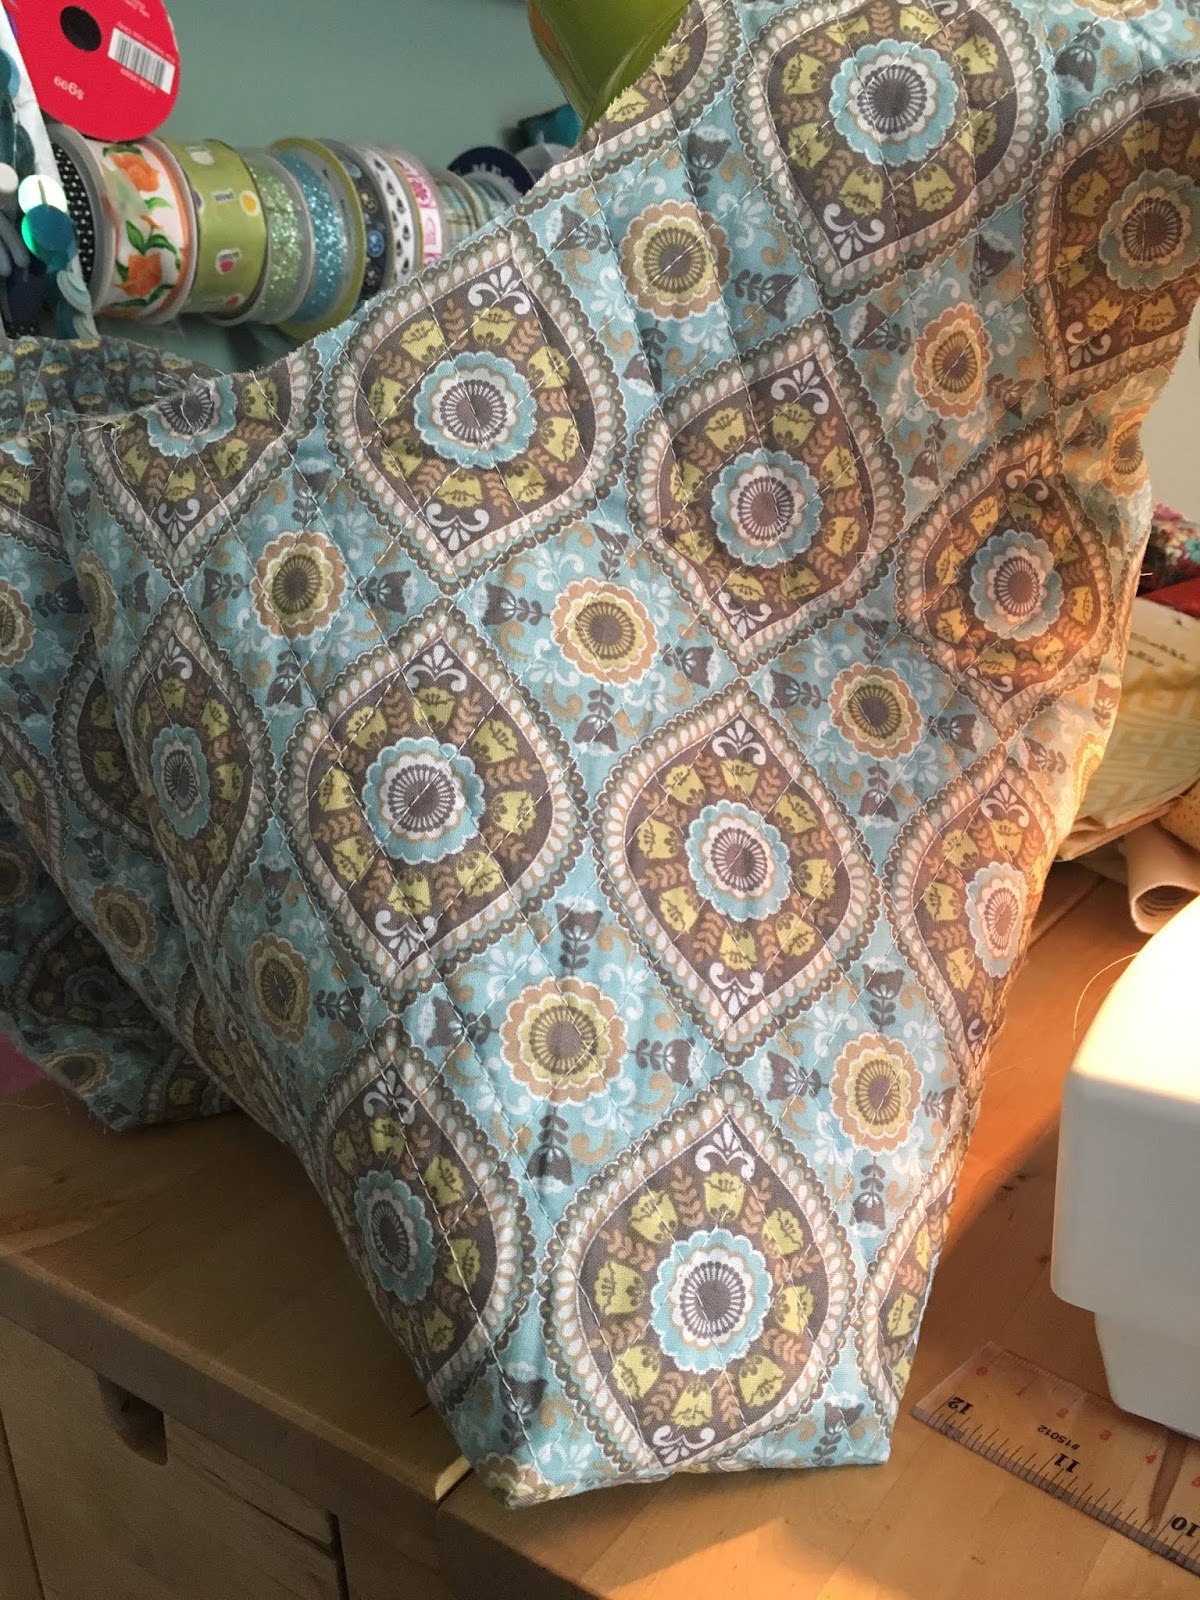

Now repeat with your second fabric so you have two unlined bags:

One more thing is how to deal with joining the strap together at the top. Two ways: the most simple is to turn the edges under on each side and sew across. You'll have two straps that aren't hooked together at this point but they are finished off. Once the rest of the bag is sewn and you've turned it right side out, tie the straps together with a big knot and you're done. The second way is trickier to describe but it's a little more seamless looking than having the knot: turn the edges under one side of the strap and pin, but do not sew the opening closed - the other side of the strap gets sewn along with the rest of the bag when you are attaching the two bags together. Once the bag is turned right side out you insert the finished side of the strap into the opening of the other side, putting one inside the other, then sew across the top joining the two pieces together. Decide which way you want to go before sewing the bag together.
 |
| left strap is closed and sewn shut, right strap the edges are turned under creating a hem but not sewn closed yet. |

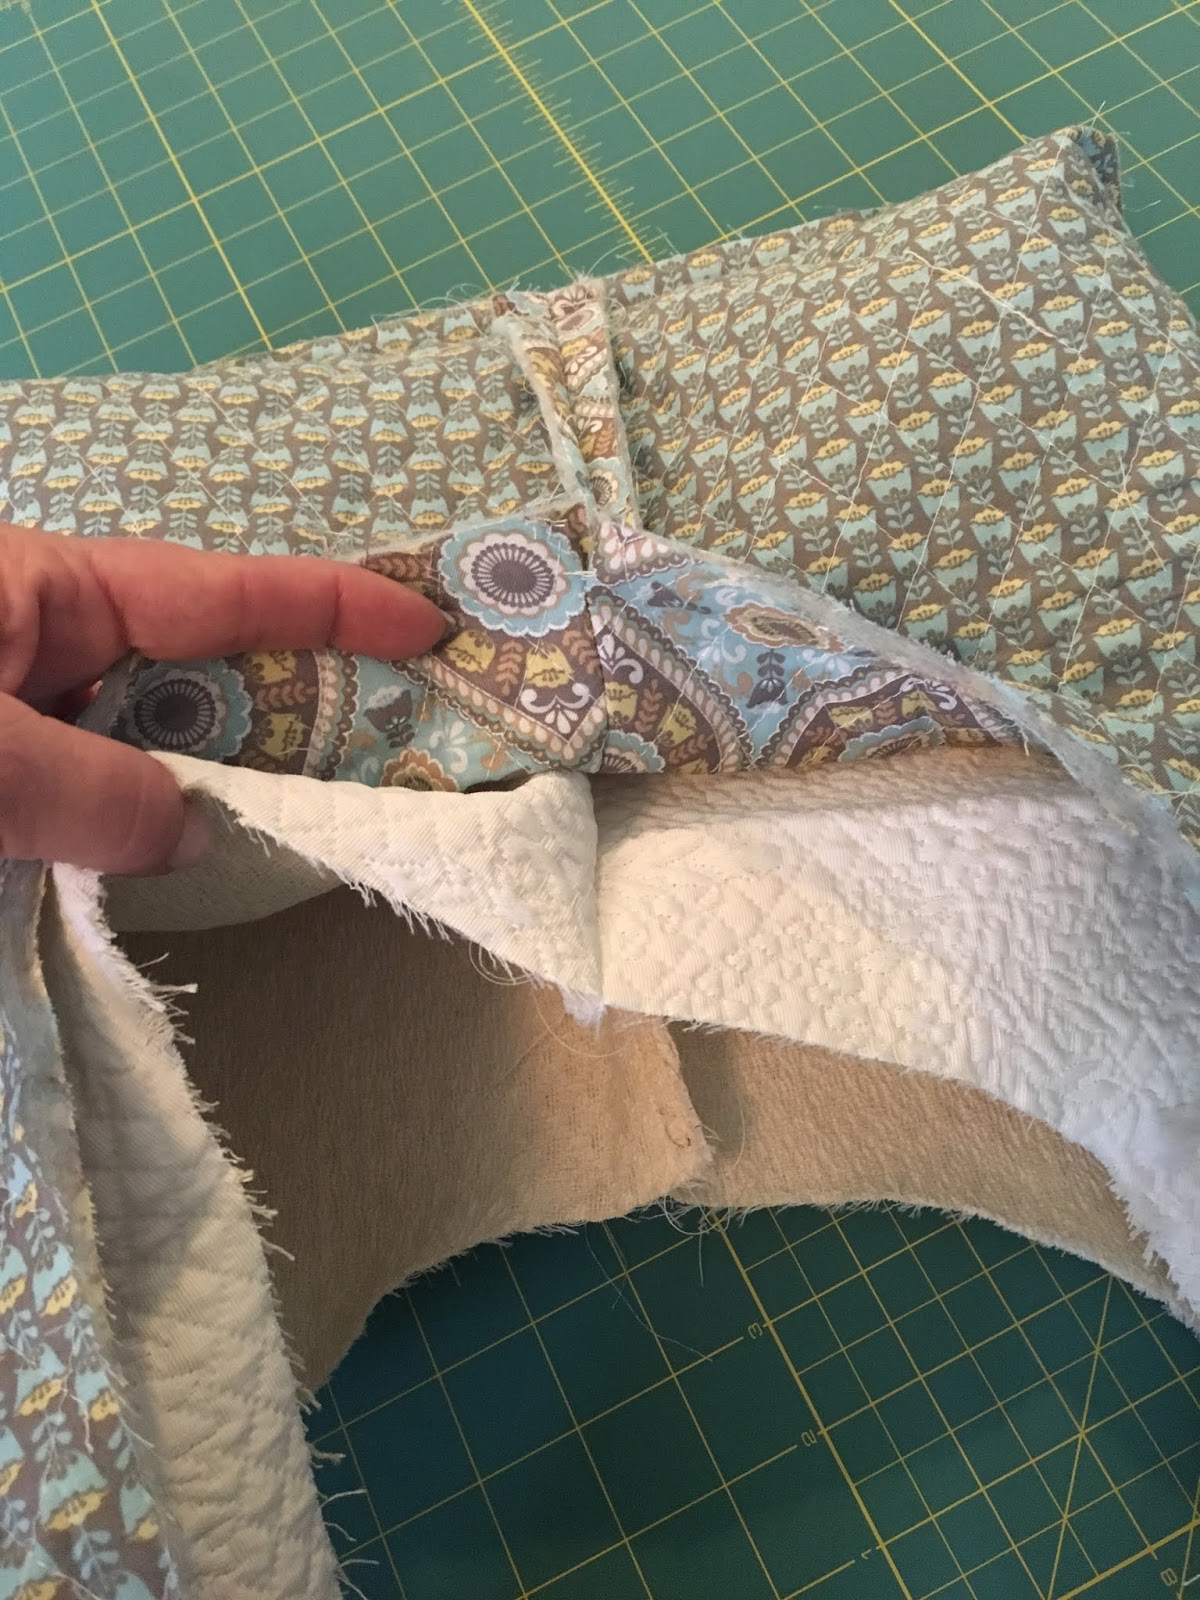
Put one side of the bag into the other, for mine the pattern is outside and the white is inside. Iron to make the bag lay flatter, especially the straps. Top stitch where the bags came together, all around the edges including the gap that was left open for turning the bag right side out. Depending on which way you went with the straps, either feed the finished end into the open end and sew across, or tie the two together.


Finished!! This bag is approx. 16" wide by 9" tall, with 15" strap drop for a total of 24" long.


Here's some of the old ones I made - some of them I put a simple pocket in, or changed the fabrics using 4 different patterns (sort of patchwork looking bag). You can also change the width and/or depth by adding a few inches onto the bottom/side of the original 11" x 8 1/2" paper, and adjust the strap length by adding or decreasing the strap piece (pattern #1).


3/1/17: Julie's key lime pie
Happy moment ~ found $10 in the pocket of a coat I haven't worn in a while
No comments:
Post a Comment