1.7.18: healthy breakfast egg muffins
Monday, January 7, 2019
Man-Day Monday: How to Check Tire Pressure
Here's the first installment of a new blog segment I'm calling "Man-Day Monday". I haven't researched to see if that's an actual thing or if I've coined a new phrase - anyone heard of man-day?! This is happening because I mentioned to Dave the other night that I think he should start his own blog about guy and/or ukulele stuff but he waffled because of the time commitment (I can't even tell you how many times he has heard me say "I can't do ____ because I have to blog", the idea of running his own blog is too intimidating at this point...), so I offered him a guest blog gig on make my day camp to get his feet wet. Who knows if this will be every Monday, or just first Monday of the month, or a one-and-done event...for now we have this short video on how to check your tire pressure if you freak out when an alert comes on in your car (especially if you're in LA and driving really fast and the thought of breaking down on a 6 lane freeway is slightly freaking you out) and you have no idea what to do...ahem, this may or may not have recently happened to me...so I present to you - "Man-Day Monday: how to check your tire pressure" so you can take care of this yourself from now on if you don't already know! If you love (or don't love) this new segment let me know - I'll pass it on to Mr. Man-day ;)
1.7.18: healthy breakfast egg muffins
1.7.16: fruitcake squares - they're good, promise!
1.7.18: healthy breakfast egg muffins

Sunday, January 6, 2019
Around The Campfire (week 1)
Dear Campers ~
Hope you all had a Happy New Year week - did you have a chance to take down all the Christmas stuff? I may or may not have been involved in a caper a long time ago with LeDonna involving a road trip to rid the world of Christmas decorations still up in February but my lips are sealed...;) Ours is put away other than a handful of things that I've deemed to be "winter" and not just Christmas - for real, not just being lazy HA!
It was a busy week, here's a recap if you didn't have time to check the blog:
Posts you might have missed ~
12/30: around the campfire (week 52)
12/31: antipasto wreath with prosciutto wrapped pears
1/1: happy new year!
1/2: diaper fold gift holder
1/3: remove wax from candleholders
1/4: paper mâché reindeer door hanging
1/5: unstuffed chicken cordon bleu
What's cooking ~
Hope you all had a Happy New Year week - did you have a chance to take down all the Christmas stuff? I may or may not have been involved in a caper a long time ago with LeDonna involving a road trip to rid the world of Christmas decorations still up in February but my lips are sealed...;) Ours is put away other than a handful of things that I've deemed to be "winter" and not just Christmas - for real, not just being lazy HA!

It was a busy week, here's a recap if you didn't have time to check the blog:
Posts you might have missed ~
12/30: around the campfire (week 52)
12/31: antipasto wreath with prosciutto wrapped pears
1/1: happy new year!
1/2: diaper fold gift holder
1/3: remove wax from candleholders
1/4: paper mâché reindeer door hanging
1/5: unstuffed chicken cordon bleu
What's cooking ~
- tuna noodle casserole with panko topping
- grilled strip steak, roasted baby potatoes, deconstructed wedge salad with homemade bleu-cheese dressing
- oven baked bbq ribs, coleslaw
- grilled turkey ruebens
- lasagna, salad, garlic bread
Week one of the new year is in the books! Here we go...359 posts remaining for 2019 - stay tuned!
Sincerely,
Jill
Saturday, January 5, 2019
Unstuffed Chicken Cordon Bleu
 Made this unstuffed chicken cordon bleu for Sunday supper and it was a huge hit. I'm never stuffing it again, why go thru that extra work when you can just layer the ham and cheese on top of thinly pounded chicken breasts - so much easier, looks great, tastes fantastic. You are definitely going to want to try this for yourself - I made a couple little changes but even if you follow her recipe exactly it'll be great and you'll look like a rock star when people gobble this up!
We had a couple pieces left over and it made for a delish lunch the next day...actually it made for delish breakfast for me, lunch for others haha.

INGREDIENTS:
- 2 tablespoons olive oil
- 1 1/2 pounds broccoli, cut into spears/thin wedges (see pictures in the post for a visual)
- Salt and pepper
- 4-5 boneless, skinless chicken breasts (1 1/2 to 2 pounds), pounded to 1/4-inch thick or cut in half to form two thinner cutlets (see note)
- 2 tablespoons Dijon mustard
- 4 to 8 slices deli ham (exact amount depends on brand/size of slices)
- 1 cup (4 ounces) shredded Gruyere or Swiss cheese
- 15 Ritz crackers, coarsely crushed (about 3/4 cup)
- DIRECTIONS:
- Preheat the oven to 450 degrees. Make sure an oven rack is in the lower-middle position. Brush a large, rimmed baking sheet (about 11X18-inches) with 1 tablespoon of the oil.
- Toss the broccoli with the remaining tablespoon of oil, 1/4 teaspoon salt (I use coarse, kosher salt), and a pinch of black pepper.
- Pat the chicken dry with paper towels and season lightly on both sides with salt and pepper. Place the chicken breasts side-by-side on one side of the prepared baking sheet (to help them fit, you can alternate thicker end to thinner end as you lay them down). Placing them close together (without overlapping) will help the cheese stay put as they bake.
- Spread the mustard lightly over the top of each chicken piece. Top with 1 to 2 slices ham to cover and then add 1/4 cup or so of the shredded cheese evenly across the top.
- Sprinkle the cracker crumbs evenly over the cheese, and press lightly so the crumbs aren't loose.
- Arrange the broccoli in a single layer on the opposite side of the baking sheet.
- Bake for 20 minutes until the chicken registers 160 degrees F on an instant-read thermometer and the broccoli is roasted and tender. The exact time will depend on the thickness of the chicken. If the chicken still needs more time but the broccoli looks like it is finished, scoop the broccoli off the sheet pan onto a plate and lightly tent with foil while the chicken finishes cooking.
- I recommend removing the chicken as soon as the sheet pan comes out of the oven so it doesn't sit in the liquid that will naturally pool on the bottom of the sheet pan.

My changes: I did green beans instead of broccoli, and roasted them on their own baking sheet - I made too much chicken for it all to be on the same pan. Used thinly sliced swiss cheese instead of shredded; and substituted coarse panko crumbs mixed with melted butter for the Ritz crackers. Oh man this is good ;)

The recipe came from Mel's Kitchen Cafe, click here for the original post.
Friday, January 4, 2019
Paper Mâché Reindeer


Because it's paper and not sealed and our door gets a lot of sun, wind, occasional rain, I painted the face with a light creamy-colored craft paint just to help seal it. Then I wrapped the antlers using thick twine, just adding a drop of hot glue here and there to hold in place.

 |
| I tried a couple different types of twine before deciding to go with the one on the right |

For Christmas I hung it on top of a tinsel wreath with a big silver bow and put a couple pieces of fake pine garland around the antlers - wouldn't ya know it, we had a wind storm and the whole thing fell down and one of the antlers broke. Sigh. I performed surgery (removed the twine, hot glued back together, reinforced with masking tape, then re-wrapped the twine) and it's good as new. Better. Stronger. 6 million dollar man-like reindeer....or was that the Bionic Woman? Whatev. I fixed it.

One more reindeer fact because I'm on a roll - male reindeer shed their antlers in the fall and females in the spring. Which means Santa's reindeer are probably girls because the males don't have antlers in the winter!!! Mind blown, right? 😁


1.4.18: cookie sheet hack
1.4.17: grilled turkey ruebens
1.4.16: scrabble tile keychain
Thursday, January 3, 2019
Quick Tip: removing old wax from candleholders
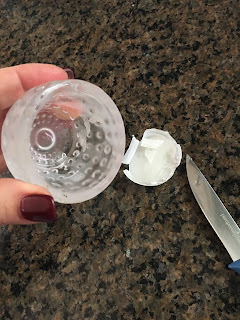
Super quick today - off to work but wanted to share this little handy tip that I tried while doing the 'after holiday cleanup'. This is not a new thing, but I'd never tried it and guess what? It totally works. I have a bunch of small votive holders that had old wax buildup in the bottoms - I'm always in too big of a hurry to clean it out so usually just put a fresh one on top of the old (I know, so lazy!). I put them in the freezer for a few minutes and sure enough, the wax just popped out! Who knew that all this time I could have had nice clean candleholders?! Later!




Wednesday, January 2, 2019
Diaper Fold Gift Holder
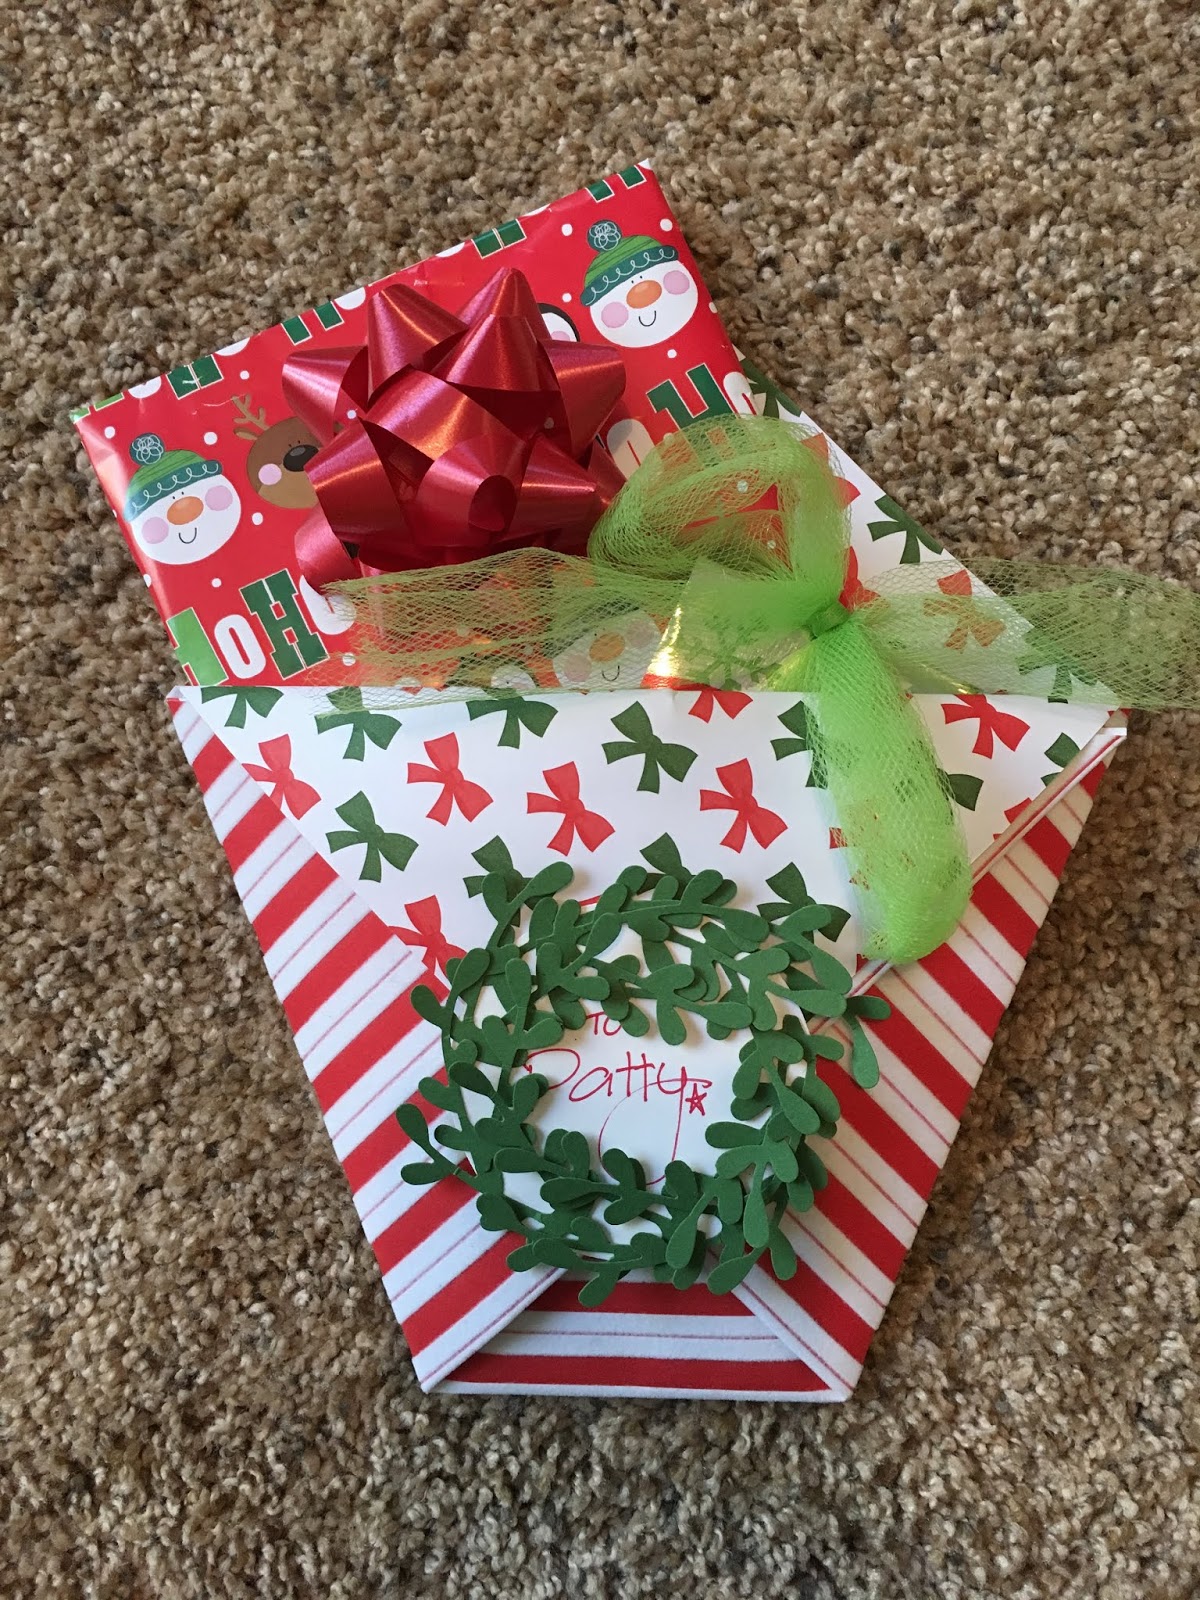
I watched a video that Ronda posted showing how to make this diaper fold gift holder; after all the times I've helped her at her Stampin' Up studio - and trust me, I've made a lot of paper gift holders for her - I've never seen this one! Super easy and it turned out soooooo cute I have to share with you. You're gonna want to do this for sure - it's now part of my commonly used techniques (along with wrapping paper gift bags, I use that ALL the time).
We just had our last holiday gift exchange so I made this holder with Christmas paper and decorations, obviously you can use this year round by using different papers, etc...You can also vary the sizes - this one I started with a 12" square piece of double sided decorative paper (this is Stampin' Up Christmas paper that is fuzzy on one side, how fun); if you don't use double sided paper then the inside of your holder and the flap that folds down in the front will be white - not bad, but I like the different patterns showing together. Do what ya' want! Change the size of the holder by changing the size of the square you start with - Ronda did as small as 6" square, up to a 12" one. The 12" is too big for a lone gift card, but if you have other things to put in the pouch, like I did, then big is ok.
1. fold the paper in half forming a triangle. Creasing the fold with a bone-folder will give you a nice crisp edge - if you don't have one I'd run something smooth and hard over the folds, like maybe a ruler or credit card.


2. with the point of the triangle that is open at the top and the folded edge at the bottom, fold in one side of the triangle straight across reaching the other side (see picture below), then fold in the other side. Add a glue dot or a little adhesive under the top flap to keep it down.


3. now that it's folded it sort of looks star-shaped to me - at the top is two open points, fold down the top one over the folds you created in step 2 leaving the bottom one still up. In the picture below, the bow print is what is on the back side of the striped paper, you see it once you fold the front point down. This opens the holder into a pouch where you place your small gift or gift cards.


Cute right? And simple! I love cute and simple ;)
Tuesday, January 1, 2019
1.1.2019 Happy New Years!
My kind of resolutions - not giving things up, just adding more of the good stuff!


Happy New Year!
Happy New Year ~ here's wishing you an amazing 2019 full of only good things :)
Cheers 🎉
Monday, December 31, 2018
Antipasto Wreath and Prosciutto-Wrapped Pears
Super last minute appetizer idea if you need something for tonight or tomorrow and are scouring for something you can whip out quickly - if I'm too late with this suggestion for this year (what? you mean I'm the only procrastinator in the bunch?!) then remember it for next time because this turned out really cute, is very easy to make, and you can change it with whatever ingredients you want to use.

I saw the idea for this wreath here, made a couple changes of course, and love the outcome. This is a keeper for sure - so pretty!
On a round platter or plate make a wreath from rosemary branches (I added thyme branches too - I was thinking parsley, cilantro, kale, and/or lettuces would also work but might get a little wilty depending on how fast this gets eaten. Fill in with meats, cheeses, fruits of your choice - I did a stack of sliced salami, cheddar cubes, marinated feta cheese (blot/dry as much as you can), grapes, prosciutto wrapped around pears and boursin cheese (see how-to below), and olives. Leave a circle free in the center of the platter, add more rosemary to make a smaller wreath shape and fill with crackers or toasted baguette.

To make the rolled pears you'll need ripe pears, boursin cheese (I used pepper flavored), prosciutto, and arugula leaves (optional).
Separate the prosciutto into slices, then cut each slice into 3 long narrow strips. I leave the slices on the backing that separates the slices in the package, then remove the backing (obviously).

Cut the pear in quarters, remove the stem and seeds, then cut each quarter into thirds - one pear yields 12 slices. Lay the prosciutto on a cutting board, top with a pear slice, an arugula leaf if you're using, and about a teaspoon of boursin (it's a creamy soft cheese, comes in a little square box). Roll the prosciutto around the pear.


To make the toasted baguette - thinly slice a small baguette and lay on a baking sheet. Melt about 1/4 cup of butter and drizzle over the baguette slices. Sprinkle with coarse salt. Bake in a 350' oven about 5 minutes, turn the slices over and bake another 5 minutes. Turn again and keep baking until the slices are crispy but not super crunchy like croutons (unless you want crouton crunchy slices, who am I to tell you how crunchy they should be?!). I dare you to not eat any of these warm out of the oven ;)

I saw the idea for this wreath here, made a couple changes of course, and love the outcome. This is a keeper for sure - so pretty!
On a round platter or plate make a wreath from rosemary branches (I added thyme branches too - I was thinking parsley, cilantro, kale, and/or lettuces would also work but might get a little wilty depending on how fast this gets eaten. Fill in with meats, cheeses, fruits of your choice - I did a stack of sliced salami, cheddar cubes, marinated feta cheese (blot/dry as much as you can), grapes, prosciutto wrapped around pears and boursin cheese (see how-to below), and olives. Leave a circle free in the center of the platter, add more rosemary to make a smaller wreath shape and fill with crackers or toasted baguette.

To make the rolled pears you'll need ripe pears, boursin cheese (I used pepper flavored), prosciutto, and arugula leaves (optional).
Separate the prosciutto into slices, then cut each slice into 3 long narrow strips. I leave the slices on the backing that separates the slices in the package, then remove the backing (obviously).


To make the toasted baguette - thinly slice a small baguette and lay on a baking sheet. Melt about 1/4 cup of butter and drizzle over the baguette slices. Sprinkle with coarse salt. Bake in a 350' oven about 5 minutes, turn the slices over and bake another 5 minutes. Turn again and keep baking until the slices are crispy but not super crunchy like croutons (unless you want crouton crunchy slices, who am I to tell you how crunchy they should be?!). I dare you to not eat any of these warm out of the oven ;)
Sunday, December 30, 2018
Around the Campfire (week 52)
Dear Campers ~
What? This is the last round-up for the year, it's week 52! Crazy. I've been busy this week around the house so didn't make a whole lot - but here's a recap of what made it on the blog:
Posts you might have missed ~
12/23: around the campfire (week 51)
12/24: animal gift holder
12/25: Merry Christmas
12/26: boxing day (aka: cleaning the garage)
12/27: sweet and tangy crockpot meatballs
12/28: make a pillow box from old Christmas card
12/29: Natalie's snickerdoodlish frosted cookies
What's cooking ~
your guess is as good as mine - hope you'll check in to see what I end up doing (unless I decide to just read books all week!). Someone commented that it's time for fashion tips hahaha, first I'll have to wear something other than leggings...🤷♀️
Happy New Year!
Sincerely,
Jill, the camp counselor.
What? This is the last round-up for the year, it's week 52! Crazy. I've been busy this week around the house so didn't make a whole lot - but here's a recap of what made it on the blog:
Posts you might have missed ~
12/23: around the campfire (week 51)
12/24: animal gift holder
12/25: Merry Christmas
12/26: boxing day (aka: cleaning the garage)
12/27: sweet and tangy crockpot meatballs
12/28: make a pillow box from old Christmas card
12/29: Natalie's snickerdoodlish frosted cookies
What's cooking ~
- full on turkey dinner with 2 new additions that turned out great and I'll post the recipes soon!
- leftover turkey dinner - our standard day after meal. Simply warm up the gravy in a saucepan and add pieces of chopped turkey; once heated thru serve over stuffing and/or potatoes. Easy peasy and actually tastes better this way than the first day (nothing like floating meat in gravy to make things extra delicious LOL!)
- grilled pork chops with perfect baked sweet potatoes
- grilled tuna steaks with greek salad
Miscellaneous stuff happening that isn't post-worthy but kept me busy ~
- finished "Where the crawdads sing" and can't recommend this book enough. Loved it. Also read "Ghosted" by Rosie Walsh and loved that one too. Good book week ;) This may or may not be what kept me from making very many things this week hahaha.
- organized all the Christmas stuff in the garage, cleaned everything out and made a spot for all of it. I used to dread pulling things out and putting it away but now it's so easy! yay me.
- rearranged the living room furniture, which led to rearranging my office/junk room.
Hope you all had a very Merry Christmas! Have no idea what I'll be making this week to blog about,
Happy New Year!
Sincerely,
Jill, the camp counselor.
Saturday, December 29, 2018
Natalie's Frosted Snickerdoodlish Cookies (updated)
I posted this recipe of Natalie's for rolled and frosted cookies last year (I still love the idea of a snickerdoodle-flavored frosted cookie!), but I wanted to share this again because she sent it to me with more instructions and recipes for glazing and/or frosting them. She makes these for Christmas but of course you can make them anytime - wouldn't pretty, glittery white and silver stars be fun for New Years?
Here's the recipe in her words:
8th Time is the Charm Cookies
Over the last 8 holiday breaks I’ve tweaked and combined and tried making different combinations of recipes, searching for a soft, frostable, snickerdoodlish tasting cookie.
Here’s the winner:

Makes 100 1/4” thick cookies, recipe can be halved.
First-whisk together
1 tsp. Cream of Tartar
1/2 tsp. Kosher salt
3/4 tsp. Baking soda
5 cups all purpose flour
Second-cream in the mixer
4 sticks (1 pound) Unsalted butter
1.5 cups granulated sugar
Add 2 eggs and continue beating until fluffy
Stir in 2 tsp. Real vanilla extract
Third-add flour mixture to the mixer slowly-to incorporate without a flour fog :)
Fourth-lay out 5 pieces of plastic wrap, split dough equally between each piece, shaped into flat discs. Refrigerate for an hour (will keep for 3 days).
Fifth-take out all 5 discs and let rest for 15 minutes.
Sixth-roll out 1 disc on a floured counter to 1/4” thick—about the size of a cake pan. Flour cookie cutters, count shapes, lift with spatula and place on parchment paper lined cookie sheets.
Bake in preheated 350 degree oven for 8-10 minutes—until they don’t look glossy-but are not browned.
Let rest for 2 minutes, then remove cookies to cool on wire racks.
Glaze: pipe edges then fill...decorate with sprinkles or piped butter cream (below)
1 cup powdered sugar
1 Tablespoon light corn syrup
2 Tablespoons milk
1/2 tsp. Real Vanilla Extract-OR 1/4tsp. Almond Extract
(I do a white vanilla, and teal Almond extract batch)
Buttercream Frosting (plenty for all cookies-to be split into separate bowls after mixing to color):
In mixer Cream together a 2lb. bag Powdered sugar and 2 Sticks softened salted butter (add sugar slowly to avoid fog)
Add 1 tsp. Real vanilla extract and whip until light ivory and fluffy.
Add up to 1/2 cup milk slowly-whipping between additions until frosting seems spreadable but still holds gentle peaks.
Frost cooled cookies and enjoy!
Here's the recipe in her words:
8th Time is the Charm Cookies
Over the last 8 holiday breaks I’ve tweaked and combined and tried making different combinations of recipes, searching for a soft, frostable, snickerdoodlish tasting cookie.
Here’s the winner:

Makes 100 1/4” thick cookies, recipe can be halved.
First-whisk together
1 tsp. Cream of Tartar
1/2 tsp. Kosher salt
3/4 tsp. Baking soda
5 cups all purpose flour
Second-cream in the mixer
4 sticks (1 pound) Unsalted butter
1.5 cups granulated sugar
Add 2 eggs and continue beating until fluffy
Stir in 2 tsp. Real vanilla extract
Third-add flour mixture to the mixer slowly-to incorporate without a flour fog :)
Fourth-lay out 5 pieces of plastic wrap, split dough equally between each piece, shaped into flat discs. Refrigerate for an hour (will keep for 3 days).
Fifth-take out all 5 discs and let rest for 15 minutes.
Sixth-roll out 1 disc on a floured counter to 1/4” thick—about the size of a cake pan. Flour cookie cutters, count shapes, lift with spatula and place on parchment paper lined cookie sheets.
Bake in preheated 350 degree oven for 8-10 minutes—until they don’t look glossy-but are not browned.
Let rest for 2 minutes, then remove cookies to cool on wire racks.
Glaze: pipe edges then fill...decorate with sprinkles or piped butter cream (below)
1 cup powdered sugar
1 Tablespoon light corn syrup
2 Tablespoons milk
1/2 tsp. Real Vanilla Extract-OR 1/4tsp. Almond Extract
(I do a white vanilla, and teal Almond extract batch)
Buttercream Frosting (plenty for all cookies-to be split into separate bowls after mixing to color):
In mixer Cream together a 2lb. bag Powdered sugar and 2 Sticks softened salted butter (add sugar slowly to avoid fog)
Add 1 tsp. Real vanilla extract and whip until light ivory and fluffy.
Add up to 1/2 cup milk slowly-whipping between additions until frosting seems spreadable but still holds gentle peaks.
Frost cooled cookies and enjoy!
Subscribe to:
Posts (Atom)