Thursday, February 28, 2019

Cucumber "Sushi" Appetizer

Shout out to Mindi Torrey for sharing this brilliant idea for these beautiful appetizer bites - they are hollowed out cucumber slices filled with different toppings; she identified each one with a different colored toothpick so you knew which one you were eating (which is another great idea).  I love this idea for a party - or for my lunch - finger food that doesn't need utensils or plates to clean up is the best. 


Mindi works with my sis, who was nice enough to take pictures for me (and eat one of each in the interest of "research" - thanks Sissy!) and ask Mindi how she made these - she didn't get an exact "recipe" because you can put whatever fillings you want in the cukes so just eye-ball your amounts and ingredients. The combination options are endless!


The fillings for her party "sushi":

1: tomato, avocado, black olives, feta, with Greek yogurt topping
2: avocado, black olive, radish, carrot slices, topped with sriracha mayo
3: tomato, avocado, sausage, bacon, topped with sriracha mayo 


I'm not a huge cucumber lover, but in this case the cucumber is just a vehicle for the goodies on top - and you're getting more veggies (and less calories) than putting these toppings on crackers or bread. Finger food that is easy, small, pretty, has delish toppings, that are lower calorie and clean-up free? Perfect.


Happy moment ~ gypsies, tramps, and thieves...singing in the car, all by myself. couldn't care less if anyone is watching. 


Wednesday, February 27, 2019

Samoa Sheet Cake

I made this chocolate sheet cake topped with toasted coconut, chocolate, and caramel for Dave to take to a ukulele party - he didn't take pictures of the cake once it was cut; since it's a sheet cake it isn't a very tall piece of cake, so just imagine a moist, thin chocolate slab topped with this amazing combo of goodness to get a picture of what the inside looks like ;) Apparently it was a hit because he didn't bring any leftovers home!

It's technically named "Samoa" sheet cake - and who doesn't love a Samoa cookie...but I want to steal a clever Girl Scout's idea and rename it " Momoa sheet cake" (do you know Jason Momoa? Plays Aquaman and is a cutie...) but I'll leave it as is. 

Cake:
  • 2 cups flour
  • 2 cups sugar
  • ½ cup butter
  • 1 cup water
  • 4 Tablespoons cocoa
  • ½ cup shortening
  • ½ cup buttermilk
  • ½ teaspoon baking soda
  • 2 eggs
  • 1 teaspoon vanilla

Frosting:
  • ½ cup butter
  • 6 Tablespoons milk
  • 3 cups powdered sugar
  • 1 teaspoon vanilla
  • ⅛ cup caramel sauce, I used caramel ice cream topping in the jar

Toppings:
  • 2½ cups toasted coconut
  • 1/2 cup mini chocolate chips
  • additional caramel sauce to drizzle on top - maybe 1/2 cup or so
  • ¾ cup milk chocolate chips
  • 1 teaspoon shortening or oil

Instructions:
  1. Before making the cake, line an 18x13x1 inch cookie sheet with foil and spread shredded sweetened coconut evenly over cookie sheet.
  2. Bake at 375 degrees F for 10 to 15 minutes, checking and tossing coconut regularly, every 2-5 minutes, to make sure all the coconut gets toasted evenly and does not burn. Coconut is done when it is golden brown.
  3. In a large mixing bowl, measure flour and sugar. Set aside.
  4. In a medium sauce pan, combine butter, water, cocoa and shortening. Bring to a boil. After mixture reaches a boil, add it to the flour mixture and stir to combine.
  5. Add buttermilk, then baking soda, then eggs, then vanilla in that order, mixing in-between each addition.
  6. Pour into a greased 18x13x1 inch cookie sheet and bake at 400 degrees F for 20 minutes.

Frosting and Toppings:

1. In a medium microwave safe bowl, combine butter and milk and bring to a boil. Stir caramel sauce and then add powdered sugar and vanilla and stir until smooth.

2. After cake has cooked, remove from oven and poke holes in hot cake with a fork. Pour frosting evenly over top. Immediately sprinkle with top of warm frosting with toasted coconut.
I added a few mini chips along with the toasted coconut
3. In microwavable bowl, heat caramel sauce until it's smooth and warmed thru. Drizzle over coconut.
4. In another microwavable bowl, add chocolate chips and shortening (or oil). Microwave on high in 30 second increments, stirring in between each increment until the chocolate in melted. Drizzle over caramel. 
5. Sprinkle mini chocolate chips over the whole delicious mess. 
5. Let Caramel and Chocolate drizzle set before cutting into it.


Click here for original recipe source, I only changed a couple things like adding mini chocolate chips and using caramel sauce to drizzle instead of mixing block caramels and evaporated milk.


2.27.18: quinoa salad
2.27.17:  make a beaded bauble ring


Happy moment ~ Sarge charging seagulls

Tuesday, February 26, 2019

Tip-sy Tuesday: stained carpet

My Sissy gave me the idea for today's tip - in her words: "My tip for the day is if too poor to completely change stained carpet throw a cheap area rug on top of it."


I laughed and before she could send me a photo of her rug on top of carpet I sent her my picture of a new rug I just got and put on top of carpet - not covering a stain, just like how it looks. It's a great idea tho to cover up an area of carpet that is stained! 


2.26.18: adding a safety chain to a bracelet
2.26.17: Missy's seafood gumbo


Happy moment ~ spotting the neighbor's turtles sunning on top of their pond


Monday, February 25, 2019

Double Bed Skirt

I have a white dust ruffle on the guest room bed hiding all the under-bed storage I've got going on - no, it's not a cluttered-stick-it-somewhere-how-'bout-under-the-bed thing, it's all organized and necessary things to have that there is no other place to store (Christmas wrapping papers, extra blankets, etc.). Anyway, when cleaning out the garage a while back I found a few blocks used to jack a bed up and give extra room underneath the bed so I put them under the guest bed...only now the dust ruffle is a few inches too short. I debated (and got other opinions) and thought it was just fine to not have the bed skirt touch the floor, until Janis gave me an old tan bedskirt she wasn't using anymore and I had an "aha" moment. What about a double ruffled bed skirt to fill in the gap? 


Super easy and I love how it turned out - I cut the ruffle off of her bedskirt and sewed it to an old bottom sheet I have that has lost it's elasticity in the corners so it hangs straight down. It's the perfect thing to attach the ruffle to; I put the sheet on the boxspring and pinned the ruffle in place so I knew that it was the right length to touch the floor, then machine sewed the sheet and ruffle together. Put in back over the boxspring and then layered my white dust ruffle over top, then put the mattress back on. 

It looks so good now!! Thanks again Janis, your dust ruffle is the perfect solution to my floating bedskirt issue (other than finding another place to hoard, I mean store, my miscellaneous stuff that is). 


I cut the ruffle off about an inch above the pleating -
which meant I could sew it to the sheet with having
to pleat it myself...win!


After I made this I saw an article about things women over 40 shouldn't have - dust ruffle made the top of the list LOL!  Whatev.


Happy moment ~ sitting in the dark with a candle burning first thing this morning


my helper


Sunday, February 24, 2019

Around the Campfire (week 8)

Dear Campers ~

A quick recap of what happened at camp this week in case you missed anything!

Posts ~
Sarge after the groomers, he did
not have a good week...but he looks
so handsome!

2/17: around the campfire week 7
2/18: paint a brick fireplace
2/19: deviled egg cover
2/20: rainy day casserole
2/21: yarn wrapped jars
2/22: oatmeal face scrub and mask
2/23: turkey tetrazzini

What's cooking ~
  • turkey tetrazzini, salad
  • stuffed cabbage, pierogi
  • grilled steak, roasted mini potatoes, caesar salad
  • grilled chicken, gnocchi with pesto, salad
  • lemon rosemary chicken, long grain and wild rice pilaf, salad
Miscellaneous stuff keeping me busy ~
  • read Harry Potter and the Half Blood Prince, and The Roses
  • tried multiple times to paint "dot art" on rocks but kept washing it off, haven't mastered the technique yet but as soon as I do I'll show you! Yep, I said painting rocks.
That's all for now - hope you had a nice, creative week! I've set my sewing machine up and have been busy making sewing projects - I'll show you some of them this week, along with a couple good recipes, a tip or two, and whatever else I think of :)

Sincerely, 


Jill
camp counselor and sucky dot painter

Saturday, February 23, 2019

Turkey Tetrazzini

not the best pic, I forgot until the next day to take the
photo...the sauce is now all absorbed so doesn't look
as creamy and luscious as it should! but it's still delicious!
Made this for Sunday Supper last week and it was a big hit. In the past I've made it the super easy way using condensed soup (similar to how I usually make tuna noodle casserole) but this time I thought I'd make the sauce from scratch and it turned out great. The recipe makes so much sauce I thought it'd be soupy but nope - the sauce gets absorbed into the pasta and makes for a very rich, creamy, filling, satisfying meal. I based the dish using the recipe found here, it says the yield is 6-8 servings and I wanted more than that so after making the sauce per the original recipe I made another small amount and ended up adding a small can of cream of mushroom soup to make sure it wouldn't be dry. Read the original recipe if you only want to make 6-8 servings and follow her sauce amounts.

Here's my version:

Ingredients

  • 9 tablespoons unsalted butter, divided (that means you'll use butter in different sections of the recipe - not all at once)
  • 1 pound cremini mushrooms, sliced
  • 1/2 cup diced shallots 
  • 2 cloves garlic, chopped
  • 2 teaspoons fresh thyme
  • 1/2 cup flour
  • 3 cups whole milk
  • 3 cups chicken stock
  • 2 cups heavy cream
  • 3 Tablespoons sherry
  • 1/4 teaspoon ground nutmeg
  • 1 1/4 cups grated Parmigiano, divided
  • 1 cup frozen peas (don't thaw first)
  • 3-4 cups shredded cooked turkey breast (or chicken)
  • 1/4 cup chopped Italian parsley
  • 1/2 cup seasoned panko breadcrumbs
  • 1.5 pounds cavatappi pasta (I used one and a half boxes), cooked until just al dente - do not overcook as it will continue cooking in the oven. Note: traditional tetrazzini uses linguini but we like the curly cavatappi. You can change up the shape of pasta to whatever you like.
  • coarse salt and black pepper 
  • 1 small can condensed cream of mushroom soup, optional  
Directions
  1. Preheat oven to 400'. Butter a 13x9 casserole dish.
  2. Melt 2 tablespoons of butter in a large pot over medium-high heat. Add mushrooms with 1/2 teaspoon salt and 1/4 teaspoon pepper, and cook until liquids are released and mostly evaporated, about 8 minutes.
  3. Add shallots and cook for about 3-4 more minutes, until mushrooms are beginning to brown. Stir in garlic and thyme and cook for 1 minute, until fragrant. Remove mixture from pan and set aside.
  4. Melt 6 more tablespoons butter in the empty pan. Stir in flour and cook for 2-3 minutes. Whisk in milk, stock, cream, sherry, nutmeg, 1 teaspoon salt, and 1/2 teaspoon black pepper. Continue cooking, whisking, until the sauce is smooth and glossy, about 5 minutes. NOTE: I incorporate the liquid into the flour/butter mixture very slowly, like when I make gravy. After the flour has cooked for a couple minutes remove the pan from the heat, whisk in about 1/4 cup liquid and stir until completely absorbed. Continue adding very small amounts of liquid and whisking until absorbed until the mixture is starting to resemble sauce. Then put the pan back on the heat and add the rest of the liquid. I never have lumps when I do it this way - go slow when adding the liquid!
  5. Whisk in 1 cup parmesan until smooth. Remove from heat and fold in sautéed mushrooms, frozen peas, shredded turkey, and parsley. Season to taste with salt and pepper.
  6. Stir in cooked pasta and pour into the prepared casserole dish. NOTE: all of the pasta might not fit in your dish, if that's the case put in a second smaller dish. Depends on how big and deep your casserole pan is - and if you use a different shaped pasta.
  7. Melt the remaining tablespoon of butter, stir in panko breadcrumbs, the remaining 1/4 cup of parmesan, and 1/4 teaspoon black pepper. Set aside for now.
  8. Place dish on a baking sheet, cover with foil, bake for 30 minutes. Remove the foil, top with the breadcrumb mixture and continue baking until the pasta is heated thru and the crumbs are browned. 


If you want to freeze this for dinner at a later time, wrap it up before baking and don't put the breadcrumbs on it until you are ready to bake it. Defrost before baking, then bake according to above instructions. 

Happy moment ~ found a perfect stick on the sidewalk, Dave so used to me bringing found       items home he didn't even blink at my carrying the stick for our entire walk...


Friday, February 22, 2019

Oatmeal Face Scrub and Mask

my teenager formula...
As a teenager I made the simplest face scrub by mixing oatmeal flakes with a little water and then gently applying it all over my face using small circle motions, then rinsing it off. Side note: I had a friend at the time that would spread Crisco shortening all over her face, she liked how soft it made her skin - I tried it once and it was gross! Anyway,  I haven't made the scrub for years but have been seeing more grown-up versions of the same idea lately and thought I'd give it a try. This updated scrub is still very easy, it just has a few more additions -  I ground the oatmeal in a small coffee bean grinder until it was pretty fine, then added a little honey, liquid coconut oil, and a couple drops of frankincense essential oil (supposed to be good for your skin). Mix together; it was a bit dry so I stirred in a little water to make a paste. You can then use it as a scrub and rinse it right off, or pat the mixture all over your face and let it set for a few minutes until it dries (or you get tired of sitting there with oatmeal on your face). Rinse off, pat dry. My face is really soft and smooth (without using Crisco!),  and the stuff smells pretty good too... either version (teenager or grownup) works!


...and the "grown-up" version - grinding the oatmeal
first made the scrub thicker and easier to apply
Lucy isn't sure what to think!


2.22.18: homemade tortilla chips
2.22.17: white chocolate macadamia cookies
2.22.16: making dreamcatchers


Happy moment ~ Sarge snuggling on the angel blanket

Thursday, February 21, 2019

Yarn Wrapped Jars

before...snooze...
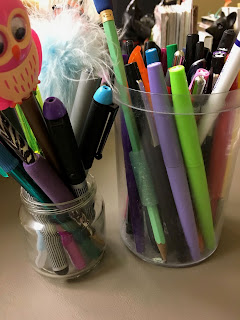
Super easy crafty thing today - I have a couple of jars on my desk holding pens and markers and it occurred to me how boring they are...they've only been in front of my face in plain old jars for like 3 years and I'm just now thinking about them hahahah but better late than never. Quick fix: wrap them with yarn and pompom trims. And now they're cute. And now I can stop thinking about them again for another 3 years until I decided they need to have a different look ;)


the yarn looks a little bumpy in these pictures, but isn't in person!

2.21.18: snickerdoodles
2.21.17: cleaning baseboards
2.21.16: three cheese potato gratin


Happy moment ~ the color of the waves this morning

Wednesday, February 20, 2019

Rainy Day Casserole


LeDonna sent me this recipe a while ago and I forgot about it... with all the rain we've been having you'd think I would have remembered this aptly named casserole before now! She got the recipe from a church cookbook, says it's similar to goulash, and that it's great. Although it's named "rainy day casserole" I'm sure it'll taste good rain or shine - what's not to like about baked cheesy sausage-y pasta? Mmmmmm....


she didn't get a picture before scooping into it - I told her
 no worries, we can see what the inside looks like this way!


1 pound ground Italian pork sausage (remove casings if you buy links instead of bulk sausage)
1 cup minced onion
1 cup minced green pepper
2 cups canned crushed tomatoes
2 cups milk
2 cups macaroni
2 tablespoons brown sugar
1 tablespoon chili powder
2 cups shredded colby jack cheese, divided (1 cup in the casserole, 1 cup on top)

Brown sausage in skillet, breaking apart with a fork. Add onion and green pepper; cook for several minutes. Place sausage mixture, tomatoes, milk, macaroni, sugar, chili powder, and 1 cup of cheese in a greased baking dish. Mix well and cover. Bake at 350' for 45 minutes or until macaroni is tender. Remove the cover, top with 1 cup of cheese, bake an additional 15 minutes more.


Happy moment ~ Lucy helping herself to the jar of q-tips (she chews the ends off)

Tuesday, February 19, 2019

Tip-sy Tuesday: Deviled Egg Cover

Here's a new segment I'm calling "Tip-sy Tuesday"...no, this might come as a surprise but it won't be about alcohol tips every week hahahah - more like helpful little every day tips that you might not know or have thought of!

Kickin' the new category off is an easy way to cover deviled eggs or anything you don't want messed up but need to cover - and don't have an actual deviled egg cover/holder thingy or a big enough lidded container - put a few toothpicks in the eggs (or cake, etc...) spacing them out around the perimeter and in the center, before covering with plastic wrap. You are sort of creating a tent to keep the plastic wrap from settling on top of your pretty food and smushing it up. Remove the toothpicks when you are ready to serve - when I do this on a decorated cake or cookies I try to put the toothpicks in strategic places to minimize where the toothpick holes might be when you remove them, usually you can't see the holes unless you're really looking for them.


My sis makes the best deviled eggs - click here to see her recipe. 


2.19.18: macrame wall hanging (and Sarge "helping me")
2.19.16: kid craft - decorate notebooks


Happy moment ~ watching Sarge get the zoomies


Monday, February 18, 2019

Fireplace Refresh

Check out the before-and-after of this fireplace transformation - Cathy and Al did this at their daughter's house and it's such a fresh and modern update, what a difference! She makes it sound like an easy quick project - I'm looking at you old-boring-basic-red brick fireplace in my basement and thinking it's time for a change ;) 


before...

...during...

...after. Love it!
Cathy's instructions: It was pretty simple -  you took a paintbrush and painted light gray paint  in all of the spaces between the bricks. When that dried we rolled on a dark gray overtop of the bricks, for the most part it stayed on the face of the bricks and it didn't even get in the cracks that we had previously painted.


2.18.18: pastitsio
2.18.17: paint samples
2.18.16: fleece tie pillow


Happy moment ~ watching Nick the fish eat his breakfast flakes

Sunday, February 17, 2019

Around The Campfire (week 7)

Dear Campers ~

Here's what happened at camp this week in case you missed anything!

Posts ~

2/10: around the campfire week 6
2/11: make an ear crawler
2/12: change up a necklace
2/13: dark chocolate coconut granola
2/14: asian style meatballs
2/15: self tanning tips
2/16: taco bowl

What's cooking ~
  • roasted turkey breast (in a turkey oven bag - makes clean up a cinch!), stuffing, gravy, roasted green beans and mushrooms
  • grilled steak, mashed potatoes, stuffed mushrooms, sautéed spinach
  • shake and bake (I doctor it up with extra spices and grated parmesan) chicken, roasted broccoli, caesar salad
  • skillet pork chops in mushroom "gravy" over rice
  • bbq ribs, coleslaw, roasted potato wedges
I didn't feel so hot this week so spent lots of time sitting in my office - we have been in the condo for 10 years and it took me this long to realize I put my filing cabinet together wrong...all this time I thought the drawers just didn't work very good but now that I've had an "aha" moment and fixed it, it's like a whole new cabinet! Yay. Then because I had everything out of it I spent a few hours cleaning up the files, trashing and shredding a ton, re-labeled and organized the folders. My late-discovery that I'm an airhead turned into a very fun day (in my world organizing and labeling is a good day). 


Hope you had a good week - check back next week for lots more fun projects, recipes, tips, whatever I think of to amuse myself hahahah!

Sincerely ~


Jill
camp counselor and master file organizer 

Saturday, February 16, 2019

Walking Taco Bowl

Have you had 'walking tacos'? It's individual sized bags of fritos with a scoop of chili and toppings added right in the bag - then you are free to walk around and eat them out of the bag. Hence 'walking taco'. Great for a party or sporting events, low mess and easy cleanup. 


I made chili for dinner and wanted to do something other than make my usual corn bread as a side, or serve it over pasta (Cincinnati chili), so I took the idea of a walking taco and turned them into bowl-sized tacos - think of them like 'deconstructed tacos'. Put a handful of frito corn chips in the bottom of the bowl, top with chili, sprinkle on shredded cheese, and garnish with shredded lettuce, chopped tomatoes, and sour cream. These turned out SO good; maybe not as easy to clean up since we had to do dishes, but I don't really want to walk around my kitchen and eat dinner from a bag ;) this is a new favorite for sure. Dave added more frito's to the top because the bottom ones got soft from soaking up the chili, mine stayed crunchy enough (I probably put less chili in my bowl).

Click here for my go-to chili recipe, or use whatever kind you like! Easy and delicious.


Happy moment ~ walking with a friend

Friday, February 15, 2019

Self-Tanning Tips

Tired of winter yet and feeling all pasty white from lack of sunshine? Cathy asked me about self-tanner before she left for a warmer location/winter break and I saved my notes to share with you - this is how I do it, and if it's wrong or doesn't work for you please don't blame me for your streaky orange skin LOL! PS: she asked me about self tanning because I do not tan naturally from the sun...I burn...and that's if I even go in the sun since usually I stay in the shade! Self-tanning saves me from looking sickly in the summer ;) 

-exfoliate really well first, shave your legs…


If you’re using tanning lotion:

-very lightly and sparingly rub moisturizer over your ankle bones, knees, and elbows. These areas tend to pick up too much color. 
-I start with my feet and work up, because if you do top of legs first and then bend forward to do your shins and feet you might get tanner on your torso.
-do the tops and sides of your feet or else there will be a weird break between your leg and foot!
-I do one leg from knee down, then the other leg under knee down, then do thighs and above (once again you need to at least blend it a bit at the top of your leg or it looks weird - even if no one is going to see it you don’t want to have that haha!). After applying to whole leg I rub the residual of what’s on my palms over my knees and ankle bones.
-If you are only doing legs make sure if your arms touch your legs while applying the tanner that you wash your arms or tanner will show where you touched.
-If putting on my face I mix a small amount of tanner with a small amount of moisturizer in my palm before applying. Doing your face is hard so I make the solution pretty weak to avoid weird streaks!

You do not want to have any lotion not rubbed in, it’ll leave nasty streaks. Go sparingly with the tanner and apply to small areas at a time. Make sure you are blending it in really well and don’t do more than one coat - and don’t keep going over the same areas. I tend to rub it in in small circle motions rather than up and down to try to keep the streaking down. If doing your arms remember to do the underside or you’ll see the tanner line.

If you’re using spray tanner:

follow the directions on the can. I can’t remember how many inches away to spray, and you aren’t supposed to rub it in but I feel like if you miss a spot with the spray you get weird white patches so I do lightly pat it around. Spray is nice for areas you can’t reach like your back...if just doing legs I would use lotion. 

Wash your palms with soap when you are finished!

I personally like the daily tanner/moisturizer that doesn't develop a full on tan in one application. I'll do that for a couple days and then use spray overtop every now and then. That way you can bring a small thing of the daily tanner/moisturizer stuff and use thru-out your trip to maintain the color. Otherwise one application of self tanner is going to fade pretty quickly!

Oh, and if you're wearing jeans and leggings the tan rubs off way faster than if you are wearing lightweight clothes!


Happy moment ~ wearing jeans and not having to worry about self-tanning for now...looking for the bright spot of winter haha! 

Thursday, February 14, 2019

Dark Chocolate Granola (copycat recipe)

Saw this recipe for dark chocolate granola here, it caught my eye because the author said it's a copycat of Love Crunch granola which Dave love loves, and I thought I'd make it for him for Valentine's Day. It turned out great, but not sure it's like Love Crunch's version...it tastes so good tho I don't think that matters! Maybe her recipe is a different flavor than Dave's favorite 'dark chocolate macaroon', I did a photo comparison so you can see that the store-bought one is much lighter than the one I made following the recipe exactly (other than I omitted the almonds - it would not be very nice of me to give Dave, who is allergic to nuts, granola he can't eat for Valentine's day..."here ya go honey, be my Valentine, eat this almond granola and then we can take a ride to the ER")...otherwise I pretty much followed the recipe. Here's what I did, click on the above link if you want to see the original recipe with the nuts and a couple other changes.

Ingredients:
  • 3 cups old-fashioned oats (not quick cooking)
  • 3/4 cup unsweetened coconut flakes, plus additional for optional garnish 
  • 1/2 cup unsweetened cocoa powder
  • 1/3 cup brown sugar
  • 1/4 cup maple syrup
  • 1/4 cup melted coconut oil (or other neutral oil)
  • 1 teaspoon vanilla
  • 1/2 teaspoon salt
  • 1-2 cups chocolate chips
  • handful of chocolate baking chunks, chopped into smallish pieces, optional 
Preheat oven to 250'. Line 2 rimmed baking sheets with parchment paper.

 In a big bowl combine oats, coconut, cocoa powder, and brown sugar.

In a small separate bowl combine maple syrup, coconut oil, vanilla, and salt. 

Slowly pour the wet ingredients over the dry, stirring to fully incorporate. Spread onto the 2 prepared baking sheets and bake for 1 hour, stirring occasionally. 

Remove the granola from the oven and sprinkle on the chocolate chips, lightly stir to incorporate the chips and then let it stand for a couple hours until the chocolate is completely cool. I added additional coconut flakes and chocolate baking chunks to the cooled granola so it looks more like the store-bought kind. Break up and store in air-tight container for 1-2 weeks. 

To give as a gift I'm planning to cover an empty oatmeal container with valentine paper and a big red bow - I'm going to go do that now before he gets up!

my gift packaging - still need to cover the carton with Valentine paper and a bow 
side-by-side with the original, mine is so much darker!
before adding additional coconut and chocolate chunks for garnish...
...and after. 


2.14.18: dried cranberry and chocolate cookies
2.14.17: flower heart
2.14.16: tuna over nice (basically Nicoise salad)


Happy moment ~ finding kid's chalk art on the sidewalk outside of our condo