Wednesday, March 10, 2021

Crock Pot Corned Beef and Cabbage (and carrots and potatoes too!)

I'm pretty sure I post this identical recipe every year around this time, but it's so good I don't want you guys to have to be googling recipes and wondering how to make this easy dish - you can trust this one, I promise! For the past few years we've bought the corned beef at Costco, I get the kind that has the seasoning packet included and I follow this recipe in addition to the directions they have on the packaging:

CROCK POT CORNED BEEF

4 lb. corned beef with seasoning
1 cup water
1 cup guinness (enough liquid to fill 1/2 way up or so)
2 bay leaves
1 t. extra cloves

cook on low x10 hours.

add carrots last 4-5 hours
add cabbage last 3 hours (if you're adding to the crock pot)

I don't add potatoes to the crockpot, over the years I've found people prefer either roasted potatoes or mashed potatoes; same with the carrots - I put some in the crockpot but I also roast some in the oven. I can never fit the cabbage in the crockpot so I usually cut it into wedges and steam it in a large pan on the stovetop. Click here for more info on how to prepare the rest of the meal. 

I don't have pictures of this but it just looks like a traditional corned beef and cabbage St. Patrick's Day meal :). But it has great flavor, promise - never too fatty or tough. Mmmmmm. So good! 

3.10.18: pots of gold

Tuesday, March 9, 2021

Tip-sy Tuesday: Shamrock Plant

I posted about shamrock plants back in 2018, there's a good tip in the post that I'm repeating in case you missed it, or forgot (says the woman with the worst memory!):

You can grow more shamrock plants by taking a leaf from an existing plant, put the stem in a glass of water until it roots, then plant it. For real, it works! A cute idea is to buy a plant for your St. Patrick's day table, then give out single leaves (wrap in wet paper towels) as little St. Pat party favors. 

Here's the original post in it's entirety:

I bought little tiny shamrock plants as decorations for our St. Patrick's Day dinner tonight, and then I'll send them home with guests as party favors. I love shamrock plants - I grew my first one from a leaf that our friend Al gave me (he gives them out every year, literally just a leaf with its stem wrapped in wet paper towel), he said to put it in a glass of water and wait for it to grow roots (which it totally did!) and then plant it. Sure enough, a few months later I had my own full shamrock plant! It produces pretty little white flowers that close up at night, and has clover shaped leaves - perfect for St. Patrick's Day of course, but also a pretty houseplant the rest of the year.


Gotta run - I've got corned beef in the crock pot, make-ahead mashed potatoes on the stove, Irish cream bundt cake in the oven...it's a busy morning! Have a fun day everyone (and good luck with that green beer. Just sayin')!

3.9.20: shamrock garland

3.9.18: kids travel snack dispenser

3.9.17: crack dip

3.9.16: St. Patrick's table decor (pots of gold)

Monday, March 8, 2021

Foam Shamrock Indoor Wreath

Any plans for St. Patrick's Day? Can we even have plans for St. Patrick's day? I'm not sure what's allowed and what is still off-limits or frowned upon! Whether you're home alone or not, you might want an easy quick decoration to jazz up the day - I came across this indoor wreath I made in 2016 and thought I'd share again. You can whip this up in a matter of minutes (after sawing the foam in half that is!) - I was at the dollar store a couple days ago and they still had lots of these felt shamrocks so it isn't too late to make this!

3/2016:

I found all the supplies to make this cute wreath at a dollar store - check out how simple and inexpensive this is to make:


All you need is a styrofoam wreath, pre-cut foam shamrocks, ribbon for the bow, something to hang it with (I used a zip tie, you can use anything - a chenille stem, ribbon, twine, wire...), and adhesive (I used hot glue). 

I wanted the wreath base to be flat on the side where I was gluing the shamrocks - not rounded,  so I sawed the styrofoam wreath in half with a serrated knife. If you can find one already flat on one side get that, it was kinda messy sawing the styrofoam but it's totally do-able.

Attach whatever you are using to hang it with at the top, and tie on a long piece of ribbon at the bottom before you start gluing on the shamrocks. 


Lay down the first row of foam shamrocks, alternating colors and which way they are facing and glue them down. Add 2 more layers the same way. 

To finish, tie or knot the ribbon however you like. I looped it back and forth 4 times and tied a small piece around the center to hold the loops in place. 

3.8.20: 🔥week 10
3.8.19: sew a fabric wallet (fyi - I still use this all the time, so handy)


Sunday, March 7, 2021

🔥Around the Campfire (week 10)

Dear Campers ~

Here's a quick recap in case you missed anything at camp last week:

Posts ~

2/28: 🔥week 9 

3/1: ribbon bracelet

3/2: TT: no-stick foil tip

3/3: red and green enchiladas

3/4: Brooke's TikTok Pasta

3/5: pre-spring wreath

3/6: double barley posole

What's Cooking ~

  • red and green enchiladas
  • lemon-paprika chicken with couscous and garbanzo beans, steamed green beans
  • pork chops, greek broccoli gratin (recipe soon), sweet kale salad
  • baked walleye, roasted asparagus, coleslaw
  • chicken tikka masala (Costco), cilantro lime rice, steamed broccoli
  • grilled flat iron steak, baked potatoes, roasted veggies
Miscellaneous stuff keeping me busy ~
  • read 'Charlotte Figg takes over Paradise' by Joyce Magnin - her writing style reminds me of Fannie Flagg which I enjoy, about a widow who moves to a trailer park and brings together the community with her band of misfit neighbors. Decent read. ⭐️⭐️⭐️
  • read 'Winter Prey' by John Sandford, #5 in the series (#4 Silent Prey wasn't available yet so I skipped one, I'll get to read #4 Silent Prey this week). This one is seriously twisted and I read it so fast - had to find out what happens. Creepy killer in the middle of the winter trying to control who has knowledge of the child porn and sex ring he's part of might not sound like a good plot but it is very well done, suspenseful, good characters, good action. ⭐️⭐️⭐️⭐️⭐️
  • Also read 'You Had Me at Hockey' by Kelly Jamieson. I put this one on hold a few weeks ago after it popped up in my 'suggested books I might like' library list, just because I love hockey hahah. I knew this would be a romance novel which I rarely read and even more rarely enjoy, and I was right - it's cute, young NHL player meets social-media influencer who knows nothing about hockey and they hit it off. Let me give you a heads up tho, there are quite a few fairly graphic sex scenes (I forgot to tell you she's a virgin when they meet but that is soon no longer a story point hahah) mixed into the cute story! ⭐️⭐️⭐️
  • had another order for masks, yay!
That's about it - hope everyone had a great week and will stop by often for more crafts, projects, recipes, whatever else I think of to make at camp next week! Happy Sunday!

Sincerely ~


Jill
camp counselor

Saturday, March 6, 2021

Double Barley Posole

This soup is so good - I wondered whether Dave would even try it (barley? hominy? haha) but he did and we both loved it. This is definitely a keeper. I had to look up what posole is again (it's Mexican soup or stew - I made a different recipe in 2019 and googled what posole is then but still couldn't remember! click here for that post), but whatever you want to call it, it's great. 


I made a couple changes - used regular white mushrooms, omitted the onion and added less red pepper, used dried thyme instead of fresh, and the only pearl barley I could find is 'quick' - so it didn't need 40 minutes for the barley to cook. Oh, and I used chicken stock instead of vegetable. The soup is still delicious if you choose to not add the avocado, cilantro, sour cream and lime garnishes - I didn't do the cilantro or lime, but it's great with avocado and sour cream!

  • 2 T. olive oil
  • 8 oz. cremini mushrooms, quartered
  • 1 cup chopped red bell pepper
  • 1/2 cup chopped yellow onion
  • 1 T. minced garlic
  • 1 T. chopped fresh thyme
  • 1 T. flour
  • 1 (12 oz) bottle pilsner beer
  • 3 1/2 cups unsalted vegetable stock
  • 3/4 cup copped peeled butternut squash (about 4 1/2 oz.)
  • 1/2 cup uncooked pearl barley
  • 1 t. pepper
  • 1/8 t. kosher salt
  • 1 (15oz) can white hominy, rinsed and drained
  • 1/2 cup chopped zucchini
  • 1 ripe avocado, diced
  • 1/4 cup fresh cilantro leaves
  • 1/4 cup light sour cream
  • 4 lime wedges

1. Heat oil in a Dutch oven over medium-high. Add mushrooms; cook, stirring occasionally, until mushrooms begin to release their liquid, about 5 minutes. Add bell pepper and onion; cook, stirring occasionally, until onion is translucent, about 4 minutes. Add garlic, thyme, and flour; cook, stirring often, 1 minute. Stir in beer; cook until liquid is reduced and glossy, about 7 minutes. Stir in vegetable stock, squash, barley, black pepper, and salt; bring to a boil. Reduce heat to medium-low; cover and cook until barley is tender, about 40 minutes. Stir in hominy and zucchini; simmer until zucchini is tender but still bright green, about 5 minutes.

2. Divide soup evenly among 4 bowls; top servings evenly with diced avocado, cilantro, sour cream, and lime wedges.


 click here for original source at cookinglight.com


3.6.20: paper masks and feathers 

3.6.19: stuffed poblano peppers

3.6.18: arranging daffodils

3.6.17: shamrock wreath

3.6.16: crock pot white chicken chili


Friday, March 5, 2021

Green (pre-spring) Wreath

We aren't usually here this time of year so I have no decoration for our front door once the Valentine hearts come down - it feels too early for my usual springtime wreath (there's still some snow on the ground) and I don't want a wreath just for St. Patrick's Day, so I decided to make a wreath just using green and white leaves and flowers. For this project I think dollar store floral stems are just fine - true they aren't very good quality and the colors can be a trifle fake looking hahahha, but in this case I'm happy with the ones I picked. I did get one thing of orange flowers for a pop of color, but the overall look is still green and white. For Easter I might add some colored eggs or something - we'll see. For now tho I'm good for the rest of March.

For each wreath:

wire wreath form

artificial flowers and leaves

light floral wire (mine is on a spool and is 22 gauge)

wire cutters to cut the flowers apart (sharp scissors would probably work but might dull your scissors) and cut the wire from the spool

a hanger of some sort - pipe cleaner, yarn, twine, etc. 

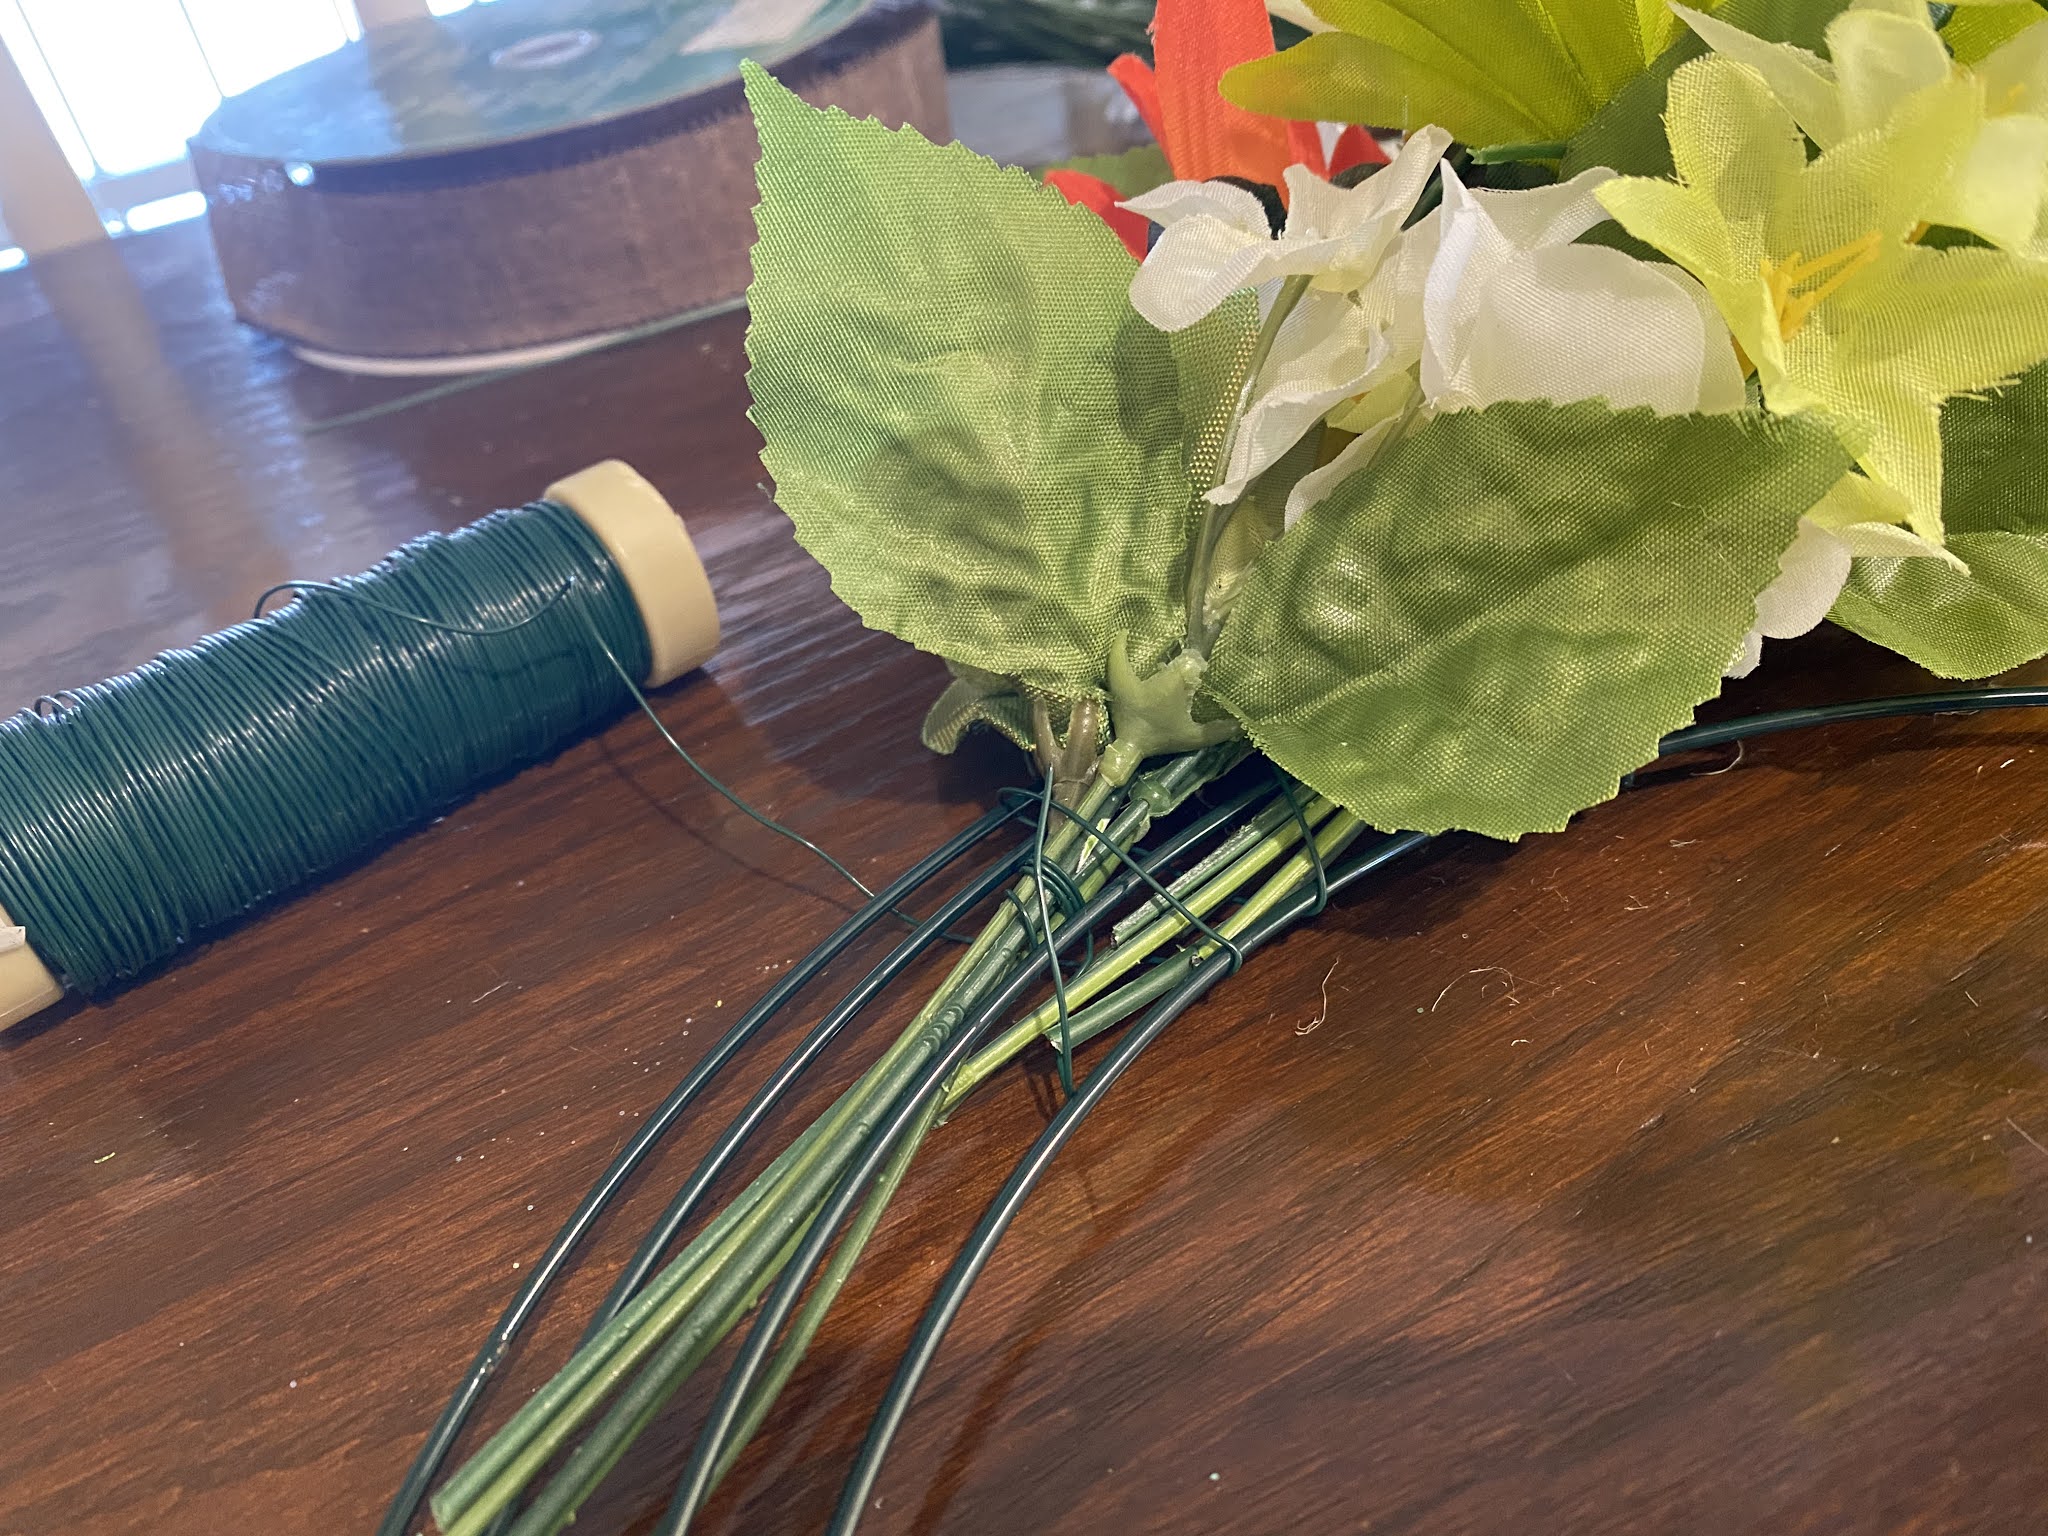
Cut all the flowers off the bundle, most of mine had between 5 or 6 stems. One tip is to push the leaves up the stem to sit closer to the flower. Make bundles of a few flowers and leaves and tightly wire them together. For my wreaths I ended up needing 11 bundles each. Attach one end of the wire spool somewhere on the wreath form, lay down a flower bundle and wrap the wire across the bundle and around the wreath form a couple times. Continue adding bundles and wrapping them to the wreath until you get to the last bundle - turn that one the other way to finish (like if you were laying the bundles down on the wreath in a clockwise pattern turn the last one facing counter-clockwise - it helps fill in the last space better). 


You can add other decorations if you like - a big ribbon bow, or hot glue/wire birds or something. I stuck a big grass bush thing in on an angle which for right now I like, I might change my mind and remove it later - ya never know hahah. I didn't wire it in, just pushed it into the wreath form and it's holding just fine. 

without the shootie grass thing

hard to see with the reflection, I know...

If you're worried about the back of the wreath with the wire touching and harming your door, you can hot glue ribbon, fabric, felt, or cardboard over the back to protect the doors. I didn't do that, and if the wreath seems like it's moving around on the door too much I will put some of that museum/earthquake putty stuff underneath it to hold it in place. 

3.5.20: goldenrod update

3.5.19: TT: prep bowl

3.5.18: Tesha's crockpot potato soup


Thursday, March 4, 2021

Tik Tok Pasta by Brooke

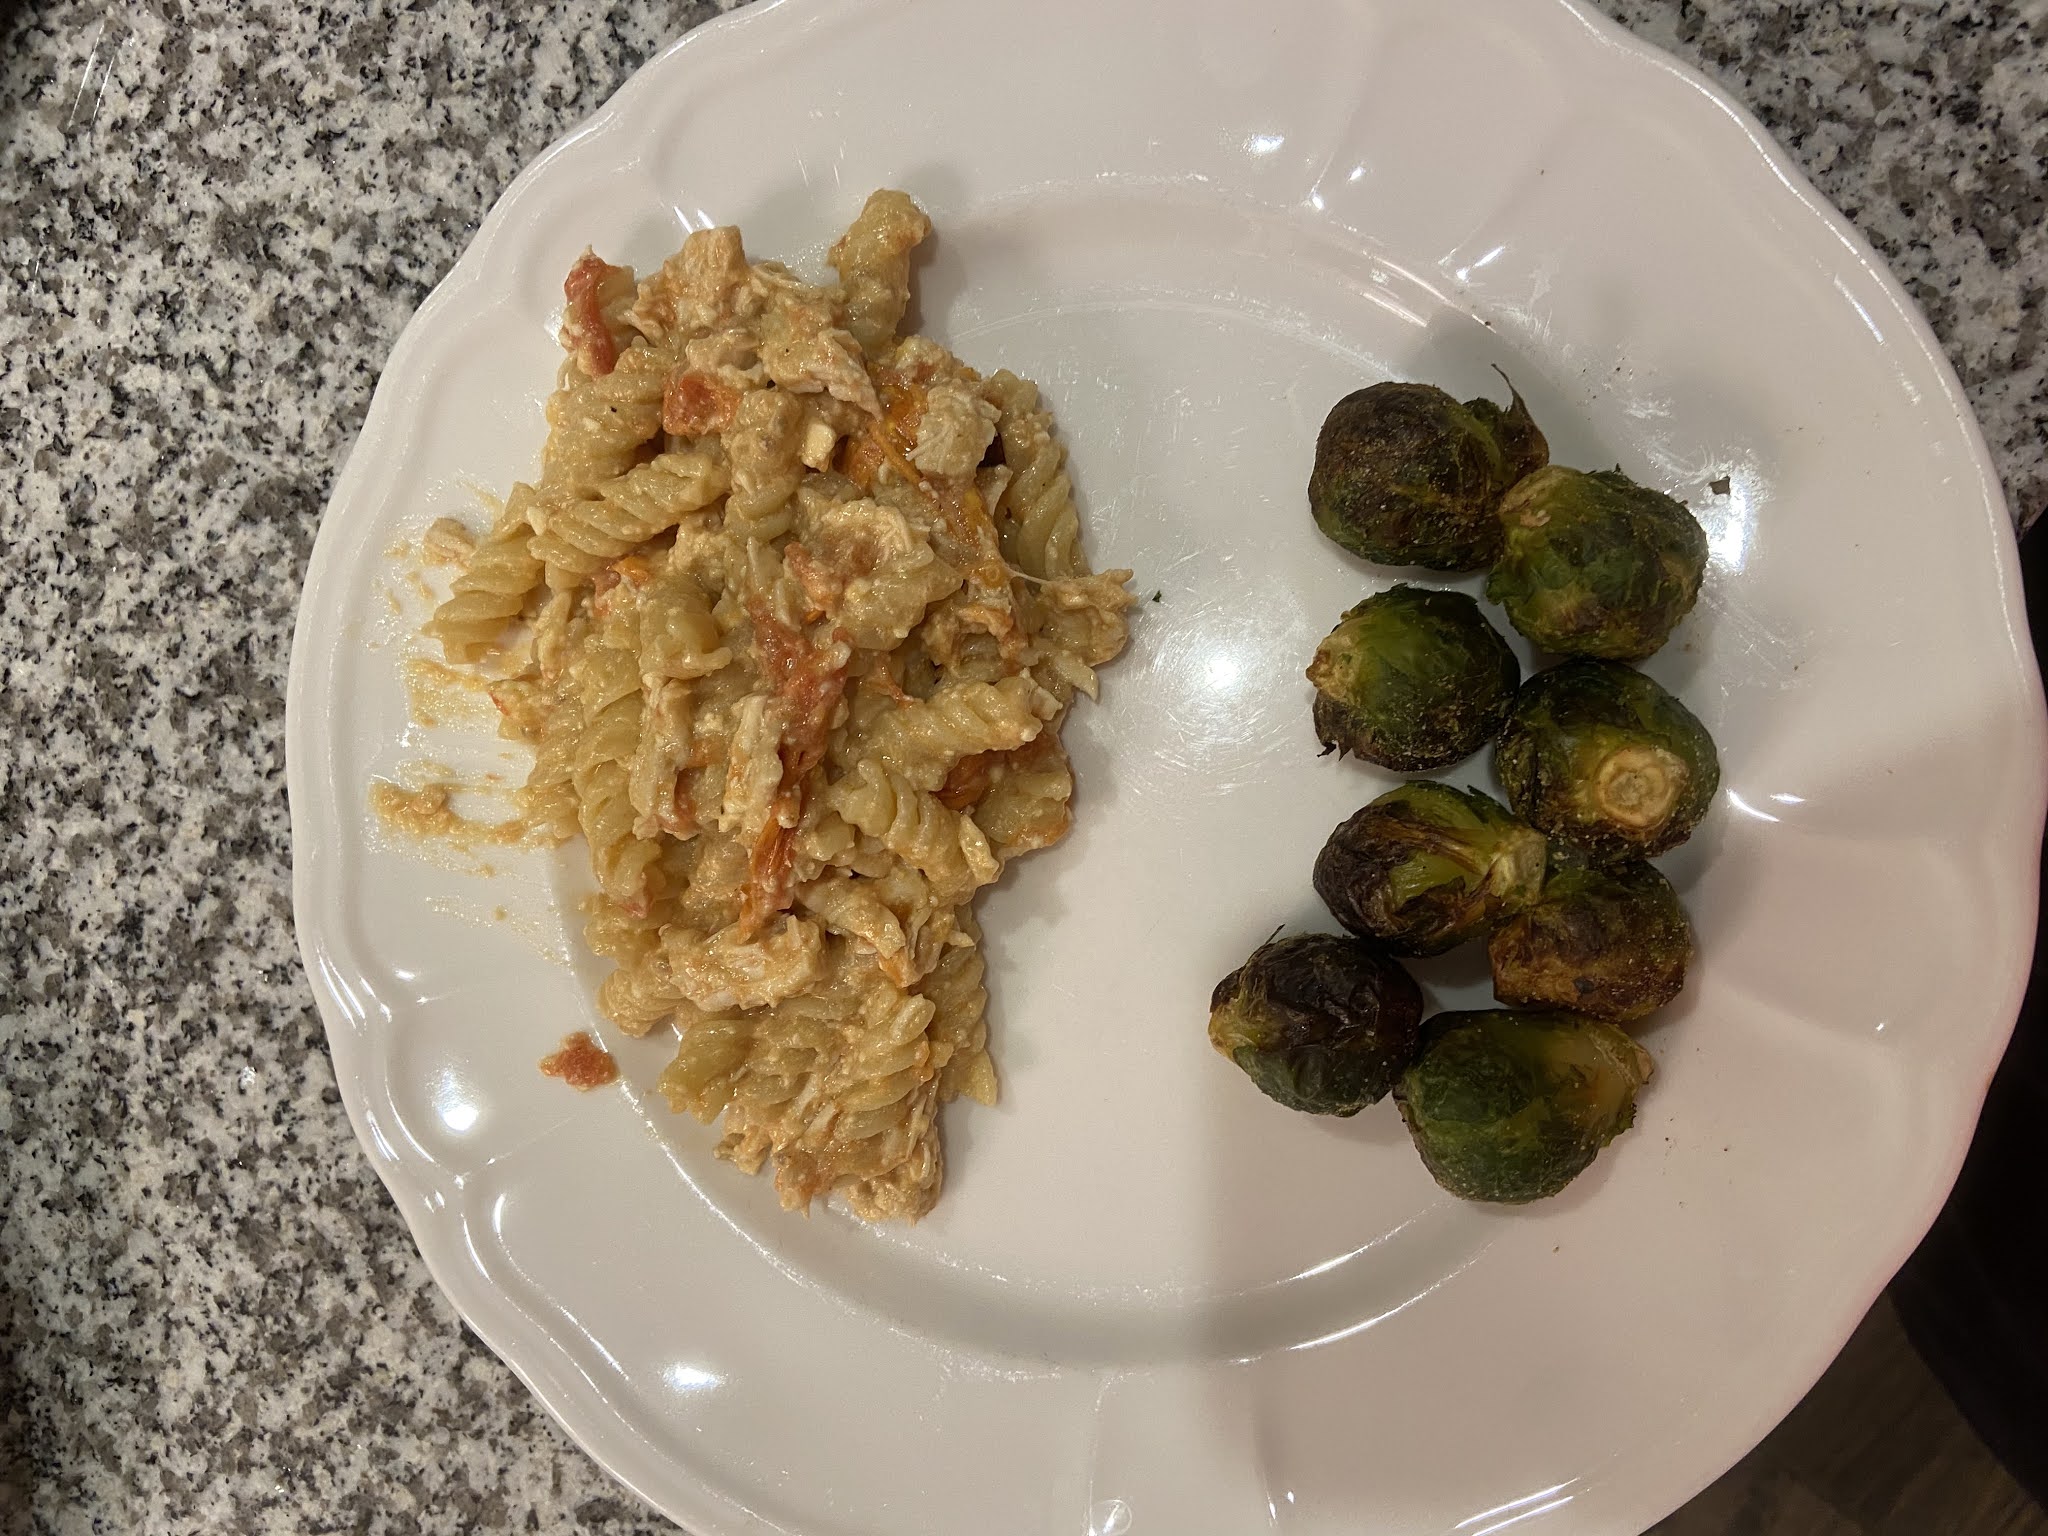
Hey guys! There’s this pasta all over tik tok so I decided to make it for dinner! it wasn’t hard and was really good! But I did need a little help to cook the chicken lol... first I took a glass baking dish and put 1 container of cherry tomatoes in it with 1/2 cup of olive oil and mixed it around. Then I put those in half and pushed them to each side and put a container of feta cheese in the middle. I tired to keep the cheese in a pile because the recipe calls for a block but the store didn’t have any... but this worked just as good! But if you use a block you will do the same thing and just place it in the middle of the pan with tomatoes on each side. After you put the cheese in the middle you can move the tomatoes more evenly around it. After that sprinkle a pinch of salt and pepper on top. And a 1/2 teaspoon of crushed red pepper. And put it in the oven at 400° for 40 minutes. while you’re doing that cook 2 chicken breasts. After cooked put them in a bowl and take 2 forks and shred the chicken. Then boil your noodles. You can use whatever kind of noodles you would like. once your cheese and tomatoes have been in the oven for 40 minutes take it out and mix it all together. Smash the tomatoes up or leave them bigger whatever you desire. If you like your sauce more runny leave the oil but if you want it a little thicker drain some of it out. My mom and I drained some of it out. Then I added the shredded chicken slowly to have enough to my desire for the sauce. Then added the noodles slowly until there was enough sauce to noodles in the pan! it was so good! My mom and I loved it! And it was so easy! 


Jill here - I have no idea what this dish is called so I named it Tik Tok Pasta, it probably has a better name hahah. This sounded so good, and my sister raved about it even before Brooke said she took pictures to blog it (yay, thanks B!) - as soon as I got the recipe I made it for dinner and they're right, this is great! I cut the cherry tomatoes in half before roasting, and add some chopped sun-dried tomatoes in oil (LeDonna bought a large jar of them at Costco and we are thinking of ways to eat them!). I didn't have too much oil that needed to be drained off, in fact we added a little oil to the dish once everything was combined. Here's what mine looked like. Yum!


3.4.19: DIY car air freshener


Wednesday, March 3, 2021

Red and Green Enchiladas

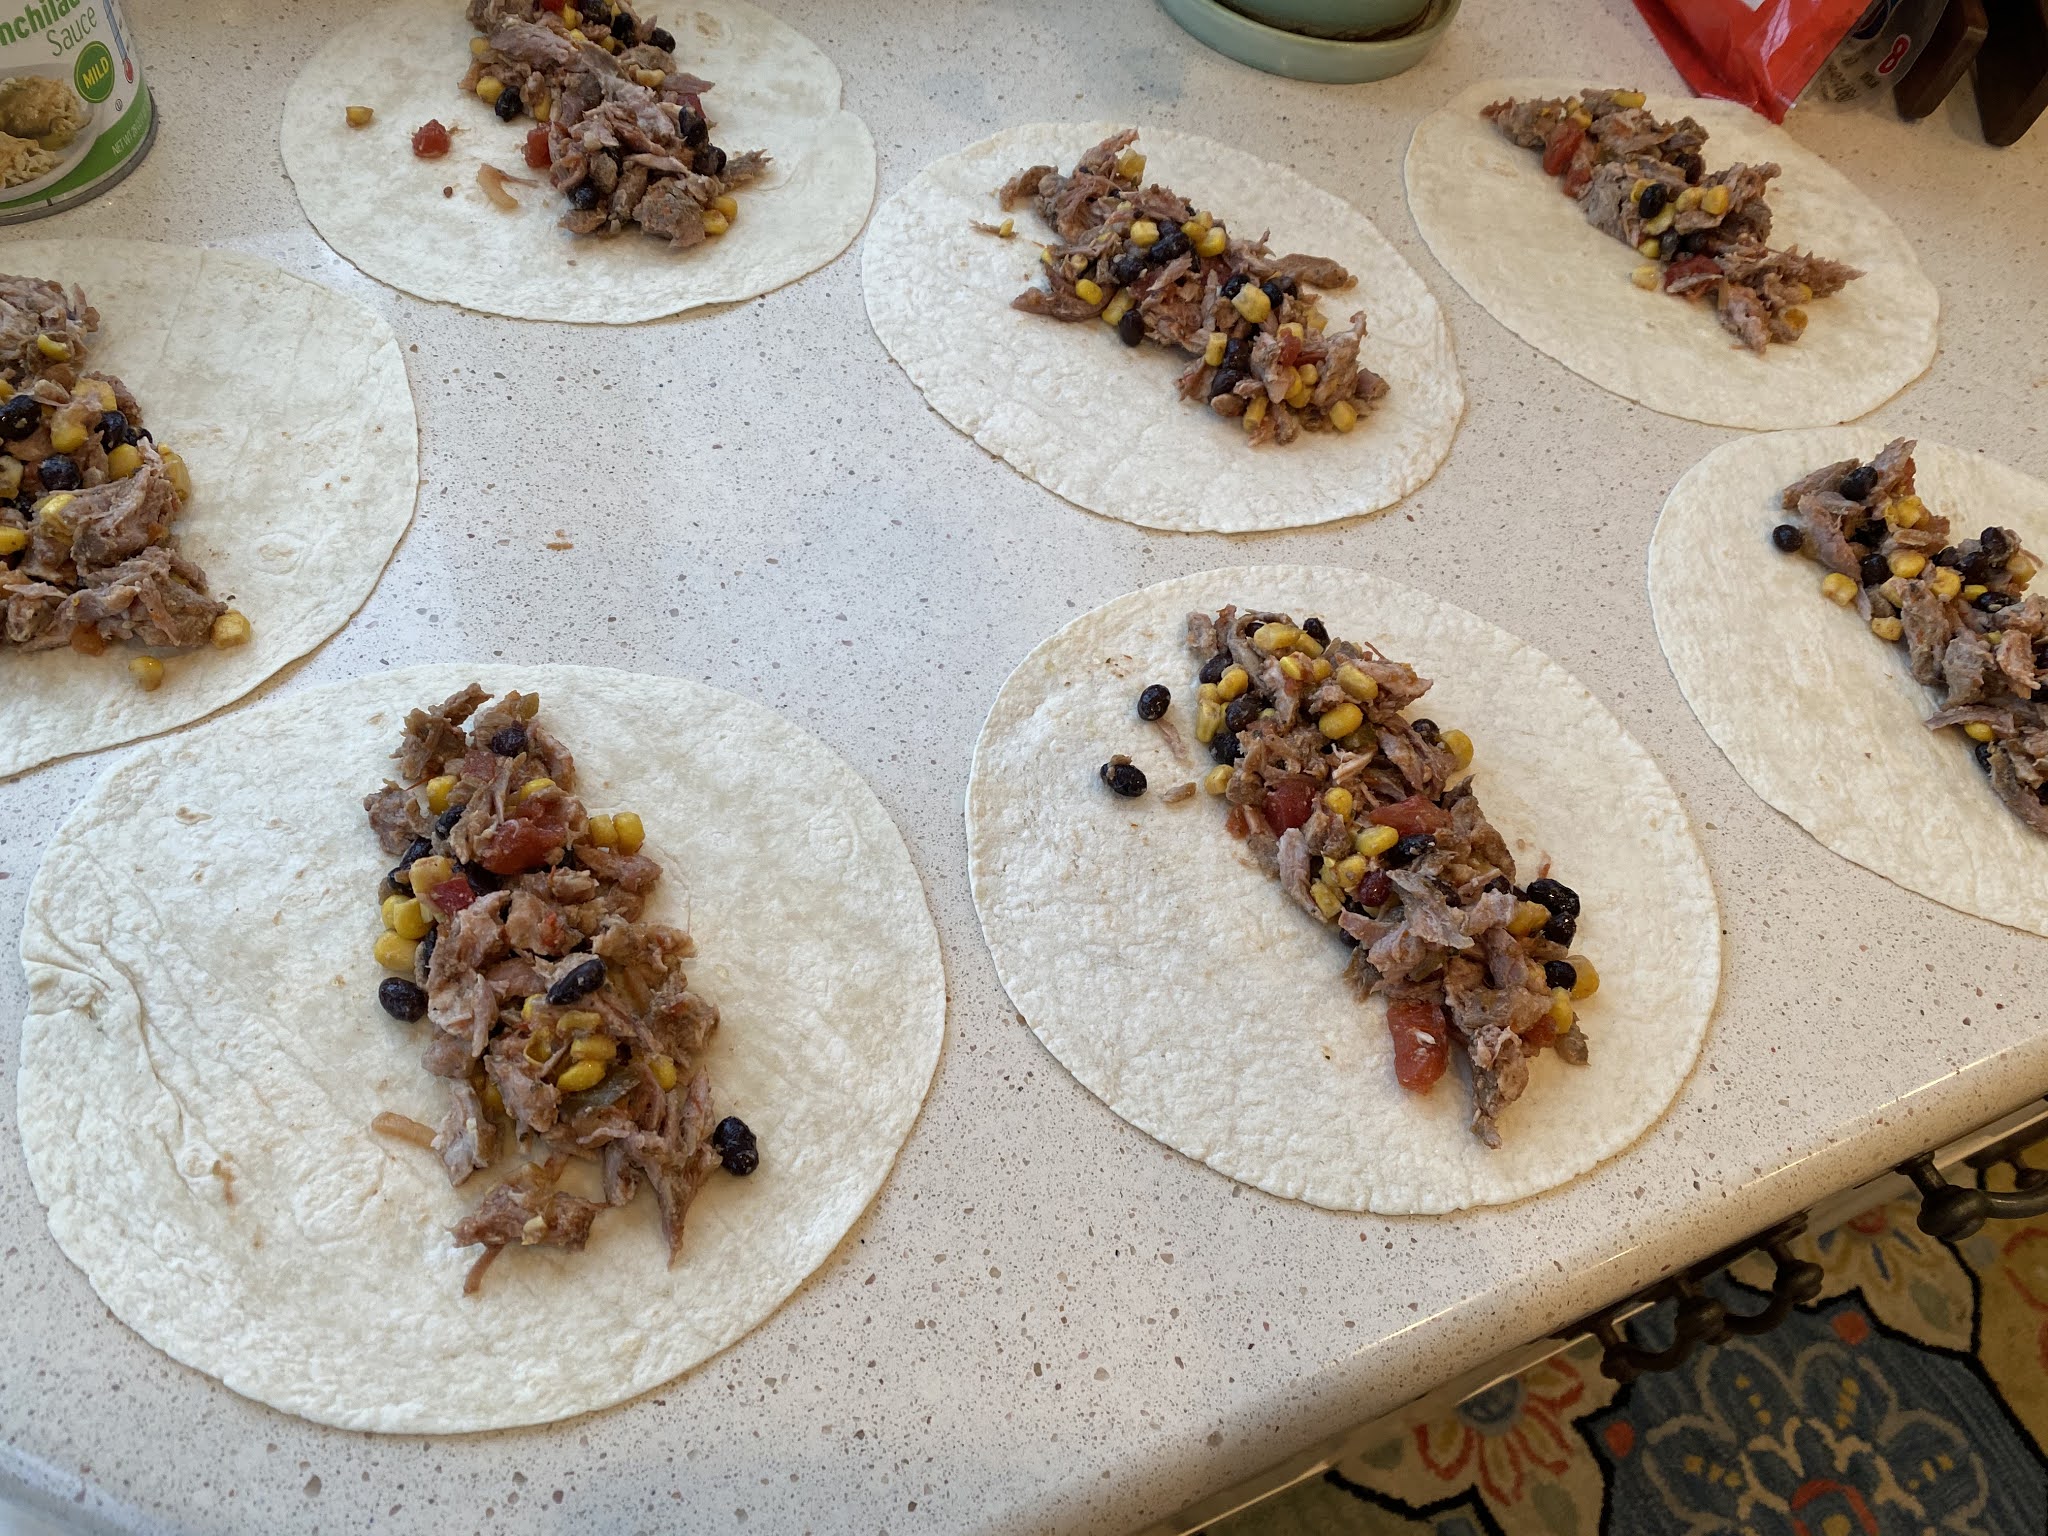
I've made these 2 weeks in a row they're so good! First week I chopped up leftover pork roast and mixed with cooked ground pork, black beans, and corn. This week I used ground pork, corn, and refried beans - both ways are delish. I'll tell you how I did both weeks, it's basically the same just changed the filling a bit. 

It's a non-recipe recipe, you know how much I like those hahahha - just wing the amounts and adjust the filling to your liking. This is what I did:

1st week:

  • 8 low-carb flour tortillas
  • 1 lb. ground pork
  • 1/2 lb. chopped cooked pork roast
  • salt and pepper
  • salsa
  • 1/2 can corn, drained
  • 1/2 can black beans, rinsed and drained
  • shredded cheese
  • 1 can red enchilada sauce
  • 1 can green enchilada sauce
2nd week:
  • 6 low-carb flour tortillas 
  • 1 lb. ground pork, seasoned with Mexican spice blend
  • 1 (11 oz.) can corn, drained
  • salt and pepper
  • 1/2 can refried beans (fat-free)
  • shredded cheese
  • 1 can red enchilada sauce
  • 1 can green enchilada sauce
Directions: preheat oven to 350'

1st week ~
  1. cook the ground pork in a skillet until no longer pink. Add the cooked pork roast, corn and black beans, and salsa to taste. Season with salt and pepper to taste. 
  2. spread a thin layer of red sauce on one half of the bottom of a 13x9" baking dish, spread a thin layer of green sauce on the other half.
  3. lay out 8 tortillas on a clean counter or work space. Distribute the filling mixture evenly between the tortillas, sprinkle with cheese. 
  4. roll up each tortilla tightly around the filling and place in the baking dish. 
  5. spoon the red sauce over the 4 tortillas that are on top of the red sauce in the bottom of the dish, run a knife between the enchiladas so sauce coats their sides and helps them to not stick together. Repeat with green sauce. 
  6. top with additional shredded cheese. Cover with foil, bake for 30 minutes or so until hot and the cheese is bubbly.


2nd week ~
  1. cook the ground pork in a skillet until no longer pink, add Mexican spice blend to taste. Mix in the corn, season with salt and pepper to taste.
  2. spread a couple tablespoons of refried beans on each tortilla. Top with the pork mixture. (Note I lay all the tortillas out on the clean kitchen counter and evenly distribute the beans and pork mixture before rolling them up.)
  3. sprinkle with cheese if you want (Note: 1st week I added the cheese, 2nd week I forgot and we couldn't tell the difference). 
  4. spread a thin layer of either sauce in the bottom of your baking dish. I used a 13x9" for the 8 tortillas and a square 9" for the 6. Roll up each tortilla tightly around the filling and place on top of the sauce in your dish. 
  5. spoon the red sauce over 1/2 of the enchiladas. Run a knife between the enchiladas so sauce will coat the sides and keep them from sticking together as much. Repeat with the green sauce. Top with shredded cheese, cover with foil and bake in a preheated 350' oven for 30 minutes or so until heated thru and the cheese is bubbly. 


Another note: 1st week I spread either red or green sauce on each enchilada the long way, which means when serving you get a whole red or whole green sauced enchilada. 2nd week I spread the sauce over 1/2 of each enchilada so you get 1/2 red and 1/2 green sauce with each enchilada - make sense? Look at the photos for reference and you can see what I mean! 

Tip: if you spray the foil with non-stick cooking spray before placing on the dish the cheese won't stick!

3.3.20: TT: copycat Old Bay seasoning (especially useful right now - no one has Old Bay in stock!)

3.3.19: 🔥week 9

3.3.18: host an Oscar party

3.3.17: Brooke decorates her phone charger

3.3.16: photo class - self portraits


Tuesday, March 2, 2021

Tip-sy Tuesday: no-stick foil tip

This is a super easy and helpful tip to keep food from sticking to aluminum foil while baking - spray it with non-stick cooking spray first. This seems like a no-brainer but I've never done it until now; I made red and green enchiladas last night (come back tomorrow for the recipe!) and sprayed the foil and sure enough - no cheese stuck to the foil which means more cheese on the enchiladas (and more melty cheese for me to eat!) and not having the top of the dish messed up was nice too. 

Where has this tip been all my cheesy-casserole baking life?


3.2.20: breaded baked eggplant

3.2.19: arugula with pancetta salad

3.2.18: Gracie's watercolor mermaid


Monday, March 1, 2021

Ribbon Bracelet

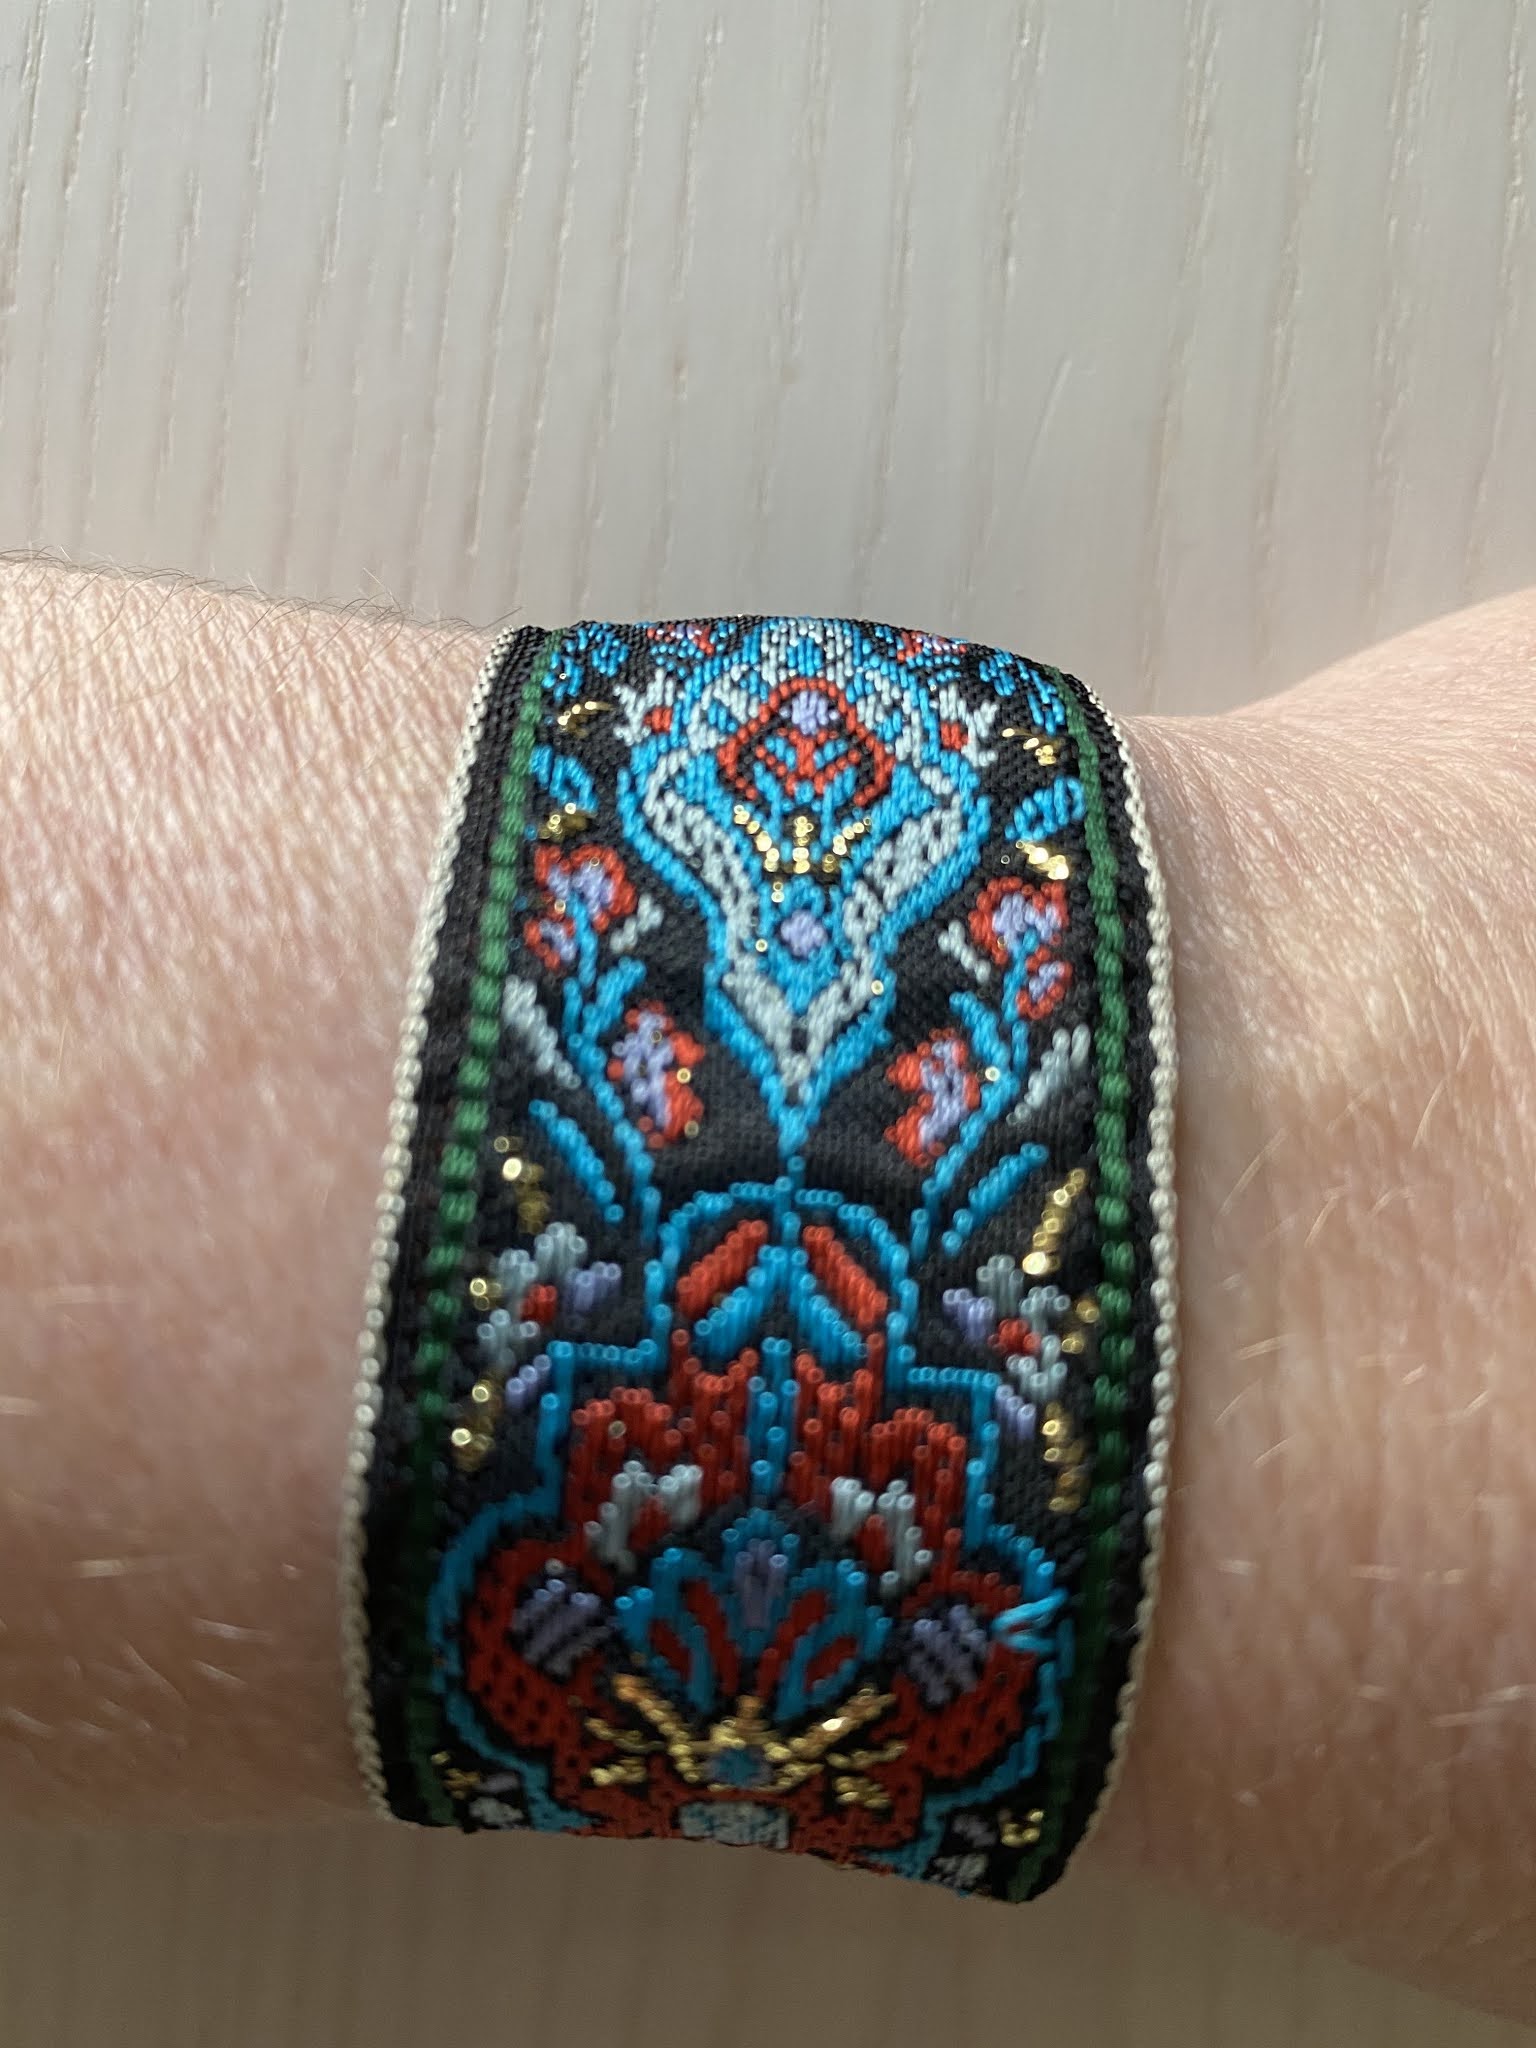
 I wore a ribbon bracelet the other day and couldn't remember if I'd ever posted how to make one - I did, way back in March 2016. It's a fun easy little project that I'm posting again so we all remember how to make them (myself included hahaha!). In this post I made one for St. Patrick's Day, now I want to make one for all the holiday's - easy accessory! Here's the one I wore recently - pretty, right? 


Originally posted 3/16:

There are some beautiful ribbons out there that catch my eye and I want to buy, but there's only so many ribbons a person needs...then I started buying just a small amount of the ones that I love and would be pretty to wear and now I make bracelets out of them. My favorites to wear are from ribbons that are soft to touch and very detailed, like this flowered one:


I wanted to make a St. Patrick's Day ribbon bracelet but didn't find any ribbon that was perfect - but I do like this green/black/white striped ribbon enough and they are pretty easy to make so even though it isn't my favorite ribbon ever I still made it and really like how it turned out. Now I'll have something green to wear on St. Patty's Day!


materials needed:
8" ribbon
20 seed beads
1 small button for closure
stretchy cord
needle and thread

cut a length of stretchy cord to make the closure loop, I cut a piece probably 10" long. thread it onto a needle, tie a knot in one end of the stretchy cord and pull it thru from the backside of the ribbon.

turn the ribbon over and add 20 seed beads to the cord, the needle probably won't go thru the tiny hole in the beads but the stretchy cord is stiff enough that you can just thread them right onto the end of the cord.

thread the cord back onto the needle and poke it back thru the front side of the ribbon right next to where the cord came up to start. this creates a bead loop for the closure. 

this is what the back of it will look like after you make the bead loop and tie it off close to the ribbon.

fold the end of the ribbon over twice making sure the loop is at the edge of ribbon. sew the hem in place.

measure how long you want the bracelet to be for your wrist, add about an inch so you can fold the other end of ribbon over twice and sew it in place. sew on the button on the right side.


here's the front of the finished bracelet..


...and the back..


...and how it looks on!


3.1.20: ðŸ”¥week 9

3.1.19: boho sling bag

3.1.18: password keeper

3.1.17: Julie's key lime pie

3.1.16: organize the spice drawer