Friday, January 14, 2022

T-Shirt Rag Quilt (re-run)

This was originally posted 8/18 - my sis and I were just talking about not wearing all the t-shirts we have but can't part with because they're either cute or good memories and I said I should make another t-shirt quilt. So I'm reposting this for me as well as you hahaha. My first quilt is almost too heavy to comfortably use, I have it on display but rarely pull it out to snuggle in it - I think the next one I make might be either less layers, a lighter middle layer, or maybe I won't do the backs of the shirts. 

Here's the original post:

Cathy is helping her granddaughters pare down their clothes and thinking about making them t-shirt quilts for the shirts that are cute or memorable that they are having trouble parting with - that reminded me that I made a rag quilt out of my old t-shirts before I started this blog so thought I'd share it with you (and her). Great way to keep the memories without having to store all the old t-shirts.


I followed the instructions found here at sweet tea in the south; instead of my copying all her directions I'm including the link - just click on it if you want to make one and need more detailed instructions and photos -  I'll just give you the outline of what I did and will try not to be too confusing. This isn't hard it just takes a little time.

I made my quilt out of 20 t-shirts, each cut 12" square (you need the front and backs of the shirts). I also used 1 narrower piece of the shirts for filler 5 pieces (one in each row) to make the quilt even on the edges. For example, in the picture below there is a pink narrower filler piece on the top right, etc.
The quilt example I followed has the squares lined up evenly in rows but I like how the squares look being offset from each other, that meant I needed the narrow fill-in pieces to square the quilt up - you can just line them all up evenly if you want and skip the narrower fill-in pieces! (Once again, click here to see how it looks all lined up.)


In addition to the t-shirt squares, you'll need something to line it with - I used 2 pieces of lightweight flannel, cut the same size, per square. This makes each 12" square have a total of 4 layers. 

A summary to assembling this cute quilt:
  • for each square you need a front and back 12" square of t-shirt - note I tried to center the t-shirt logo/words/image in the center of the front square; for the back square sometimes I used the solid part of the shirt, or included a smaller detail if the leftover shirt had something on the front or back that I liked. In the photo above some of the squares are the backs of my shirts (like the number 18, or "coach jill") and some were the front (like the parrot or "frank the tank"). Play with the part of the shirt you really like and is the "memory" part of the shirt before cutting it out, save the rest of the shirt for the back of the quilt. 
  • you also need 2 (12") squares of lightweight flannel to go between the front and back t-shirt squares. Cut all the squares out before continuing on. 
  • lay out all the front squares on the floor and move them around until you like their placement. I tried to separate the same colored squares to make the quilt more balanced. Then do the same thing for the back squares (making up the back of the quilt). Take a picture on your phone of both sides so you remember where everything goes!
  • now to assemble the squares: lay down the back square with the "right" or good side of the shirt facing down, add 2 flannel squares and top with the front square "right" side up. Remember that the bottom square is the back of the quilt so make sure you lay the square down so you'll have any logo or the right side of the shirt facing out. Pin each square together, and then sew a giant "X" thru all 4 layers to hold them together.
  • look at the link I posted to see how to do this next part, I'm having a hard time describing how to sew it together. In order to get the front of the quilt to be "ruffled" you need to sew the squares together so that all of the edges are facing the front (you put the bottom of the squares together and sew thru all 8 layers, repeat adding the next square). Sew the squares together going across the row first - example, for the top row I sewed the light pink dance shirt to the black "big blue in the house", then added the white shirt, then the gray toyota shirt and lastly the pink filler square. Repeat for each row, and then sew the long rows together. I sewed 1/2 inch seams, you can make larger seams if you want a bigger ruffle. 

  • front of the quilt - all the seams are facing forward
back of the quilt        
  • this is the most time consuming part but it isn't difficult - make little notches along all the exposed seams including the edges, once you wash the quilt the notches with fray and curl and make the "ruffle" effect. Once it's all notched wash and dry the quilt - helpful tip that I'm happy I did is take it to the laundromat the first time...there are LOTS of little strings that come off in the initial wash and dry cycle! 


 I love this quilt - it's fairly heavy but in a nice way, and I love that I'm able to preserve my fun and memorable shirts while making way for new shirts in my closet (and eventually to be turned into another memory quilt haha), and it's so easy-care since it's just a bunch of t-shirts!


1.14.21: dog crochet basket 

1.14.20: TT: cleaning your mattress

1.14.19: bath salt cakes


Thursday, January 13, 2022

Chicken Parmesan Stuffed Portobello Mushrooms (re-run)

I originally posted this recipe 12/18, I completely forgot about making this but after reading the post I can now remember how much we loved it and I want to make them again: 

The grocery store had these giant portobello mushrooms on sale, standing in the aisle I googled what I could stuff them with and came across a chicken parmesan recipe that looked great so that's what we had for dinner! This was very easy to make - and if I would have used cooked chicken like the recipe calls for it would be a super quick meal...I had Dave grill some thin chicken breasts to use in the recipe so that added a little time (but the hot freshly grilled chicken was excellent!).

I tweaked the original recipe a bit, will give you how I did it; if you want the original source and pictures click here.


  • 1 pound thin chicken breasts (brush with olive oil, season with lemon pepper, grilled and chopped into bite sized pieces). Note you can use whatever cooked chicken you want!
  • 4 large portobello mushrooms, wipe clean with a damp paper towel
  • large handful of chopped fresh spinach
  • 1 cup pizza sauce (you can substitute marinara)
  • 1/3 cup grated parmesan
  • 1/2 cup shredded mozzarella cheese
  1. Preheat oven to 400'.
  2. Scrape black gills out of mushrooms with a spoon and remove stem.
  3. Place mushrooms on a baking sheet sprayed with non-stick cooking spray, gill sides up.
  4. Top each mushroom with some of the spinach, bake a few minutes until the spinach is wilted and the mushrooms start to release their juice. Carefully drain off what liquid you can without the mushrooms falling off the baking sheet.
  5. In a small bowl combine the chopped chicken with sauce and parmesan, stir until well combined. Note if it seems dry add a little more sauce. 
  6. Pile the chicken mixture evenly on top of prepared mushrooms. Sprinkle with mozzarella cheese. 
  7. Bake for a few minutes more until tender and the cheese is melted, about 10-15 minutes.


1.13.21: lemon honey dijon chicken


1.13.19 - ðŸ”¥week 2

1.13.18 - lentil gravy

1.13.17 - bath bombs

Wednesday, January 12, 2022

Chocolate Caramel Tart (re-run)

This blog for chocolate caramel tart was originally posted 12/17 and it's making me hungry just thinking about it - here's the original post:

I made this along with a coconut cake (one of the cakes that I filled with my new favorite thing - stabilized whipped cream, click here for that post) to take to our "Friendsmas" party (Hm, is "Friendsmas" a thing? Like Thanksmas or Palentine's Day? If it isn't, I'm taking credit for this new word LOL!).


This might look like a lot of steps, but don't let that stop you from making it - none of the steps are hard and the result is an ooey, gooey, chocolatey delicious dessert! You don't need a candy thermometer, it's an 'eyeball it until it's the right color' kind of caramel - at room temperature it's quite soft but sets up firm when chilled. Don't leave it sitting out too long tho, it'll get really soft again - still tastes really good but isn't easy to serve in wedges that way!

I got this at melskitchencafe.com. She has lot of pictures if you want to see the steps.

Ingredients:

crust:
  • 1/2 cup butter, softened to room temperature
  • 1/3 cup powdered sugar
  • 1/4 cup cocoa powder
  • pinch of salt
  • 1 large egg yolk
  • 1/2 teaspoon vanilla
  • 1 cup all-purpose flour
caramel:
  • 2 cups sugar
  • 1/2 cup water
  • 1/4 cup corn syrup
  • 1/2 cup butter, cut into pieces
  • 1/2 cup heavy cream
  • 1 teaspoon vanilla
ganache:
  • 3 ounces (1/2 cp) semisweet or bittersweet chocolate, chopped (or use good-quality chocolate chips)
  • 1/3 cup heavy cream
  • coarse or flaky salt for sprinkling (optional)
Directions:
  1. Preheat the oven to 350'.
  2. FOR THE CRUST: in the bowl of a stand mixer fitted with the paddle attachment (or in a bowl using a handheld mixer), combine the butter, powdered sugar, cocoa powder, salt, egg yolk, vanilla and flour. Mix until combined (it may be crumbly but will hold together when pressed).
  3. Crumble the mixture over the bottom of a 9 or 10" tart pan (or a pie plate). Press evenly up the sides first all the way around the edges, and then press the remaining crust mixture evenly over the bottom. (MY NOTE: I did not grease the pan and it was difficult to cleanly remove slices of  the tart - next time I will grease the pan before putting in the crust!).
  4. Place on a baking sheet and bake for 18-20 minutes. Remove from the oven and let cool.
  5. FOR THE CARAMEL: In a heavy bottomed saucepan, combine the sugar, water and corn syrup (try not to splash the mixture up on the sides of the pan). Bring the mixture to a simmer over medium heat. Cook for 10-12 minutes, until the mixture is a medium-dark amber color, tilting the pan just slightly every couple of minutes to swirl the mixture - don't swirl or tilt the pan to quickly or get the caramel mixture up high on the sides of the pan. The exact cooking time will depend on how high/low the heat is on the stove.
  6. Immediately remove the pan from the heat and carefully add the butter, cream, and vanilla. The hot mixture will bubble vigorously. Stir to combine (don't scrape the sides of the pan too much or the granules that are on the sides will get into the smooth caramel). 
  7. Pour the caramel over the baked crust. Refrigerate until the caramel is set and no longer warm, 1-2 hours.
  8. FOR THE GANACHE: Place the chocolate in a small bowl. Heat the cream in the microwave until simmering. Pour cream over the chocolate. Let the mixture sit for a minute or 2; stir to combine until the chocolate is glossy and smooth. Spread the ganache evenly over the caramel. Chill until the chocolate is set and no longer melty/soft. Sprinkle with a bit of coarse or flaky salt if desired (MY NOTE: her recipe calls for "fleur de sel" but I don't have that. Coarse or flaky works the same!). 
  9. Keep refrigerated until serving. For neat even slices, run a long chef's knife under hot water, wipe dry and slice (repeating as needed to get clean slices). 


1.12.21: TT: fennel

1.12.20 - ðŸ”¥week 2

1.12.19 - sour cream chicken enchiladas

1.12.18 - sweet dill pickles

1.12.17 - what to purge list

1.12.16 - closet organizing

Monday, January 10, 2022

Car Air Fresheners (re-run)

Today's re-run is from 3/19 - how to make car air fresheners. I still have a bunch of these wool balls, I should make some more! I still have the original ones and just add essential oils every now and then when I think about it.

Here's the original post:

There's lots going on while you're in the car and some of it is unpleasant. For example: traffic. lights. slowpoke grandpa in front of you. construction. stale air. Or maybe you're bummed you've lost that "new car smell"...


Any number of things to make your drive more difficult than it should be. Enter these easy to make air diffuser/fresheners to help change your mood, calm your mind, chill out, slow the road rage, or at the minimum at least make your car smell good!


You'll need:
embroidery thread
needle
wool felt balls
mini clothespins
essential oils
bells, buttons, beads, artificial flowers, plastic animals - lots of options!


Super easy - string a long piece of embroidery thread onto a needle; pull it thru the eye on a mini clothespin, then string a few wool felt balls leaving about an inch or so gap between the top ball and the clothespin.


After you have the number of balls you want strung, run the thread thru something that will hold them in place - I made a few different ones using a mini bell, a button, a plastic bead, and an artificial flower all with good success. I even drilled a hole thru a small plastic animal and strung that on in between the balls. So cute! Then run the thread back up thru the last felt ball and cut the thread close to the ball so you don't see a tail.


Once your air freshener is all strung, put a few drops of essential oils on each felt ball - you can do all one scent or mix them up; I did combinations of different citrus scents (grapefruit, tangerine, lime), grapefruit and lavender, tangerine and mint - whatever you like!


Clip to your car vent, or I have a bunch of stuff hanging from my rear view mirror so clipped mine to one of the existing hooks. When the scent starts to dissipate just add more essential oil drops to the balls.


1.10.21: 🔥 week 2

1.10.20 - sweet and sour cabbage


1.10.17 - kitchen tip, date your spices 


Sunday, January 9, 2022

🔥 Around the Campfire (week 2)

Dear Campers ~

I'm off camping in Florida this week, here is the recap of the re-runs I posted tho in case you missed anything - they're oldies but still goodies hahah!

Posts ~

1/2: 🔥 week 1

1/3: hemp dog collar

1/4: past tip-sy tuesday tips

1/5: funny - gym equipment

1/6: tbt: alligator pear salad

1/7: cauliflower pizza

1/8: candy bouquet 

Because I'm scheduling this ahead of time I have no idea what's on tap for dinner ideas! Here's a couple good recipe suggestions if you're looking for inspo ~


Hope you had a great first week of January - no one has volunteered to guest blog (!) so there'll be a few more days of re-runs, hope you're enjoying some old posts! I've had fun looking back down the blog's memory lane ;)

Sincerely ~

Jill
camp counselor

1.9.21: pub soup
1.9.20: TBT: pear salad


Saturday, January 8, 2022

How to Make a Candy Bouquet (re-run)

This was originally posted 8/16, I haven't made one since and forgot about the idea - it's so fun I have to remember it for the next gift I need:

Brooke and I made this candy bouquet to take the birthday party last weekend (see here for the desserts we made) - it's a pretty easy project and makes a great, fun gift or centerpiece.


I found this flower pot at a dollar store, you want the container to be weighted or else it will tip over when you put the candy in it. I bought a small piece of floral foam that fit in the pot but you can fill it with whatever you can find that will hold the candy in place. Next time I will tape the foam down (criss cross tape across the top of foam and stick to the edge of the container), when I started adding the candy the foam wanted to pop out - I just kept shoving it back in and eventually it held. Cut up small squares (maybe 4" or so, does not have to be perfect cuz you're scrunching them up) of tissue paper, I sort of folded them and bunched them up so they are ruffly, and attach them to the foam around the edge of the pot. Note: I burned my finger bad doing this so be careful! I still have a blister on the whole top of my index finger - my advice is to use a skewer or something other than your finger to press the tissue squares in place!


Next attach the candy to bamboo skewers with clear packing tape - note for the rolos we just stuck individual ones onto the tip of the skewer. Place the largest candy in first -  this is just like if you're flower arranging, put in the green cover that covers the foam, add the eye-catching large blooms, then the medium flowers, and last fill in with the small filler - followed by the medium sized candy in wrappers and lastly I filled in with the shooty rolos. Isn't it cute?


Friday, January 7, 2022

Cauliflower Pizza (re-run)

This post is from 2016 -  funny that I'm trying to talk you into trying cauliflower pizza back in '16 and now it's such a common thing! By now you've probably tried pizza crust made out of cauliflower, but if not this is a great recipe I still follow. 

Here's the original post:

Ok, stay with me here - I love this and it's a much healthier version of pizza ... even if you aren't looking for a healthier version of pizza it's worth trying! I know it sounds weird but it's good - Dave will even eat it (when I won't let him order regular pizza!) and seems to like it - or doesn't complain about it if he doesn't haha :).  After baking the crust for a few minutes add whatever toppings you like (we like mushroom, canadian bacon and fresh tomatoes) - or you can top the crust with just cheese (no sauce) and bake it for a few more minutes, then cut into "breadsticks" which is also yummy and makes a good side dish. C'mon, try it :)

I follow this recipe (click here to see original post), but there are many recipes online if you want to check them out. Note: after microwaving the cauliflower I press paper towels on it to remove as much moisture as possible, I don't put it on a towel like the recipe says.


Ingredients: 
  • 1 head cauliflower, stalk removed
  • 1/2 cup shredded mozzarella
  • 1/4 cup grated Parmesan
  • 1/2 teaspoon dried oregano
  • 1/2 teaspoon kosher salt
  • 1/4 teaspoon garlic powder
  • 2 eggs, lightly beaten

Directions:

Preheat the oven to 400 degrees F. Line a baking sheet with parchment paper.
Break the cauliflower into florets and pulse in a food processor until fine. Steam in a steamer basket and drain well. (I like to put it on a towel to get all the moisture out.) Let cool.
In a bowl, combine the cauliflower with the mozzarella, Parmesan, oregano, salt, garlic powder and eggs. Transfer to the center of the baking sheet and spread into a circle, resembling a pizza crust. Bake for 20 minutes.
Add desired toppings and bake an additional 10 minutes.
Recipe courtesy of Katie Lee


Read more at: http://www.foodnetwork.com/recipes/katie-lee/cauliflower-pizza-crust.html?oc=linkback

1.7.21: no bake cookie bars by Brooke 

1.7.20: Tip-sy Tuesday: wrapping paper filler

1.7.19: the short-lived segment of Man-day Monday

1.7.18: breakfast egg muffins

1.7.17: grocery store bouquet

1.7.17: fruitcake squares (don't be afraid, they're good!)


Thursday, January 6, 2022

TBT: Alligator Pear Salad (re-run)

I originally posted this 'throw back Thursday' re-run recipe in 2020. I kind of forgot about making recipes from my super old cookbooks and want to start doing them again - like this one for 'alligator pear salad' they are fun to read the recipes and try to interpret what they intended for the dish to be hahah. 

Here's the post from 2/20: 

Alligator Pear? Are you, like me, wondering what the heck that is? Is it an old variety of pear we don't have now? 

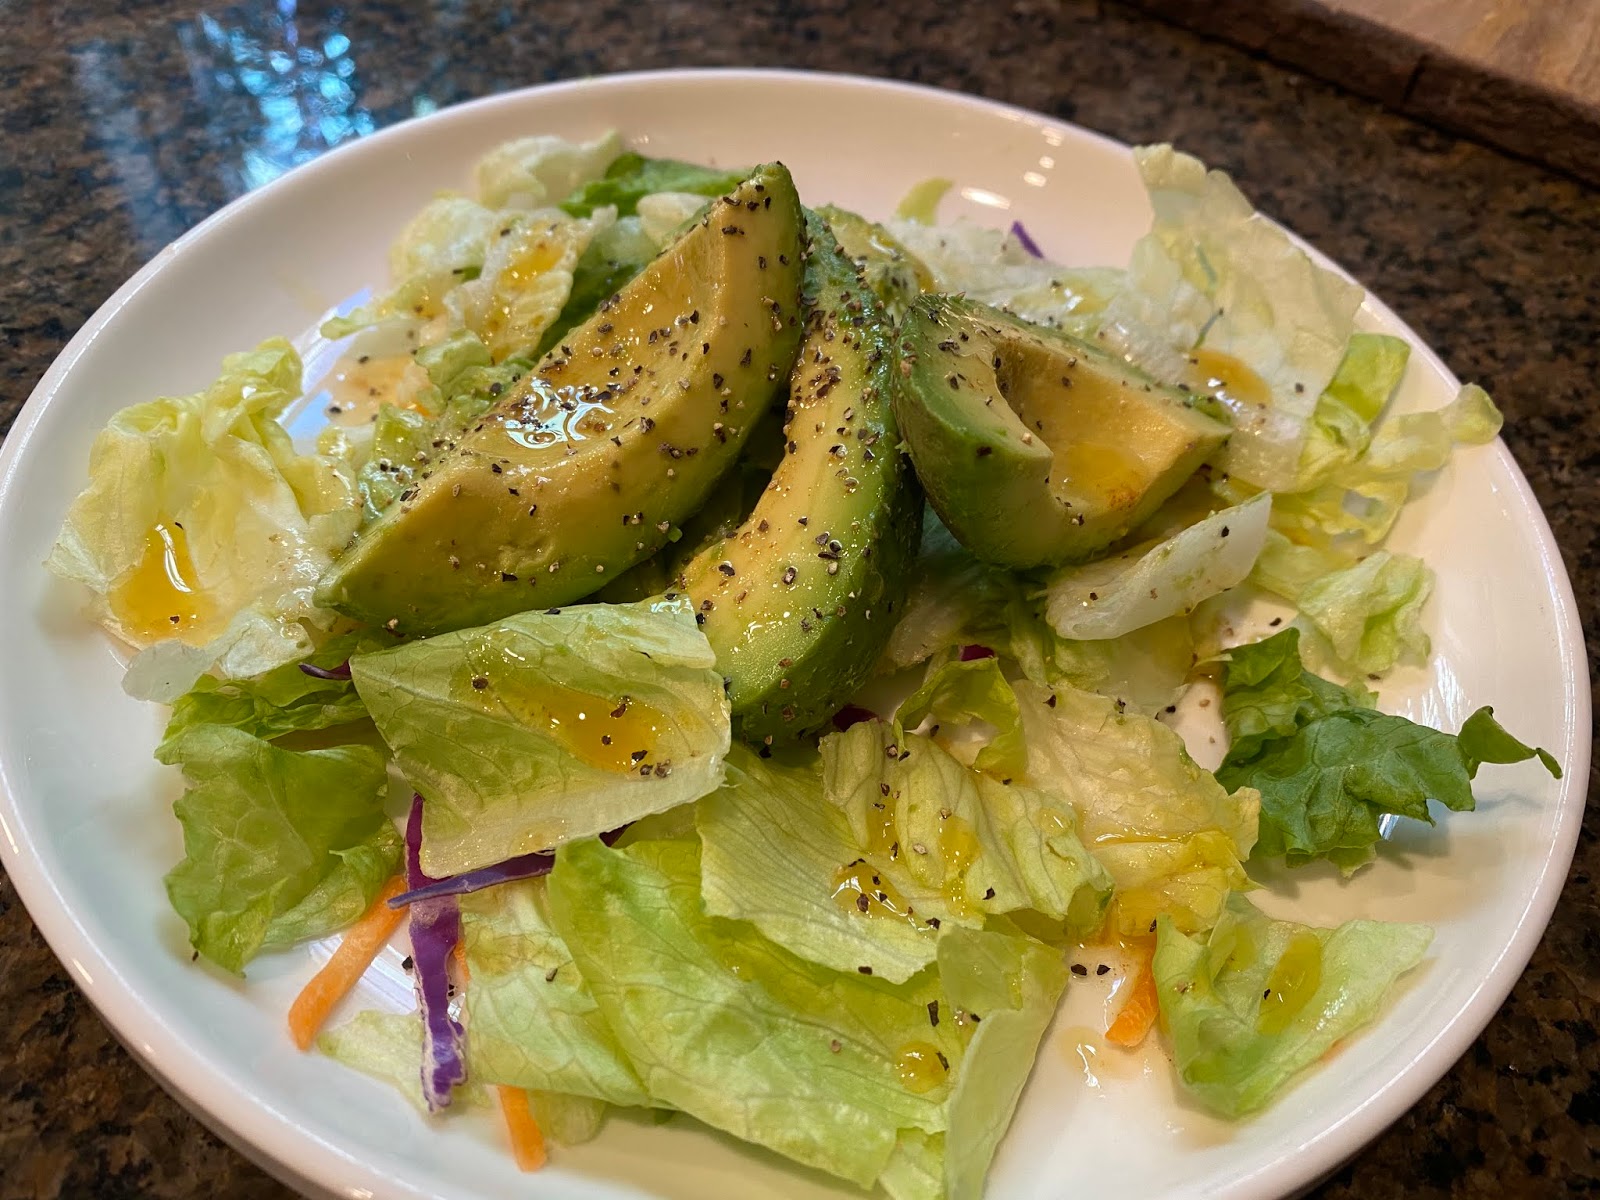
Nope - it's an avocado! Why they didn't just call it an avocado I cannot say - I guess an avocado does look like a pear with alligator hide haha. Whatever the reason, it's in my new/old cookbook and today's 'Throw-Back Thursday" recipe - alligator pear salad is just an avocado sliced into wedges, placed on top of lettuce leaves, drizzled with dressing. 

Tasty for sure - only thing I did different is used bagged salad so there's a little bit of carrot and radicchio in the mix, and I sprinkled on coarse salt and pepper. The recipe calls for French dressing which is not like our present day creamy ketchup-based French dressing - the one in the book is more oil and vinegar based (click the above link for the recipe). For now just top with whatever dressing you want (the current French dressing would also be good!).


Here's the official recipe as written in the cookbook:

ALLIGATOR PEAR SALAD

  • 2 alligator pears
  • lettuce leaves
  • french dressing

The alligator pear, or avocado, is now available in all markets at very reasonable prices throughout the greater part of the year. Cut each pear into six pieces, giving wedge-shaped sections, and if these are too large, cut each section again lengthwise. Peel and arrange wedges on beds of lettuce leaves. Either French dressing or Russian dressing may be used, but the fruit is so rich that French dressing is preferred by most people.

1.6.21: povitica (apple cinnamon bread)

1.6.20: crocheted cowl