Wednesday, March 22, 2023

SM: Gluten-Free Pineapple Upside Down Cupcakes

Macey can't eat gluten so has been shorted on getting goodies from me, when I saw a gluten-free cake mix at the grocery store I thought I'd give it a try and make her pineapple upside-down cupcakes (I was going to make a whole cake and cut out a piece for us to try before giving the rest to her but that's kinda rude hahah - cupcakes allows me to try them without anyone noticing!), I've not experimented with gluten-free baking and learned a couple things. 

Sidenote: I'm not sure if cupcakes are considered a 'starch', more like a sweet/sugar, but since this gluten-free mix includes brown rice flour, potato starch, and tapioca starch - and I'm doing starch month - I'm including it!

I followed the directions on the box except I replaced half of the milk with pineapple juice. The box said to bake for 28-34 minutes and that seemed way too long to me for cupcakes so I set the timer at 15 minutes thank goodness - they actually felt a little over-baked to the touch at 15.

To make the cupcakes: spray a 12-cup muffin tin with nonstick spray. Cut 1/2 stick butter into cubes, put an even amount of cubes into each muffin cup. Turn on the oven to 350' and put the tin into the oven as it's heating. Pull it out when the butter is melted and add 1 teaspoon brown sugar to each cup. Let the sugar melt a bit and stir it into the butter. Put a maraschino cherry in the center of each cup, surround it with pieces of pineapple (or I like to use crushed but didn't have that on hand), set aside until you make the cake batter. 

Once you've mixed the batter, spoon it evenly overtop the fruit. Bake in preheated oven for less than 15 minutes, next time I'll check them at 13 minutes. When done, turn out onto a cooling rack. 


Macey was super surprised and happy, she sent me a video of her eating one as soon as Dave delivered them and before he even left the driveway haha. She texted this instant review: 

Oh my gosh, they’re so good! If you didn’t know they were gluten-free, you probably wouldn’t have known it. It is so very similar to regular pineapple upside down cake. Honestly, they are a little more dry then normal, but that’s not you that’s the cake. And it’s missing the binder a.k.a. the gluten so it actually is a little more dry naturally. All of the breads and stuff aren’t as moist but 🤷‍♀️ I’ve been eating this way for a while now, I feel like I’m finally acclimated to the taste of gluten-free… seriously, thank you so so much! 

update 3/23/23: I've learned since making these that there are some things you can do to help with the dryness of gluten-free things like adding more fat, baking at a lower temp, and adding plain greek yogurt or sour cream. I'll post more about this in a few days but wanted you to have the info sooner if you want to make these ahead of time!


Tuesday, March 21, 2023

SM/Tip-sy Tuesday: bleached vs unbleached flour

Today's Tip-sy Tuesday tip is about the difference between bleached and unbleached flours - I'd never really given this much thought and have bought both without thinking they aren't the same. Here's some info, just FYI: 

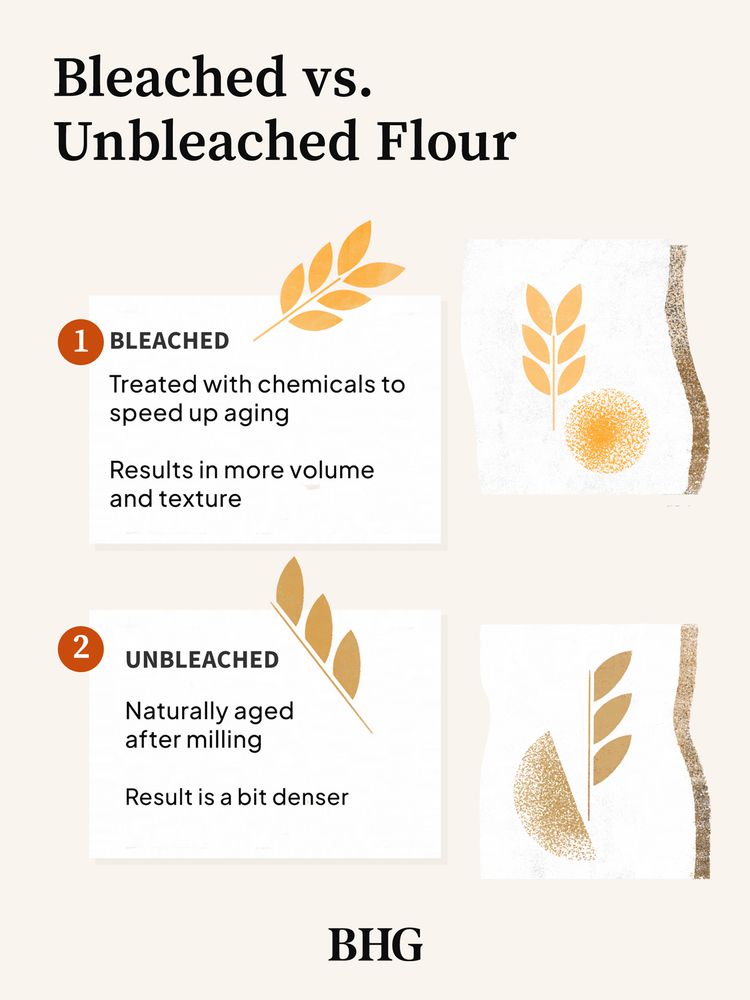
Bleached and unbleached flour are both milled flour; the difference is how they're produced. All milled flour will bleach, or turn white, on its own when allowed to stand exposed to air (unbleached flour). Because this takes time, bleaching agents such as chlorine dioxide and benzoyl peroxide are added to the flour. The resulting bleached flour is more white in color and has a slightly softer texture. If you're buying unbleached flour, it's just skipped the step of the added chemicals and is naturally aged after milling. Unbleached flour will have more of an off-white or yellow tint that fades into lighter white color as it's exposed to oxygen.


Bleached flour and unbleached flour can be used interchangeably in recipes. However, baked goods made with bleached flour contain proteins that have been altered, which helps in forming gluten bonds when baking. For example, the more glutinous your bread dough is (from using bleached flour), the easier it will be to handle because it's less sticky. The result will also have more volume and texture, whereas a loaf made with unbleached flour might be a bit denser. Those with a sensitive palate may also taste a slight difference if bleached flour is used (due to the chemicals added), but otherwise, the flavor will turn out the same.

found here  at bhg.com


3.21.22: large dish microwave cozies

3.21.21: ðŸ”¥ week 12

3.21.20: shrimp salad


3.21.19: Jen's Hello Fresh Update


3.21.17: watch Mark from Paul's Photo talk about framing your photos and prints

3.21.16: 2 different bunny cakes for Easter and Spring

Monday, March 20, 2023

SM: Broccoli Cornbread

This cornbread with broccoli sounds a little weird, I know - but Dave and I both really liked it and it'll go into the 'make again' file. I served it with grilled chicken and a chopped salad, and ate leftovers for breakfast with a basted egg on top and that was good too (yep, also a little weird but that's me haha). 


I cut the ingredients in half and baked in a small baking dish instead of a skillet, and baked it for about 20 minutes until baked thru and lightly browned. Brush the melted butter up the sides of the dish a bit, or spray with non-stick cooking spray. The batter is super thick and I had to press it into the pan with a spatula (well I actually did it with my hands but that sounds a little gross haha). 


  • 2 eggs
  • 1 cup 4% cottage cheese
  • 3 cups frozen chopped broccoli, thawed
  • 3/4 cups chopped onion 
  • 1/2 cup melted butter, divided
  • 2 packages (8.5 oz. each) cornbread mix
Combine eggs, cottage cheese, broccoli, onion, 6 T. butter, and cornbread mix until well blended. Pour remaining butter into a 10" oven-proof skillet, add batter. Bake at 350' 40-45 minutes or until golden. Cut into wedges and serve warm. 


found here at taste of home 

3.20.22: ðŸ”¥ week 12

3.20.21: corned beef and cabbage soup

3.20.20: pork chops with sauerkraut 

3.20.19: peanut blossom cookies

3.20.18: Dottie F. Bunny (Mary knitted it for me, so cute and so much work!)

3.20.17: how to hinge mat your photos or artwork

3.20.16: boneless coq au vin


Sunday, March 19, 2023

🔥 Around the Campfire (week 12)

Dear Campers ~

Here's a quick recap of what happened at 'starch madness' last week in case you missed any starchy goodness:

Posts ~

3/12: 🔥 week 11

3/13: carrot candy

3/14: TT: starchiest food list

3/15: irish soda bread

3/16: deco mesh wreath

3/17: crock pot baked ziti

3/18: words

What's Cooking ~

  • JAR pot roast, mashed potatoes, roasted carrots, horseradish sauce (I added some photos and notes to the original pot roast post if you want to see the updates)
  • crock pot baked ziti, salad
  • leftovers from both the above dinners!
  • tuna noodle casserole 
  • creamy risotto with shrimp, steamed spinach

That's it for this week, hope you'll check back often for more recipes (lots of recipes this month!) and maybe a craft or two. Bye!

Sincerely ~

Jill

camp counselor


Friday, March 17, 2023

Crock Pot Ziti (meat optional)

I made this for dinner the other night, mostly because I wanted to see what cooking dried pasta in the crockpot would be like. I am very on the fence about the results - yes thee pasta cooked in the sauce but it went from almost done to over-done in a few minutes! So it wasn't 'al dente' by any means so that made the texture off for me, but everyone else seemed to like it and Dave even requested leftovers for the next day which he rarely does. If I make it again this way I will keep a much closer eye on it. I think my mistake was turning it to the warm setting instead of serving it right away.
 

This might seem a little complicated because of how long I'm making this post, but stick with me - it's actually really easy I'm just giving you some options:

1) You could skip doctoring the jarred marinara sauce and just use it as is along with the cheese mixture and uncooked pasta in the crock pot, add a little water tho to make sure all of the noodles are covered. 

2) I browned the sausage links in a pan until brown on all sides, remove from the pan and then continue with making the sauce. Put the sausage and frozen meatballs in the sauce once you have it made and it's simmering on the stove until the sausage is cooked thru. I served the meat in some sauce on the side instead of adding to the crock pot. 

3) If you add meat to the sauce - when you're ready to put the ingredients into the crock pot, scoop sauce from around the meat and transfer it to the crock pot. I did it this way to flavor the sauce but you can skip this step! Or put one jar of sauce in a pan with the meat, and use one jar of sauce for the crock pot pasta. 

This makes a lot of sauce, enough for the crock pot pasta with plenty leftover to serve on the side with or without the meat. 

  • 1 lb. Italian sausage links, cut in half, optional 
  • 1 small bag frozen meatballs, optional 
    • 1 T. oil 
    • 1/2 onion, finely chopped 
    • 8 oz. sliced mushrooms
    • 1/2 t. garlic
    • 2 jars marinara sauce
    • 16 oz. tomato sauce
    • 1 (15 oz.) can diced tomatoes
    • 1 small can tomato paste
    • 2 t. Italian seasoning
    • 2 (15 oz) cans water
    • 2 T. sugar
    • salt and pepper to taste
    •  1/2 (15 oz.) container whole-milk ricotta cheese
    • 4 oz. cream cheese, softened
    • 1/4 cup sour cream
    • 1 t. Italian seasoning 
    • 1/2 t. crushed red pepper flakes, optional 
    • salt and pepper to taste
    • 2 cups uncooked ziti
    • 1 cup grated parmesan cheese, plus additional for serving if desired
    Make sauce: if you are using the sausage - in a large pot brown the links on all sides and remove from the pan. Cook the onion, mushrooms, and garlic in a little oil in the same pan for a couple minutes until softened. Add marinara sauce, tomato sauce, canned tomatoes, tomato paste, Italian seasoning, 2 cans of water, and sugar; stir to combine. Add salt and pepper to taste. Let in simmer for as long as you want to blend the flavors. You can use it immediately if you want, or let it hang out on the stovetop for an hour or two. If adding the meat, put the links and meatballs into the sauce and cook until the sausage is no longer pink and the meatballs are heated thru.

    Using an electric mixer, combine ricotta cheese, cream cheese, and sour cream. Add seasonings.

    Put a layer of sauce into the bottom of a 5-quart crock pot. Top with about 1/3 of the uncooked pasta. Add 1/2 of the ricotta mixture and spread over the sauce. Sprinkle with some parmesan. Add another layer of sauce, 1/3 of the uncooked ziti, and the remaining ricotta mixture spread evenly. Sprinkle on the remaining 1/2 cup parmesan. Add remaining uncooked pasta, top with remaining sauce. Make sure the noodles are completely covered by the sauce so they'll cook correctly. 

    Cover with lid and cook on HIGH for 2 - 2 1/2 hours, or LOW for 3 1/2 - 4 hours, or until pasta is tender. 


    Thursday, March 16, 2023

    Deco Mesh Wreath

    Taking a one day break from 'starch madness' to share this quick easy dollar store craft just in time for St. Patrick's Day tomorrow. We're having dinner here Friday night (sticking with my old school traditional meal of corned beef, cabbage, carrots, and potatoes, click here for recipes) and I was surfing around for easy decorations - I feel like I've done so many St. Patty's crafts that I figured I'd probably just re-use an old one haha but then I saw this mesh wreath idea, watched a couple minutes of a video on the technique and immediately hit up the local dollar store. 


    All you need is a wire wreath frame, this one is 14"; 6 rolls of mesh ribbon, I planned to mix a couple different greens but all they had was this lighter green and some sparkly white so I bought 4 green and 2 white; pipe cleaners and scissors. 

    I didn't video myself doing this but click here for the one I followed, it's very easy but too hard to describe so watch the video. You attach one end of the ribbon onto the wire form using a piece of a pipe cleaner, then draw up loops thru the rows of the wreath form and repeat over and over. Once the wreath is full separate and fluff each loop, but be careful to not pull up on the loops because they are just sitting in between the wires, nothing is holding them in place. I took some pictures but really, just watch the video haha. 


    I laid it in the middle of the table as a centerpiece and just set foam shamrocks on top. Then I found a gold vase and put dollar store fake flowers in it and placed in the center of the wreath. Last I poked Rolos onto bamboo skewers and stuck into the vase (I wanted gold coins but couldn't find any, and I like how the shooting Rolos look). 


    the video I followed is on youtube under 'deco mesh wreath' by Crafts with Chris if the link above doesn't work. 


    3.16.22: leprechaun veggie tray (by Jen) 

    3.16.21: TT steamer basket

    3.16.19: St. Paddy's 2019 Plan

    3.16.18: felt shamrocks

    3.16.17: green tassel earrings

    3.16.16: leprechaun coloring page 

    Wednesday, March 15, 2023

    SM: Irish Soda Bread

    I always follow Christa's recipe for Irish soda bread (which I promised I wouldn't share), hers has more of a quick bread texture and everyone loves it. So when I was googling for any different recipes for our St. Patrick's Day meal and I came across this recipe from Ina Garten for a bread that is more like sandwich bread than quick bread I thought it might be nice to have a second option in the Irish soda bread department. I haven't made it yet but Ina can be trusted and I'm comfortable sharing her recipe for you in time for St. Paddy's day! 

    • 4 cups all-purpose flour, plus extra for currants
    • 4 T. sugara
    • 1 t. baking soda
    • 1 1/2 t. kosher salt
    • 4 T. (1/2 stick) cold unsalted butter, cut into 1/2" dice 
    • 1 3/4 cups cold buttermilk, shaken
    • 1 extra-large egg, lightly beaten
    • 1 t. grated orange zest
    • 1 C. dried currants
    1. Preheat the oven to 375'. Line a sheet pan with parchment paper.

    2. Combine the flour, sugar, baking soda, and salt in thee bowl of an electric mixer fitted with the paddle attachment. Add the butter and mix on low speed until the butter is mixed into the flour.

    3. With a fork, lightly beat the buttermilk, egg, and orange zest together in a measuring cup. With the mixer on low speed, slowly add the buttermilk mixture to the flour mixture. Combine the currants with 1 T. of flour and mix into the dough. It will be very wet. 

    4. Dump the dough onto a well-floured board and knead it a few times into a round loaf. Place the loaf on the prepared sheet pan and lightly cut an X into the top of the brea with a serrated knife. Bake for 45-55 minutes, or until a cake tester comes out clean. When you tap the loaf, it will have a hollow sound.

    5. Cool on a baking rack. Serve warm or at room temperature. 

    recipe found here at foodnetwork. also click to read reviews and a few suggestions. 


    Tuesday, March 14, 2023

    SM/Tip-sy Tuesday: Foods High in Starch

    For today's tip-sy tip I found a list of foods high in starch, which plays into this month's theme of 'starch madness' (and it's just reading for information, not a recipe whew - tired of starch recipes yet?!)

    image found here

    This info is from an article I saw at healthline.com, some of these I didn't realize are higher in starch than some of their carb counterparts. If you want to read the article and the info that breaks down each of these foods click here, otherwise I'll just list them (note: higher in starch doesn't mean un-healthy, I worried when I saw oats and whole wheat on this list!):

    1. Cornstarch

    2. Rice Krispie Cereals

    3. Pretzels

    4. Millet Flour

    5. Sorghum Flour

    6. White Flour

    7. Saltine Crackers

    8. Oats

    9. Whole Wheat Flour

    10. Instant Noodles

    11. English Muffins

    12. Bagels

    13. White Bread 

    14. Tortillas 

    15. Shortbread Cookies

    16. Rice

    17. Pasta

    18. Corn

    19. Potatoes


    3.14.22: ManDay Monday: chicken salad

    Monday, March 13, 2023

    Starch Madness: Carrot Candy

    The original recipe calls for 8 carrots, but after I cut the first big carrot into super thin rounds I realized that I didn't need 8 carrots worth of 'candy'. The rounds do shrink up a lot, so next time I'll do maybe 2 or 3 carrots on a larger pan. The carrot flavor is intensified and the texture is chewy - a great addition to a salad or just to snack on; easy to make once you've sliced the carrots. I used a v-slicer/mandolin, if you use a knife try to cut them into equal thickness slices. 


    I only did 1 carrot but if you want to make a whole batch I don't think they'll go to waste (as long as you like carrots that is hahah, if you didn't why would you want to make them in the first place !). 

    • 8 medium carrots, about 1 pound
    • 1 T. olive oil
    • 1/2 t. salt

    Preheat the oven to 225'. Slice the carrots into 1/8" rounds and toss with oil and salt, spread onto a baking sheet in a single layer. Bake, stirring occasionally, until the slices are slightly shriveled, dehydrated, but still soft and chewy. Watch that they don't burn or stick to the pan. 

    Check them at 2 hours, then continue baking until they are as chewy and crisp as you like, another 30 to 60 minutes. Cool completely before storing in an air-tight container 

    Note: I think my slices might have been thinner than 1/8", they were done in 1 1/2 hours. 


    recipe found at VB6 (Vegan Before 6)

    3.13.22: ðŸ”¥ week 11 


    3.13.19: island cupcakes


    3.13.17: shamrock butterflies and paper garland (why did I post two that day? hmmm...)