Monday, September 30, 2024

Felt Photo Album Cover

When cleaning out my craft closets I came across another project I used to make all the time as gifts - felt-covered photo albums. I'd cut out a simple felt shape (scottie dog was a favorite!) and add sequins and beads, then hand sew it to a piece of felt large enough to wrap around an album. For the inside pieces I cut a coordinating color of felt strips and sewed them on either end of the outside cover to create pockets to hold the album in the cover. Easy! 

In this example the album is 6.25" tall by 4.5" wide and has maybe 20 pages. The outside cover is blue felt cut 6.75" by 10.25" wide (to wrap around the album). Inside green fabric pieces are each 6.75" by 2.5". Scottie is out of dark gray felt, with sequins and little seed beads sewn on top. 


the underside of the scottie appliqué - the front of the album covers it up 

PS: HAPPY BIRTHDAY MARY BFFE!!! 

9.30.23: words

Sunday, September 29, 2024

🔥 Around the Campfire (week 39)

Dear Campers ~ 

Here's a quick recap in case you missed anything at camp last week:

Posts ~

9/22: 🔥 week 38

9/23: felt cage cover

9/24: TT stop a cake from sliding

9/25: halal cart-style chicken and rice 

9/26: miniature cheesecakes with GF oreo crust

9/27: homemade strawberry sauce 

9/28: words (best times)

What's Cooking ~

  • crockpot pork chops, mashed potatoes, sautéed green beans
  • grilled tuna, greek salad 
  • beef, mushrooms, and broccoli, sticky rice 
  • grilled chicken, creamy cucumber and tomato salad 
  • chicken, spinach and mozzarella sausages, orzo salad 
  • cheese ravioli with roasted cherry tomatoes and peas, caesar salad

That's it for this week! See you next week for more projects, crafts, recipes, whatever we can think of to make at camp - bye :)


Sincerely ~

Jill
camp counselor


Friday, September 27, 2024

Homemade Strawberry Sauce

I made this super quick and easy strawberry topping for the mini cheesecakes I made for Brooke's birthday (click here for that post) - you can change the thickness by adding more or less water, the recipe as written is super thick so I added 1 Tablespoon of water at a time until it was the texture I wanted. 

Recipe found here at Sally's Baking Addiction, I'm just copy/pasting since I didn't change anything other than adding more water. 

Homemade Strawberry Sauce (Topping)

5 Stars4 Stars3 Stars2 Stars1 Star4.9 from 60 reviews
  • Author: Sally
  •  
  • Prep Time: 10 minutes
  •  
  • Cook Time: 8 minutes
  • Total Time: 18 minutes
  •  
  • Yield: 1 and 1/2 cups

You can use fresh or frozen strawberries in this versatile strawberry topping sauce. This topping is fresh, quick, & easy and gives desserts that little something extra!

Ingredients

  • 1 Tablespoon cornstarch
  • 3 Tablespoons (45ml) warm water
  • 1 lb strawberries, hulled and sliced in half (you can use frozen; don’t thaw)
  • zest and juice from 1/2 small lemon (see note)*
  • 1/4 cup (50ggranulated sugar

Instructions

  1. Whisk the cornstarch and water together until all the cornstarch has dissolved. (I just use a fork to mix—very easy.)
  2. Place the cornstarch mixture, along with the rest of the ingredients, into a small saucepan over medium heat. Using a wooden spoon or rubber spatula, stir the mixture as it cooks. Break up some of the strawberries as you stir.
  3. Bring it to a simmer and allow to simmer for 5 minutes, stirring constantly. After 5 minutes, remove pan from the heat and allow to cool. The mixture will thicken as it cools.
  4. You can serve the sauce warm before it cools completely if desired, or store in the refrigerator for up to 1 week. Strawberry topping will be thick after refrigeration, so microwave for 15 seconds or warm on the stove to thin out, if desired.

Notes

  1. Freezing Instructions: After the strawberry sauce cools completely, freeze in a freezer-friendly container for up to 3-6 months. Thaw on the counter or in the refrigerator. Warm up in the microwave or on the stove, if desired.
  2. Strawberries: You need a 1 pound carton of strawberries, which is 16 oz, 3-4 cups, or 450g.
  3. Other berries: You can substitute blackberries for the strawberries with no other changes to the recipe. Cherries work too—pit and halve them first. For other berries, try my raspberry sauce and blueberry saucerecipes.
  4. Lemon: Lemon brightens the flavor of the strawberry topping. You need about 2 teaspoons fresh lemon juice and 1 teaspoon lemon zest. Feel free to skip the lemon zest if needed.
  5. Chunks: The amount of strawberry chunks is up to you. For less chunks, mash up the strawberries a little more as the sauce cooks. For no strawberry chunks, blend the finished sauce in a blender until you reach your desired consistency.

Thursday, September 26, 2024

Miniature Cheesecakes with GF Oreo Crust

I've posted mini cheesecakes before, but this time I made half using gluten-free oreos for the crust so Macey could eat them. I read that you need to add extra melted butter to the gluten-free crumbs so I did, but found them to be a tiny bit oily. Having said that tho, everyone raved about them and most went for seconds and thirds without a mention of oiliness or noticed that they were gluten-free. 

In a food processor or blender, pulse 24 gluten-free oreos into a fine crumb (remove any large pieces that remain). Stir in 4 T. melted butter until you have a uniform mixture. This makes enough for a 9" pie or 24 miniature cheesecakes. (Note I had leftover oreo mixture). 

click here for the mini cheesecake post with pics. 

click here for source of this recipe found at all recipes. 

Ingredients

  • 1 (12 ounce) package vanilla wafers

  • 2 (8 ounce) packages cream cheese

  • ¾ cup white sugar

  • 2 large eggs

  • 1 teaspoon vanilla extract

  • 1 (21 ounce) can cherry pie filling

Directions

  1. Gather all ingredients.

  2. Preheat the oven to 350 degrees F (175 degrees C). Line two 24-cup miniature muffin tins with paper liners.

  3. Crush vanilla wafers. Press 1/2 teaspoon of crushed vanilla wafers into each paper cup.

  4. Beat cream cheese, sugar, eggs, and vanilla in a mixing bowl until light and fluffy. Fill each miniature muffin liner with this mixture, almost to the top.

  5. Bake in the preheated oven for 15 minutes until the cheesecake is set. Cool. Top with a teaspoonful of cherry pie filling.

  6. Serve and enjoy!

Nutrition Facts 

             
calories95
total fat 5g 
saturated fat 2g 
cholesterol 17mg 
sodium 63mg 
total carbohydrate 12g 
dietary fiber 0g 
total sugars 6g 
protein 1g 
vitamin c 0mg 
calcium 12mg 
iron0mg 
potassium 35mg

9.26.23: buttercream frosting

9.26.22: missed again

9.26.21: 🔥week 39

9.26.20: anniversary drawing

9.26.19: alfredo and pink sauces

9.26.18: german chocolate cheesecake

9.26.17: paper sunflowers

9.26.16: wood display box 

9.26.15: how to use a hulk sized zucchini


Wednesday, September 25, 2024

Halal Cart-Style Chicken and Rice with White Sauce

I've never had Halal Cart Chicken and Rice but when this recipe showed up in my email inbox I thought it sounded great and gave it a try. So good!!! My photo doesn't do it justice (well maybe it does, I've never had it so I don't actually know how close my interpretation is!), it looks a little messy and the sauce appears glopped on hahaha, but we highly recommend this dish! I pretty much followed the recipe as written other than I used dried oregano, minced a smaller amount of garlic, and omitted the hot sauce. 


Ingredients:

For the chicken:

  • 2 T. fresh lemon juice
  • 1 T. chopped fresh oregano
  • 1/2 t. ground coriander seed
  • 3 garlic cloves, roughly chopped (about 1 1/2 Tablespoons)
  • 1/4 cup light olive oil
  • kosher salt and ground black pepper
  • 2 pounds boneless, skinless chicken thighs, trimmed of excess fat (6 to 8 thighs)
  • 1 T. vegetable or canola oil 

For the rice:

  • 2 T. unsalted butter
  • 1/2 t. turmeric
  • 1/4 t. ground cumin
  • 1 1/2 cups long-grain or Basmati rice
  • 2 1/2 cups chicken broth 
  • kosher salt and ground black pepper 

For the sauce:

  • 1/2 cup mayonnaise
  • 1/2 cup Greek yogurt
  • 1 T. sugar 
  • 2 T. white vinegar
  • 1 t. lemon juice
  • 1/4 cup chopped fresh parsley
  • kosher salt and ground black pepper

To serve:

  • 1 head iceberg lettuce, shredded
  • 1 large tomato, cut into wedges
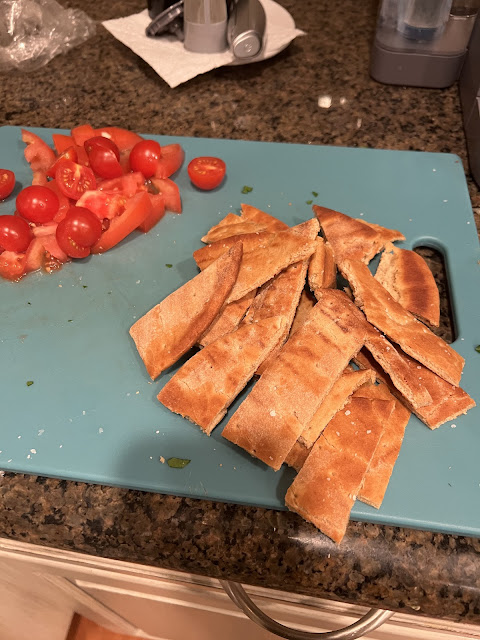
  • fluffy pocketless pita bread, brushed in butter, lightly toasted, and cut into 1 x 3" strips
  • Harissa-style hot sauce, for serving 

Directions

  1. For the chicken: Combine the lemon juice, oregano, coriander, garlic, and olive oil

    in a blender. Blend until smooth. Season the marinade to taste with kosher salt and 

    black pepper. Place the chicken in a 1-gallon zipper-lock bag and add half of the 

    marinade (reserve the remaining marinade in the refrigerator). Turn the chicken to 

    coat, seal the bag, and marinate the chicken in the refrigerator for at least 1 hour and 

    up to 4 hours, turning occasionally to redistribute the marinade (see Note).

  2. Remove the chicken from the bag and pat it dry with paper towels. Season with 

    kosher salt and pepper, going heavy on the pepper. Heat the oil in a 12-inch heavy-

    bottomed cast iron or stainless-steel skillet over medium-high heat until it is lightly

    smoking. Add the chicken pieces and cook without disturbing until they are lightly 

    browned on the first side, about 4 minutes. Using tongs, flip the chicken. Reduce 

    the heat to medium and cook until the chicken is cooked through and the center of 

    each thigh registers 165°F. on an instant-read thermometer, about 6 minutes longer. 

    Transfer the chicken to a cutting board and allow to cool for 5 minutes.

  3. Using a chef’s knife, roughly chop the chicken into 1/2- to 1/4-inch chunks.

    Transfer to a medium bowl, add the remaining marinade, cover loosely with plastic, 

    and refrigerate while you cook the rice and prepare the sauce.


  4. For the rice: Melt the butter over medium heat in a large Dutch oven. Add the

    turmeric and cumin and cook until fragrant but not browned, about 1 minute.

    Add the rice and stir to coat. Cook, stirring frequently, until the rice is lightly 

    toasted, about 4 minutes. Add the chicken broth. Season to taste with salt and 

    pepper. Raise the heat to high and bring to a boil. Cover, reduce to a simmer, 

    and cook for 15 minutes without disturbing. Remove from the heat and allow 

    to rest until the water is completely absorbed and the rice is tender, about 15 minutes.

  5. For the sauce: In a small bowl, combine the mayonnaise, yogurt, sugar, vinegar, 

    lemon juice, parsley, and 2 teaspoons black pepper. Whisk to combine. Season to 

    taste with salt.

  6. To serve: Return the entire contents of the chicken bowl (chicken, marinade, and

     all juices) to the skillet. Cook over medium-high heat, stirring occasionally, until

     heated through. To serve - divide the rice, lettuce, tomato, and toasted pita bread 

    evenly among four to six plates. Pile the chicken on top of the rice. Top with the 

    white sauce and hot sauce. Serve immediately, passing extra sauce at the table.


Note: Do not marinate the chicken longer than 4 hours or it’ll get a mushy

 texture. If you must delay cooking the chicken for any reason, remove it 

from the marinade, pat it dry with paper towels, and refrigerate until ready

 to cook.


recipe and more information found here at 
seriouseats

9.25.23: Ursula costume

9.25.22: oops - missed a day!