Monday, April 17, 2023

Memorial Pet Blanket

My niece had the idea to make a blanket out of her dog's clothes and costumes but didn't know how to go about doing it and asked if I'd help her. We brainstormed for a while and I had the thought to sew pieces of the clothes to big fabric squares and then sew the squares together, like a quilt. I asked Claudette a bunch of questions, like figuring out how much material we would need - and she gave me quite a few ideas of how to sew the patches of fabric to the squares and layer different things together, which I hadn't thought of and opened my mind to more creative ways of going about this. 

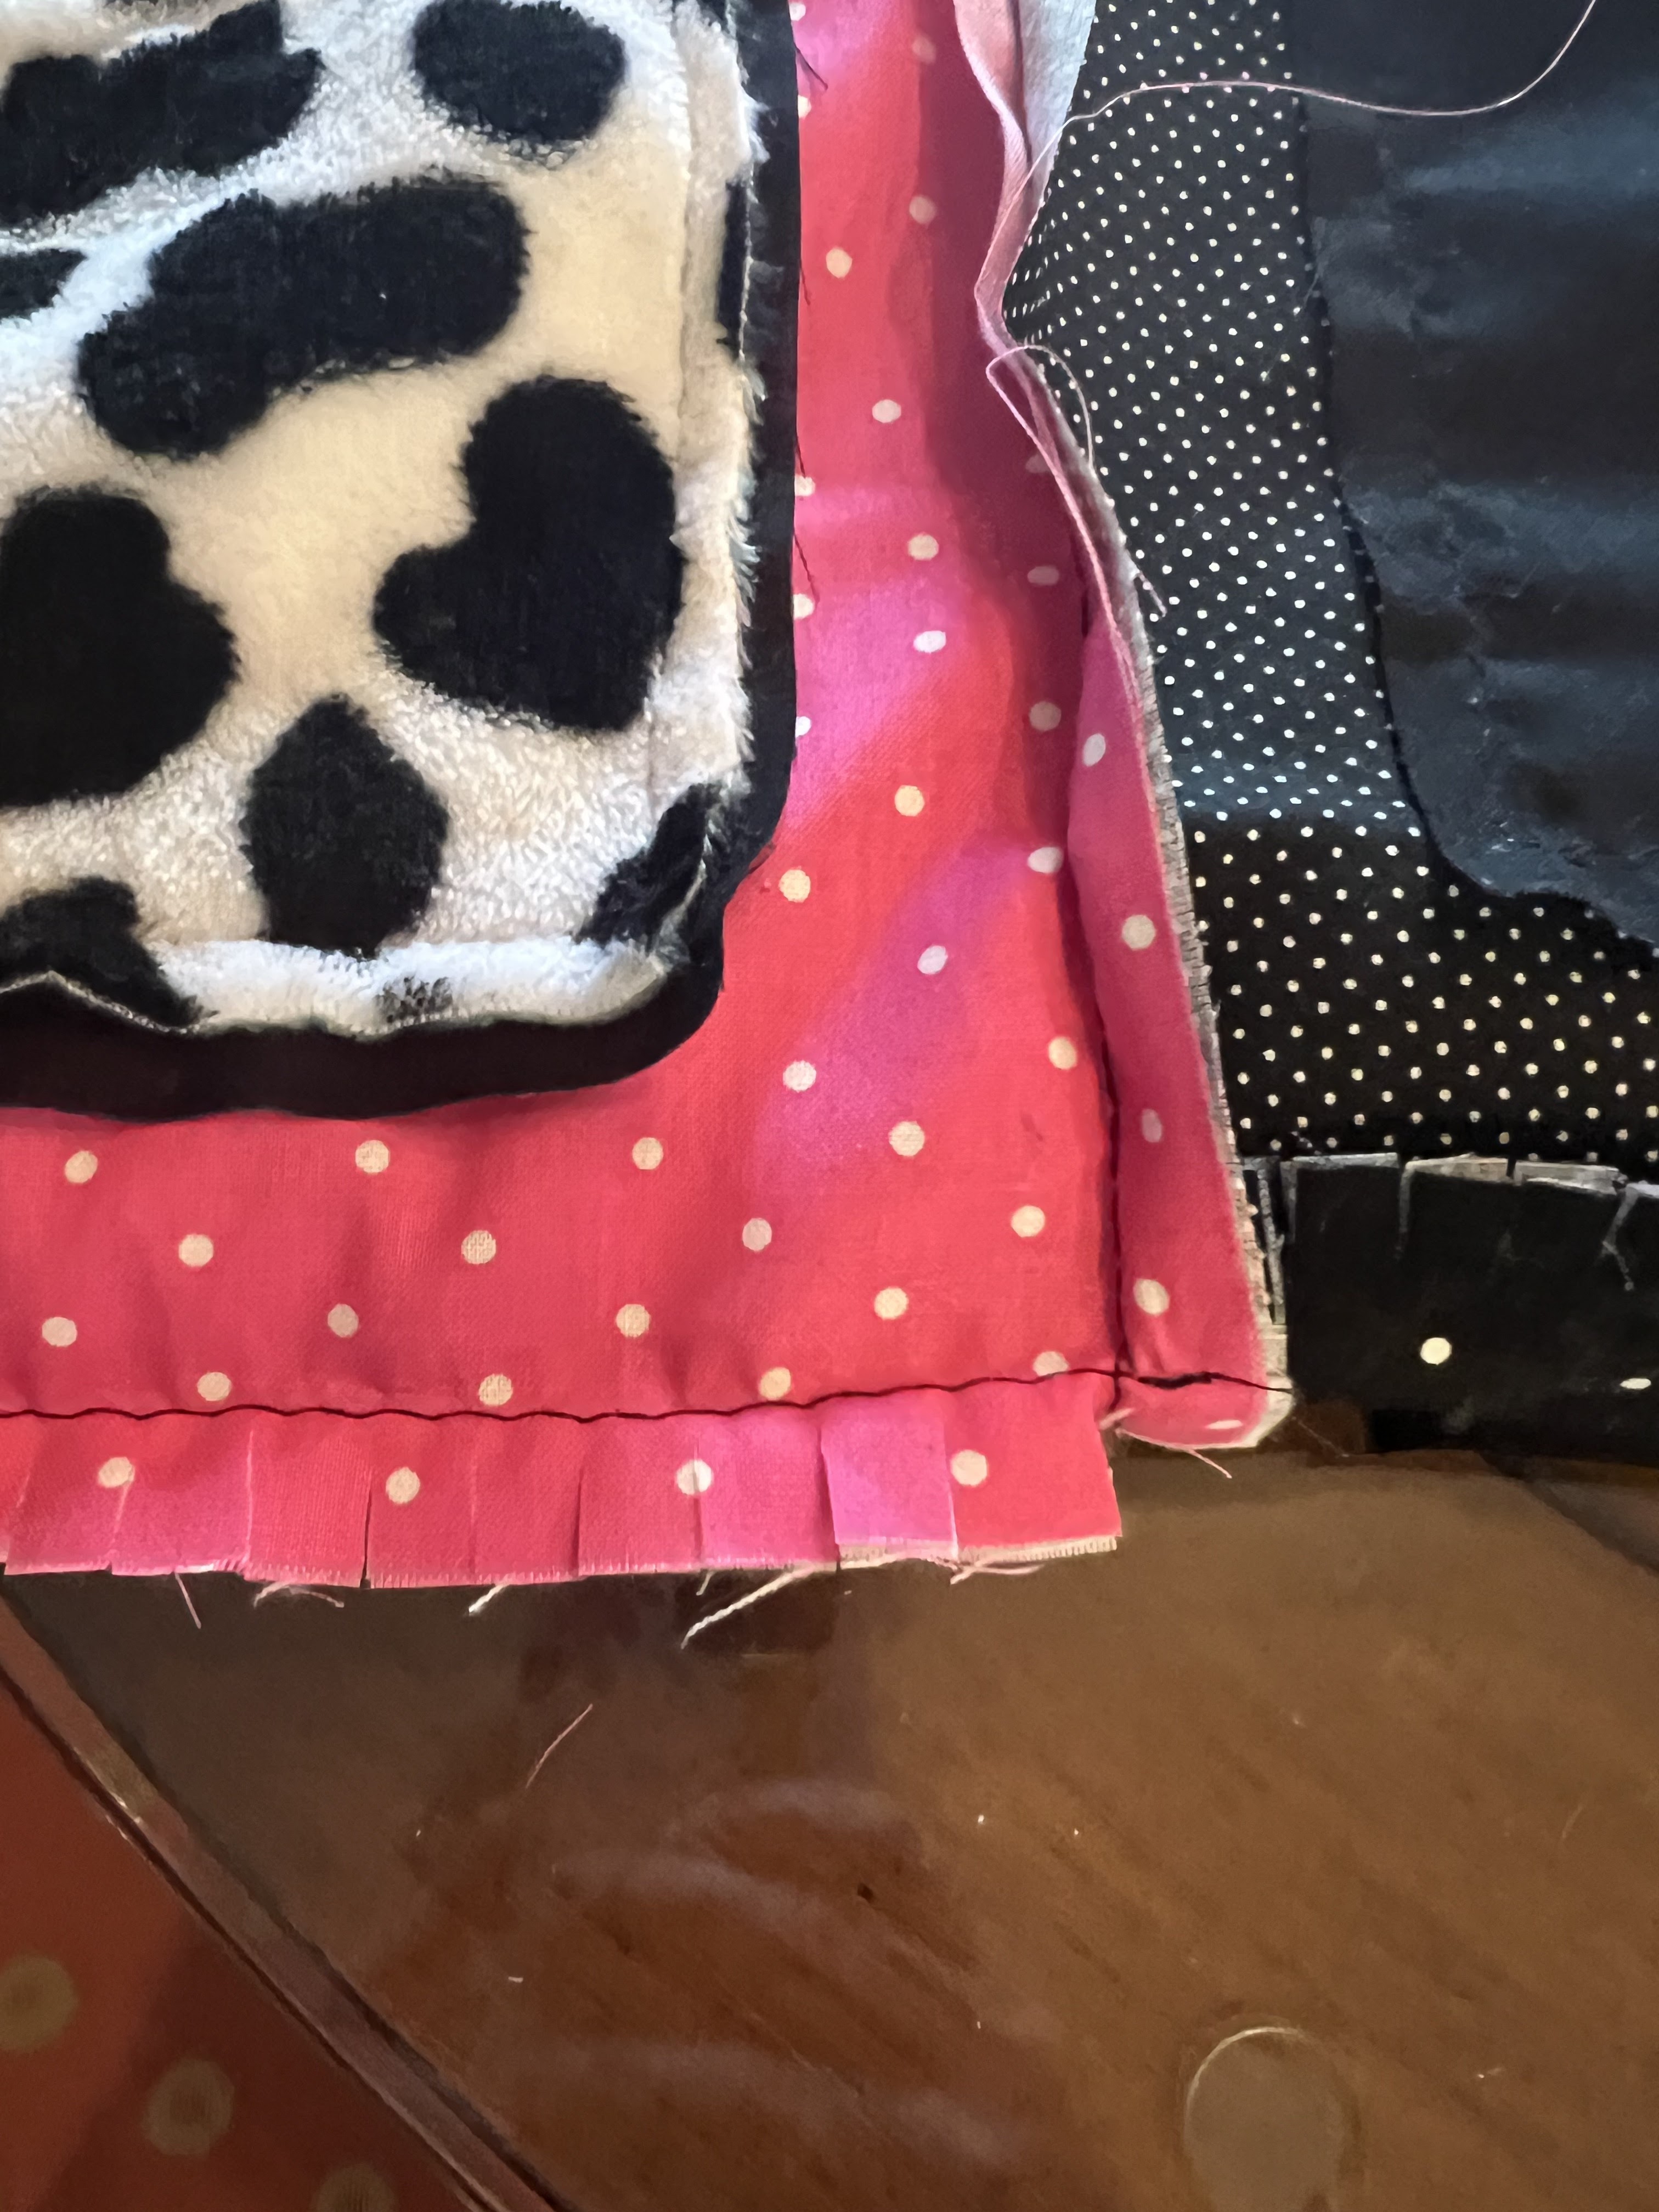
We picked 3 different cotton fabrics (black, pink, black polka dot) for the 10" quilt squares, and flannel cow print for both some squares and to back the quilt. She liked the idea of sewing the squares together like a rag quilt, which means instead of sewing the squares right sides together you do the opposite so the seams are on the front of the quilt. You then snip the seams, wash and dry it and they create a ruffle effect. Side note: this might not have been the smartest of my methods, I glued a lot of the hard to sew things onto the quilt - it held up ok during washing but even on low-heat in the dryer things came loose. If you choose to make one of these I'd either glue things on after you wash it, or don't do a rag quilt style. 
We removed any decorative bits we thought we might use, like the ruffle around a hem and ears/tails from costumes; then cut the main body of the clothes into 6"squares. Macey played with which fabric and clothes looked right to her and then laid the squares out on the floor to figure out placement. 

The sweater pieces were hard to keep square so I glued them to black fabric squares roughly the same size, and then sewed that onto the quilt fabric squares; then embellished them with the decorative things, along with patches she bought. What I couldn't attach by sewing (or couldn't attach well enough to really hold them in place), like pieces of collars and some of the animal parts like the cow head, I used fabric glue. 

After all the squares were done I sewed them together first in rows, and then sewed the rows together.(example: I sewed the top four squares together, then the second row, the third and fourth, then sewed the top row to the second row, the third row to the bottom row, and lastly sew the second row to the third row). I sewed a piece of batting to the back fabric using a big 'x' shape to hold them together, then added the top part and sewed around all 4 edges. Lastly, I tied the front and back together in a few places with string so they wouldn't shift. 


4.17.22: ðŸ”¥ week 16

4.17.21: ramen dinner by Brooke

4.17.20: no-sew t-shirt mask 

4.17.19: Cathy's baked mostaccioli 

4.17.18: shoelace tightening tip

4.17.17: money origami

4.17.16: baeckeoffe - can't pronounce it but it's good!


Sunday, April 16, 2023

🔥 Around the Campfire (week 16)

Dear Campers ~

Here's a quick recap in case you missed anything at camp last week:

Posts ~

4/9: 🔥 week 15

4/10: paper folder #3

4/11: TT slicing prosciutto

4/12: artichoke and cheesy chicken breasts

4/13: blue cheese and prosciutto dates

4/14: My Sister Tried It: pickle in a blanket

4/15: words

What's Cooking ~

  • 'fend for yourself' clean-out-the-fridge night
  • 3- ingredient macaroni and cheese with leftover ham, roasted green beans
  • grilled swordfish, yellow rice, steamed asparagus
  • fettuccini pasta kit with mushrooms and sausage, salad
  • grilled ahi tuna, leftover rice, potstickers, roasted skinny green beans (haricot verts)
PS: can you tell someone in this house is on a 'bland diet'? It's like 'starch madness' all over again!

That's it for this week - hope to see you next week for more projects, crafts, recipes, whatever else I can think of to make at camp! Bye :)

Sincerely ~

Jill

camp counselor


Saturday, April 15, 2023

4.15 ~ Words


I could be that friend. 
even if it's not my birthday ;) 


4.15.22: Easter menu and decor ideas

4.15.21: kid craft - paper butterflies

4.15.20: tuna salad stuffed avocado

4.15.19: eggshell candles

4.15.18: LeDonna's Broccoli Cottage bake

4.15.17: cork gardening

4.15.16: t-shirt hack


Friday, April 14, 2023

My Sister Tried It ~ Pickle in a Blanket

"My Sister Tried It" is a new category of recipes, products, ideas, hacks, etc. that Jen attempts to make or try. Could be fun, could be dumb, could be informative and/or helpful - could be one less post a week for me to think of LOL ;) Either way I'm game to give it a go - and she's starting with an odd one:

This is a follow up to the oatmeal bread. Here is another internet thing the cool kids are doing so I thought I’d give it a try. I saw they are frying cheese in a non stick pan and wrapping around a pickle. Ummm gross? But I do like cheese. And pickles. And hmmm. The cheese was brown and kinda crunchy- which I would also like. I had so many questions tho. How is this not a gooey mess in the pan? The cheese holds its shape? Huh? I’m disbelieving but I decided to give it a go. 

I bought sliced mozzarella (the internet kid said can use Muenster also- which reminds me of my grandpa so maybe next time just for nostalgia). Anyway. I grab the mozzarella and anticipating a mess toss it into the pan on medium high heat. Sure enough- less than 5 minutes it’s crunchy. Crunchy enough I could flip it around the pickle like the recipe said. Huh. What do ya know? The outcome? This was shockingly delicious. No mess in the pan at all. The entire thing gently flipped over the pickle just like the internet said it would. And honestly I LOVED it. Don’t get me wrong I won’t be going to Tik Tok to find my next recipe but this time it was a win! 


Jill here - I asked a couple questions (yes the first one was 'didn't this make a melty mess?); she didn't spray the pan (source found here says she sprays and uses oil), and used a dill pickle spear. It's also called a 'chickle' or 'pickle cannoli' but I like pickle in a blanket!

4.14.22: MSIH taco-tot casserole 

4.14.21: french breakfast puffs 

4.14.20: fabric masks 

4.14.19: ðŸ”¥ recap (with a beautiful bunny cake!)

4.14.18: strawberry cream cheese frosting

4.14.17: Brooke's DIY speaker

4.14.16: how to repair an ironing board


Thursday, April 13, 2023

Blue Cheese and Prosciutto Dates

This is a Barefoot Contessa recipe that's been in my files to try for a really long time - finally made them as an appetizer and they went over huge! Gotta love the Contessa :)


Here's her recipe as written, I bought pitted dates and randomly picked a blue cheese from the grocery store, I don't know much about blue cheese and which are sharper - I'm a new convert to blue cheese!

24 large dried Medjool dates with pits (14 oz.)
6 oz. sharp blue cheese, such as Bleu d'Auvergne
1/4 pound thinly sliced prosciutto (8-10 large slices)

Preheat oven to 400'.

With a paring knife, slit each date lengthwise and spread open just enough to remove the pit while leaving the date intact. Fill the cavity of each date with a small piece of blue cheese and fold the date over the cheese, pressing it back into its original shape.

Cut a strip of prosciutto as wide as each date is long and wrap it around twice, enclosing the date almost completely. Place the dates on a sheet pan and bake for about 8 minutes, until the prosciutto is browned and the cheese starts to melt.

Cool slightly and serve warm.


Wednesday, April 12, 2023

Artichoke and Cheesy Chicken Breasts

This recipe is so easy, and so so good!! It caught my eye because the it's chicken spread with Boursin soft  cheese, it reminded me of the 3-Cheese Chicken that we also loved so much. I guess I have a thing for Boursin baked on top of protein now hahaha - who knew?! I made polenta on the side, not sure why because the carrots would have been enough - maybe a side salad next time.  I'll give you the recipe as written - I reduced the amount or chicken because I was just cooking for 2, altho I used all 14oz. of artichoke hearts and half of the Boursin. I omitted the fresh herbs and garlic, still very flavorful. 


  • 6 (5-6 oz.) skinless, boneless chicken breast halves
  • 1 (14 oz.) can artichoke hearts, drained and chopped
  • 1 (5.2 oz.) package semisoft cheese with garlic and fines herbs (I assume this is Boursin!)
  • salt and pepper to taste
  • 1 (16 oz.) package peeled baby carrots, halved lengthwise 
  • 1 T. olive oil
  • 1 T. snipped fresh rosemary
  • 2 cloves garlic, minced
  • fresh parsley or rosemary
Preheat oven to 400°F. Line a large shallow roasting pan or 15x10-inch baking pan with foil; coat with cooking spray. Arrange chicken in one side of prepared pan. In a medium bowl combine artichokes and cheese; spread over chicken. Sprinkle with salt and pepper.

Place carrots in other side of prepared pan. Drizzle carrots with oil and sprinkle with rosemary and garlic; toss to coat. Sprinkle with salt and pepper.

Roast 30 to 40 minutes or until chicken is done (165°F) and carrots are crisp-tender. Sprinkle with parsley.


recipe found here at bhg


Tuesday, April 11, 2023

Tip-sy Tuesday: slicing prosciutto

I shared how I slice prosciutto into strips in another post from 12/18, but it's buried and you might not know where to look for this handy little tip. If you buy prosciutto pre-sliced in a package at the store it's cut so thinly and tears really easily - it's usually packaged with plastic sheets in between the slices which helps, but it's still not easy to work with. I've found that if I leave the prosciutto slices on the plastic sheet and cut it into strips and then peel it off the sheet, it makes it much easier to handle. 

In this picture you can faintly see the sheet behind a slice of prosciutto:

You might want to have this tip for a recipe I'm sharing later this week for blue cheese stuffed, prosciutto wrapped dates. 


Monday, April 10, 2023

Paper Folder #3

I showed you 2 other paper folders back in February but then the whole 'starch madness' thing happened so I had to wait to show you the 3rd one I made. 


I think this might be my favorite because it has a 1/2" spine folded in the middle and I like how 'clean' it looks having that little space. This one requires no cutting, just folding and a little tear tape (or adhesive of your choice) to hold the inside pockets in place. 

Start with a 12" piece of 2-sided decorative paper. 


Score at 5 3/4" and 6 1/4", fold and crease. I put pink arrows on the photo to show you where to put the fold lines, it's creating the 'spine' of the folder:

To create the folder pockets, turn the paper and score at 4" across the folds you made above. Fold and crease. 

Unfold and apply tear tape or your choice of adhesive along both edges and the center spine of the pocket (the 4" section you created above). Fold it back up and press to stick it down. 


That's it! Decorate however you'd like, I lined mine with washi tape but also tried out tying a ribbon around it or adding a tag to the front. All ways are cute. 


click here to see paper folder #1 and paper folder #2


Sunday, April 9, 2023

🔥 Around the Campfire (week 15)

Dear Campers ~


Well how did it feel to not read about starch this week? Hahaha! Here's a recap of what did happen at camp last week in case you missed anything:

Posts ~

4/2: 🔥 week 14

4/3: limoncello

4/4: TT Easter/spring veggie tray

4/5: dice bunny

4/6: bunny coaster 

4/7: rice-dyed Easter eggs

4/8: words

What's Cooking ~

  • burgers, caesar salad
  • chicken pot pie, green salad
  • chicken enchiladas, spanish rice, side salad
  • pork tenderloin, sweet potatoes, green beans
  • spaghetti and meatballs, caesar salad
  • grilled chicken, pierogi, green salad
That's it for this week - hope you have a very Happy Easter!

photo


Sincerely ~

Jill
camp counselor

4.9.19: tipsy tuesday: make a grease container
4.9.18: don't throw away old or broken candles...make new ones
4.9.17: JAR pot roast (short ribs and vegetables)
4.9.16: refrigerator jam and easy ice cream cake